
For my Large Whimsical Birds collection i haven’t followed a theme, instead i have created three distinctly different projects each with there own separate character. This could almost be three separate blog posts and treated as three separate projects so feel free to pop back as often as you like to complete your collection
First, let’s go steampunk!!

Pop all pieces out of the grey board carrier sheet but keep your waste as its always handy for chopping up and putting bits behind elements to help build dimension. Have a play around with pieces to decide how you want your bird positioned. I decided to have mine upside down with legs in the air and head swooping down towards the ground scooping up a tasty pile of rusty nuts and bolts to eat!!!
I wanted plenty of texture on my project, so prepared each bird piece and the A4 backing board with some texture paste put through a stamperia stencil and set aside to dry

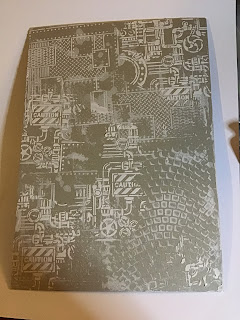

Before starting to put the project itself together, i prepared some elements in advance i used colourcraft soft form relief paste in silver in a stamperia soft mould to create my riveted sheet metal look, spread an even layer using a flexible spatula and leave over night to dry…

and air dry clay in a prima mould to create rusty pipes for the background, you could build up die cuts, use mdf, or tando produce some really useful drainpipe elements, cogs and keys that are just perfect for this!
I used pvc to stick my elements to my board and left to dry


The tando grey board is so easy to cut round with either scissors or craft knife

I added the same elements to the wings an legs and wrapped wire round the grey board for even more texture


I wanted lots of depth and dimension on the back board too, so mounted my clay elements onto rice paper scraps to provide dimension

I used decoart gel medium to mount my bird to the backing board, and tucked in all the cogs and screws, placing pieces until i was happy with the composition, left overnight to thoroughly dry and them sprayed all bare parts with decoart media mister in black dye. When this was dry i highlighted all the texture using decoart metallic lustre in copper kettle and champagne ice
With touches of silver spark and brilliant turquoise


Final touches were added by way of decortart metallic lustre in white frost and decoart shimmer in turquoise was used to create a drop shadow around the whole image

Items used for this project
For my second whimsical bird i have opted for a much simpler technique, the added advantage of grey board over mdf is that grey board can be embossed and this is exactly what i have done to provide texture to my bird
I light spritzed the body of my bird with water before placing it in a 3d embossing folder from my stash and ran it through my die cutting machine

Ive used the body of my bird upside down, just to be different!! This gave be the opportunity to use the birds “comb” as little tiny feet freeing up the birds legs to be used as flowers which add interest to my background. Always think about ways in which your pieces can be used, this will give you so much more versatility in your kids allowing you to make something completely your own!
I wanted to add texture to the backboard, but also wanted the piece to be cohesive and coordinate so i used the same embossing folder twice more on the too left and top tight corners of my board
I used decoart sand texture paste through the stamperia cobblestone stencil to add a layer of depth to the bottom half of my back board.

I mounted the pieces of my bird onto the backing board using gel medium and left to dry,
i placed one wing over one eye,which i had coloured using white paint with black for the pupil, creating an eyelid and eyelashes using a black permanent marker pen, and the other wing across tge body
when dry i sprayed with misters in turquoise and brown to colour and highlighted with Decoart metallic lustres to bring out all that embossed detail, drybrushing with white acrylic to highlight raised areas and edges. this is a very simple but very effective technique
More pictures of the finished piece


Items used for this project
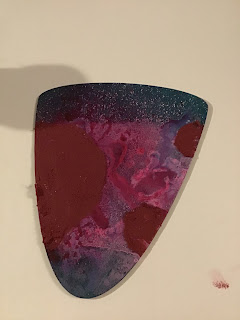
My final bird is a lot more colourful

I used Dina Wakley gloss media sprays to create a very random background and then chose coordinating decoart americana chalk paint colours to compliment those colours
I used inheritance, reminisce, romance, legacy, keepsake and revive to colour my bird
I also mixed some black and crimson brusho pigment powders into some crackle medium to give me a coloured crackle paste which i applied to three areas
Whilst i waited for this to dry, i used the waste element of grey board that the whimsical bird pieces popped out of as a stencil and created real dimensional flowers using the recess where the legs had come from. I pushed sand texture paste through this using a palette knife onto the background board and set aside until dry.
I also used sand texture paste to create a grass effect along the bottom edge and painted them when dry


I then poured a little gold paint into a fine nozzle applicator bottle so that i could pipe swirls onto the body of my bird

And add additional decorative elements

On the legs, feet and flowers too


Coloured the eye using titanium white and carbon black acrylic

For this project i used
And thats my three very different whimsical birds finished, hope you found something you’d like to try for yourself x x
1 comment:
에볼루션라이트닝카지노 바카라 사이트 에볼루션라이트닝카지노
Post a Comment