Pages

Thursday 16 December 2021

Product Focus- Steampunk Journal Cover- Fiona Randall


Morning all Fiona here with a Product Focus project.

The DT will focus on the vast array of products available on the Tando website and hopefully give you some ideas and inspiration to try something new.

For my project I have focused on the Tando A6 Binder and Cover Pack. I t comes with two A6 Binders and 4 pairs of covers. I used a pair of the covers to create a steampunk themed journal cover.


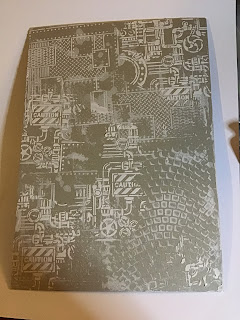
 Air drying clay was pressed into a mould and once dry glued to the front cover.
I also used for decoration the Tando Steampunk Parts Small and also the medium sized Bee from the Tando Bee panel. The covers were given a rusty and patina treatment using DecoArt Media Fluid Acrylics. The embelishments were given an aged brass effect with hints of patina also. Am quite pleased how this turned out. 
A spine was created from a piece of Tando Grey Board cut to size and attached to the journal covers using book binding tape.
To finish elastic was added to the spine so little notebooks can be slotted in.
Thanks for taking the time to stop by and read.
 Do stop by the rest of the week to see more inspiration from the DT.
Fiona xx

PRODUCTS USED.


OTHER PRODUCTS.

Stamperia Soft Mould A5 - Time Machine.


Tuesday 14 December 2021

Product Focus - Door hangers - by Kim

 How about these door hanging 'dog tags' for a quick Christmas (or any other time) present?

I've used Tando Creative's Door Hangers Style A, they are tough MDF hangers so should take any close attention the recipients should give them - well, for a while anyway.

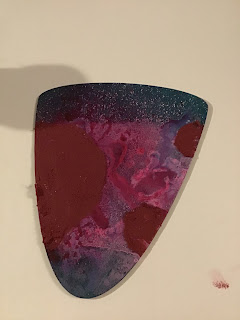
I chose colours as near to the dogs' coats as I could remember. The background was a slip-slap combination of those colours. I checked on the internet for dog noses and used them as guides. Basecoated in black then added shiny highlights, first in grey then in white. Peggy's nose looked a little odd on its own so I added her tongue as well.

Lettering is in Burnt Umber and the hangers are edged in sponged on black.

And there we have a couple of quick presents for our furry friends. How about cat tags, or kids tags?


Sunday 12 December 2021

Three very different Large Whimsical birds by Art Angel

 For my Large Whimsical Birds collection i haven’t followed a theme, instead i have created three distinctly different projects each with there own separate character. This could almost be three separate blog posts and treated as three separate projects so feel free to pop back as often as you like to complete your collection

First, let’s go steampunk!!


Pop all pieces out of the grey board carrier sheet but keep your waste as its always handy for chopping up and putting bits behind elements to help build dimension. Have a play around with pieces to decide how you want your bird positioned. I decided to have mine upside down with legs in the air and head swooping down towards the ground scooping up a tasty pile of rusty nuts and bolts to eat!!!

I wanted plenty of texture on my project, so prepared each bird piece and the A4 backing board with some texture paste put through a stamperia stencil and set aside to dry


Before starting to put the project itself together, i prepared some elements in advance i used colourcraft soft form relief paste in silver in a stamperia soft mould to create my riveted sheet metal look, spread an even layer using a flexible spatula and leave over night to dry…


and air dry clay in a prima mould to create rusty pipes for the background, you could build up die cuts, use mdf, or tando produce some really useful drainpipe elements, cogs and keys that are just perfect for this!

I used pvc to stick my elements to my board and left to dry


The tando grey board is so easy to cut round with either scissors or craft knife


I added the same elements to the wings an legs and wrapped wire round the grey board for even more texture


I wanted lots of depth and dimension on the back board too, so mounted my clay elements onto rice paper scraps to provide dimension


I used decoart gel medium to mount my bird to the backing board, and tucked in all the cogs and screws, placing pieces until i was happy with the composition, left overnight to thoroughly dry and them sprayed all bare parts with decoart media mister in black dye. When this was dry i highlighted all the texture using decoart  metallic lustre in copper kettle and champagne ice
With touches of silver spark and brilliant turquoise


Final touches were added by way of decortart metallic lustre in white frost and decoart shimmer in turquoise was used to create a drop shadow around the whole image


Items used for this project


For my second whimsical bird i have opted for a much simpler technique, the added advantage of grey board over mdf is that grey board can be embossed and this is exactly what i have done to provide texture to my bird

I light spritzed the body of my bird with water before placing it in a 3d embossing folder from my stash and ran it through my die cutting machine

Ive used the body of my bird upside down, just to be different!! This gave be the opportunity to use the birds “comb” as little tiny feet freeing up the birds legs to be used as flowers which add interest to my background. Always think about ways in which your pieces can be used, this will give you so much more versatility in your kids allowing you to make something completely your own!

I wanted to add texture to the backboard, but also wanted the piece to be cohesive and coordinate so i used the same embossing folder twice more on the too left and top tight corners of my board

I used decoart sand texture paste through the stamperia cobblestone stencil to add a layer of depth to the bottom half of my back board.

I mounted the pieces of my bird onto the backing board using gel medium and left to dry,
 i placed one wing over one eye,which i had coloured using white paint with black for the pupil, creating an eyelid and eyelashes using a black permanent marker pen, and the other wing across tge body
when dry i sprayed with misters in turquoise and brown to colour and highlighted with Decoart metallic lustres to bring out all that embossed detail, drybrushing with white acrylic to highlight raised areas and edges. this is a very simple but very effective technique

More pictures of the finished piece


Items used for this project


My final bird is a lot more colourful

I used Dina Wakley gloss media sprays to create a very random background and then chose coordinating decoart americana chalk paint colours to compliment those colours

I used inheritance, reminisce, romance, legacy, keepsake and revive to colour my bird
I also mixed some black and crimson brusho pigment powders into some crackle medium to give me a coloured crackle paste which i applied to three areas


Whilst i waited for this to dry, i used the waste element of grey board that the whimsical bird pieces popped out of as a stencil and created real dimensional flowers using the recess where the legs had come from. I pushed sand texture paste through this using a palette knife onto the background board and set aside until dry. 

I also used sand texture paste to create a grass effect along the bottom edge and painted them when dry


I then poured a little gold paint into a fine nozzle applicator bottle so that i could pipe swirls onto the body of my bird


And add additional decorative elements

On the legs, feet and flowers too


Coloured the eye using titanium white and carbon black acrylic


For this project i used


And thats my three very different whimsical birds finished, hope you found something you’d like to try for yourself x x


Friday 10 December 2021

Oh baby its cold outside

 This week is colour combination here on the Tando blog. As soon as i saw those colours i just knew i had the perfect winter photo to match


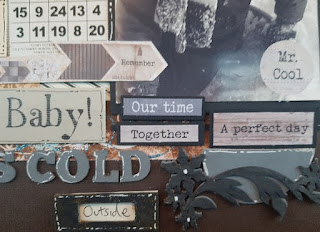
This scrapbook layout is all about my son Alex. It was 2010, it was a bad winter here in Scotland and he hardly got to school in Nov/Dec due to our isolated location. But Alex loved it. Everyday he would check his snow suit was dry and he would be out in the snow with the dog all day long. Living his best life, building snowmen and coming in for a warming hot chocolate now and then. At almost 21 now, i don't think he would go near a snowflake, lol, mess up his perfect hair and his designer shoes! oh how they grow up fast.

For this project I used 

Tando minis: snowflakes

Tando snowflake plaque

Tando Alpha Sheet

Tando Clock

White modelling paste

Paint in blacks, greys  and browns

White Journaling Pen

Stickers from Thirteen Arts

Patterned paper from the scrapbox

Brown 12 x 12 card stock

A4 black card 


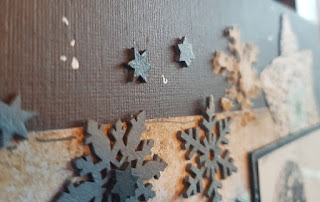
I used some white modelling paste thru the waste greyboard to make some snowflakes. They came out slightly messing but it doesn't matter as no snowflake is perfect or the same as another. 

I added lots of stickers to show the fun  we had and our memories. Top tip, if you don't want or cant fit the story onto the layout, write it out onto the back of the layout so the next generation can read all about it


I also doodled (gave them a dash of snow!) around my alphas in white pen to highlight them.


And there you go, using lots of Tando elements on another scrapbook layout.

Sarah


Wednesday 8 December 2021


Scandi Style Christmas Tag - Bernadette Ball


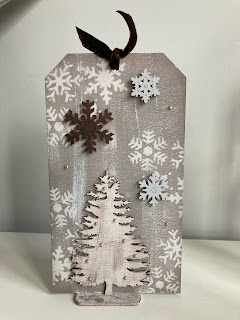
Good Morning! I think I might have chosen the wrong colours for the December colour theme but I've gone with it and created a Scandi style greyboard tag.  This is the colour theme I used:


I used a size 10 tag, my favourite :) https://www.tando-creative.co.uk/TAGS120X60.html along with the largest of the set of 3 fir trees https://www.tando-creative.co.uk/FIRTREES.html and a few of the mini snowflakes https://www.tando-creative.co.uk/TMSNWFLKS.html 

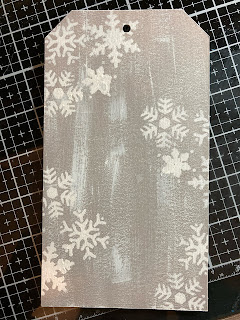
I started by painting the greyboard tag first with some white gesso then some light brown and grey paints. I dry brushed the lighter colour over the top. Once the paint was dry, I used the mini snowflake stencil with some white paint https://www.tando-creative.co.uk/MSKMINFLKE.html


I painted the largest of the 3 fir trees in the opposite way by using the lighter colours first and the darker colour dry brushed over the top 


I painted the snowflakes in grey and brown.  


I then glued the snowflakes and tree to the tag.  I glued the bottom of the tag to the stand of the fir tree, so it will stand up and tied some velvet ribbon through the tag hole.


I'll post some more photos on the Facebook Tando Creative Zone page and on Instagram with some close ups.

Happy Crafting,

Bernadette xx


Tuesday 7 December 2021

December Colour Theme-Christmas Snowflake Cubbey- Fiona Randall

 Morning All it's Colour theme week on the Tando Blog.

 For my project I used one of the Tando Cubbey's


I used three colours from the colour swatch to create my christmas snowflake cubbey.


After assembly I gave the inside a coat of DecoArt Chalky finish in Carbon and then a coat of DecoArt Media Ultra Matte Varnish to seal. The outside was given a coat of DecoArt Chalky finish in Timeless. Once dry a coat of DecoArt Crackle Medium for chalk paint was applied. This was then dried with a heat tool. ( yes you can dry this product with a heat tool). Once dry DecoArt Chalky Finish in Honour was applied with a sponge. By applying with a sponge it eliminates brush strokes and the possibility of removing the crackle. This was then dried with a heat tool to speed up the crackle effect. 
The edges of the cubbey were then swiped with DecoArt Metallic Lustre in silver spark.
Next up a piece of card stock was embossed with a mini 3d Lumber folder. This was then spritzed and sprayed with Distress Ink Sprays in Chipped Sapphire and Old Paper with a little of the Distress Mica Spray Stain in Snow Flurries for shimmer and shine. This was then glued into the cubbey.
Next up a piece of old book paper was applied to a piece of card stock with decoupage glue. Once dry this was die cut and embossed using the 3D mini impresslits snowflake folder. The edges of the snowflakes were inked with Ground Espresso distress ink.
The Snowflakes were then swiped with the silver spark metallic Lustre to the raised edges.
A Tando  Snowflake was swiped with the silver spark Metallic Lustre and a brad attached to the centre. A small Bookplate was given the same treatment and a sentiment stamped and attached.
 The snowflakes were then layered up and  applied to the Cubbey with a piece of grey board attached to the back to give depth and dimension. The bookplate was then attached to finish.

Side View.


Thanks for taking the time to stop by and Read
Fiona.

PRODUCTS USED.


OTHER PRODUCTS USED.

Tim Holtz Distress Spray Stain- Chipped Sapphire, Old Paper.
Tim Holtz Distress Mica Spray- Snow Flurries
Tim Holtz Mini 3d Embossing Folder- Lumbar
Tim Holts 3D Impresslits- Snowflake.
Tim Holz Distress Ink- Ground Espresso.
Brads.