thinking about the technique, and how to build the hexagon tower more easily. So I've come up with this method. Don't be put off by your first read through - it is easier than it looks.
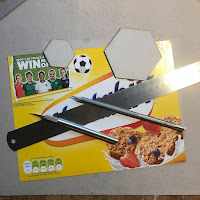
I used the smallest hexagon, 24mm sides, and the largest hexagon, 50mm sides.
A ruler, sharp craft knife, and fast drying glue (PVA will do, but you may have to wait longer for it to set)
CUTTING
1 From a cereal box cut out the two big sides. Nice straight edges, please!
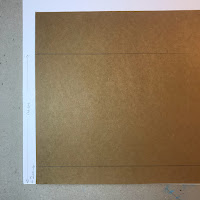
2 From the long edge measure 2cm and 14cm and draw lines across
3 From the left edge draw vertical lines at 5cm, 10cm, and 15cm
4 From the left edge mark the top centre of each of the panels created above - 2.5cm, 7.5cm, 12.5cm
5 Either side of the centre marks, mark 1.2cm.
6 In each panel draw a line from the end of the 2cm line created at #2 to the corresponding point created at #5.
7 To the right of each tapered shape draw tabs for glueing - see photo for size and position.
8 Use the craft knife and ruler to cut out the shapes - make sure you include the glue tabs - see photos for required shape.
9 Repeat all the above for a second set of three sides.
10 Use an embossing tool/dotter with a ruler to put creases along the remaining pencil lines to help you fold the pieces into shape.
CONSTRUCTION
Check photos for positions
11 Start with the large hexagon (50mm) and one of the prepared side pieces. Apply glue just below the horizontal crease at the 2cm line, across all three panels. Place the edge of the large hex in centre panel and bring up the sides to match. Let it dry.
12 Apply glue to the tabs on the long sides. You may wish to do one at a time. Bring the tabs inside the adjacent edge and and adjust to make a tidy join. When both are done, let it dry.
13 Take the small hexagon (24mm). Apply glue around the inside of the top of the tower and place the small hex in to fit nicely level with the top of the panels. Let it dry.
16 Apply glue to the remaining edges of the hexs and the last tabs. Put the last panel in place, make any small adjustments before the glue sets. Let it dry.
17 To add strength to the bottom of the tower I used the largest hex ring - same size as the plain hex. I cut a small piece from the ring to allow it to fit and to be adjusted. I found it easier to slide the ring into the space at the bottom of the tower, making sure it fitted snugly, push it in too far, then apply glue around the inner edge and slide the ring out to meet it. Let it dry.
18 Make a brew and sit back and admire your handy work.
Once you have your raw tower it can be decorated however you wish. The Lighthouse was painted with DecoArt acrylics, the Spooky Windmill had Texture Sand and Modelling paste applied. You can cut holes for windows, install battery powered lights for special effects - you are limited only by your imagination.
I have an idea for another hex project ...
Thank you for reading down this far. I hope you get to make a tower - remember you can adjust the measurements to suit your creation - and send photos so we can see how you get on!


No comments:
Post a Comment