
I think I got a bit carried away this time!
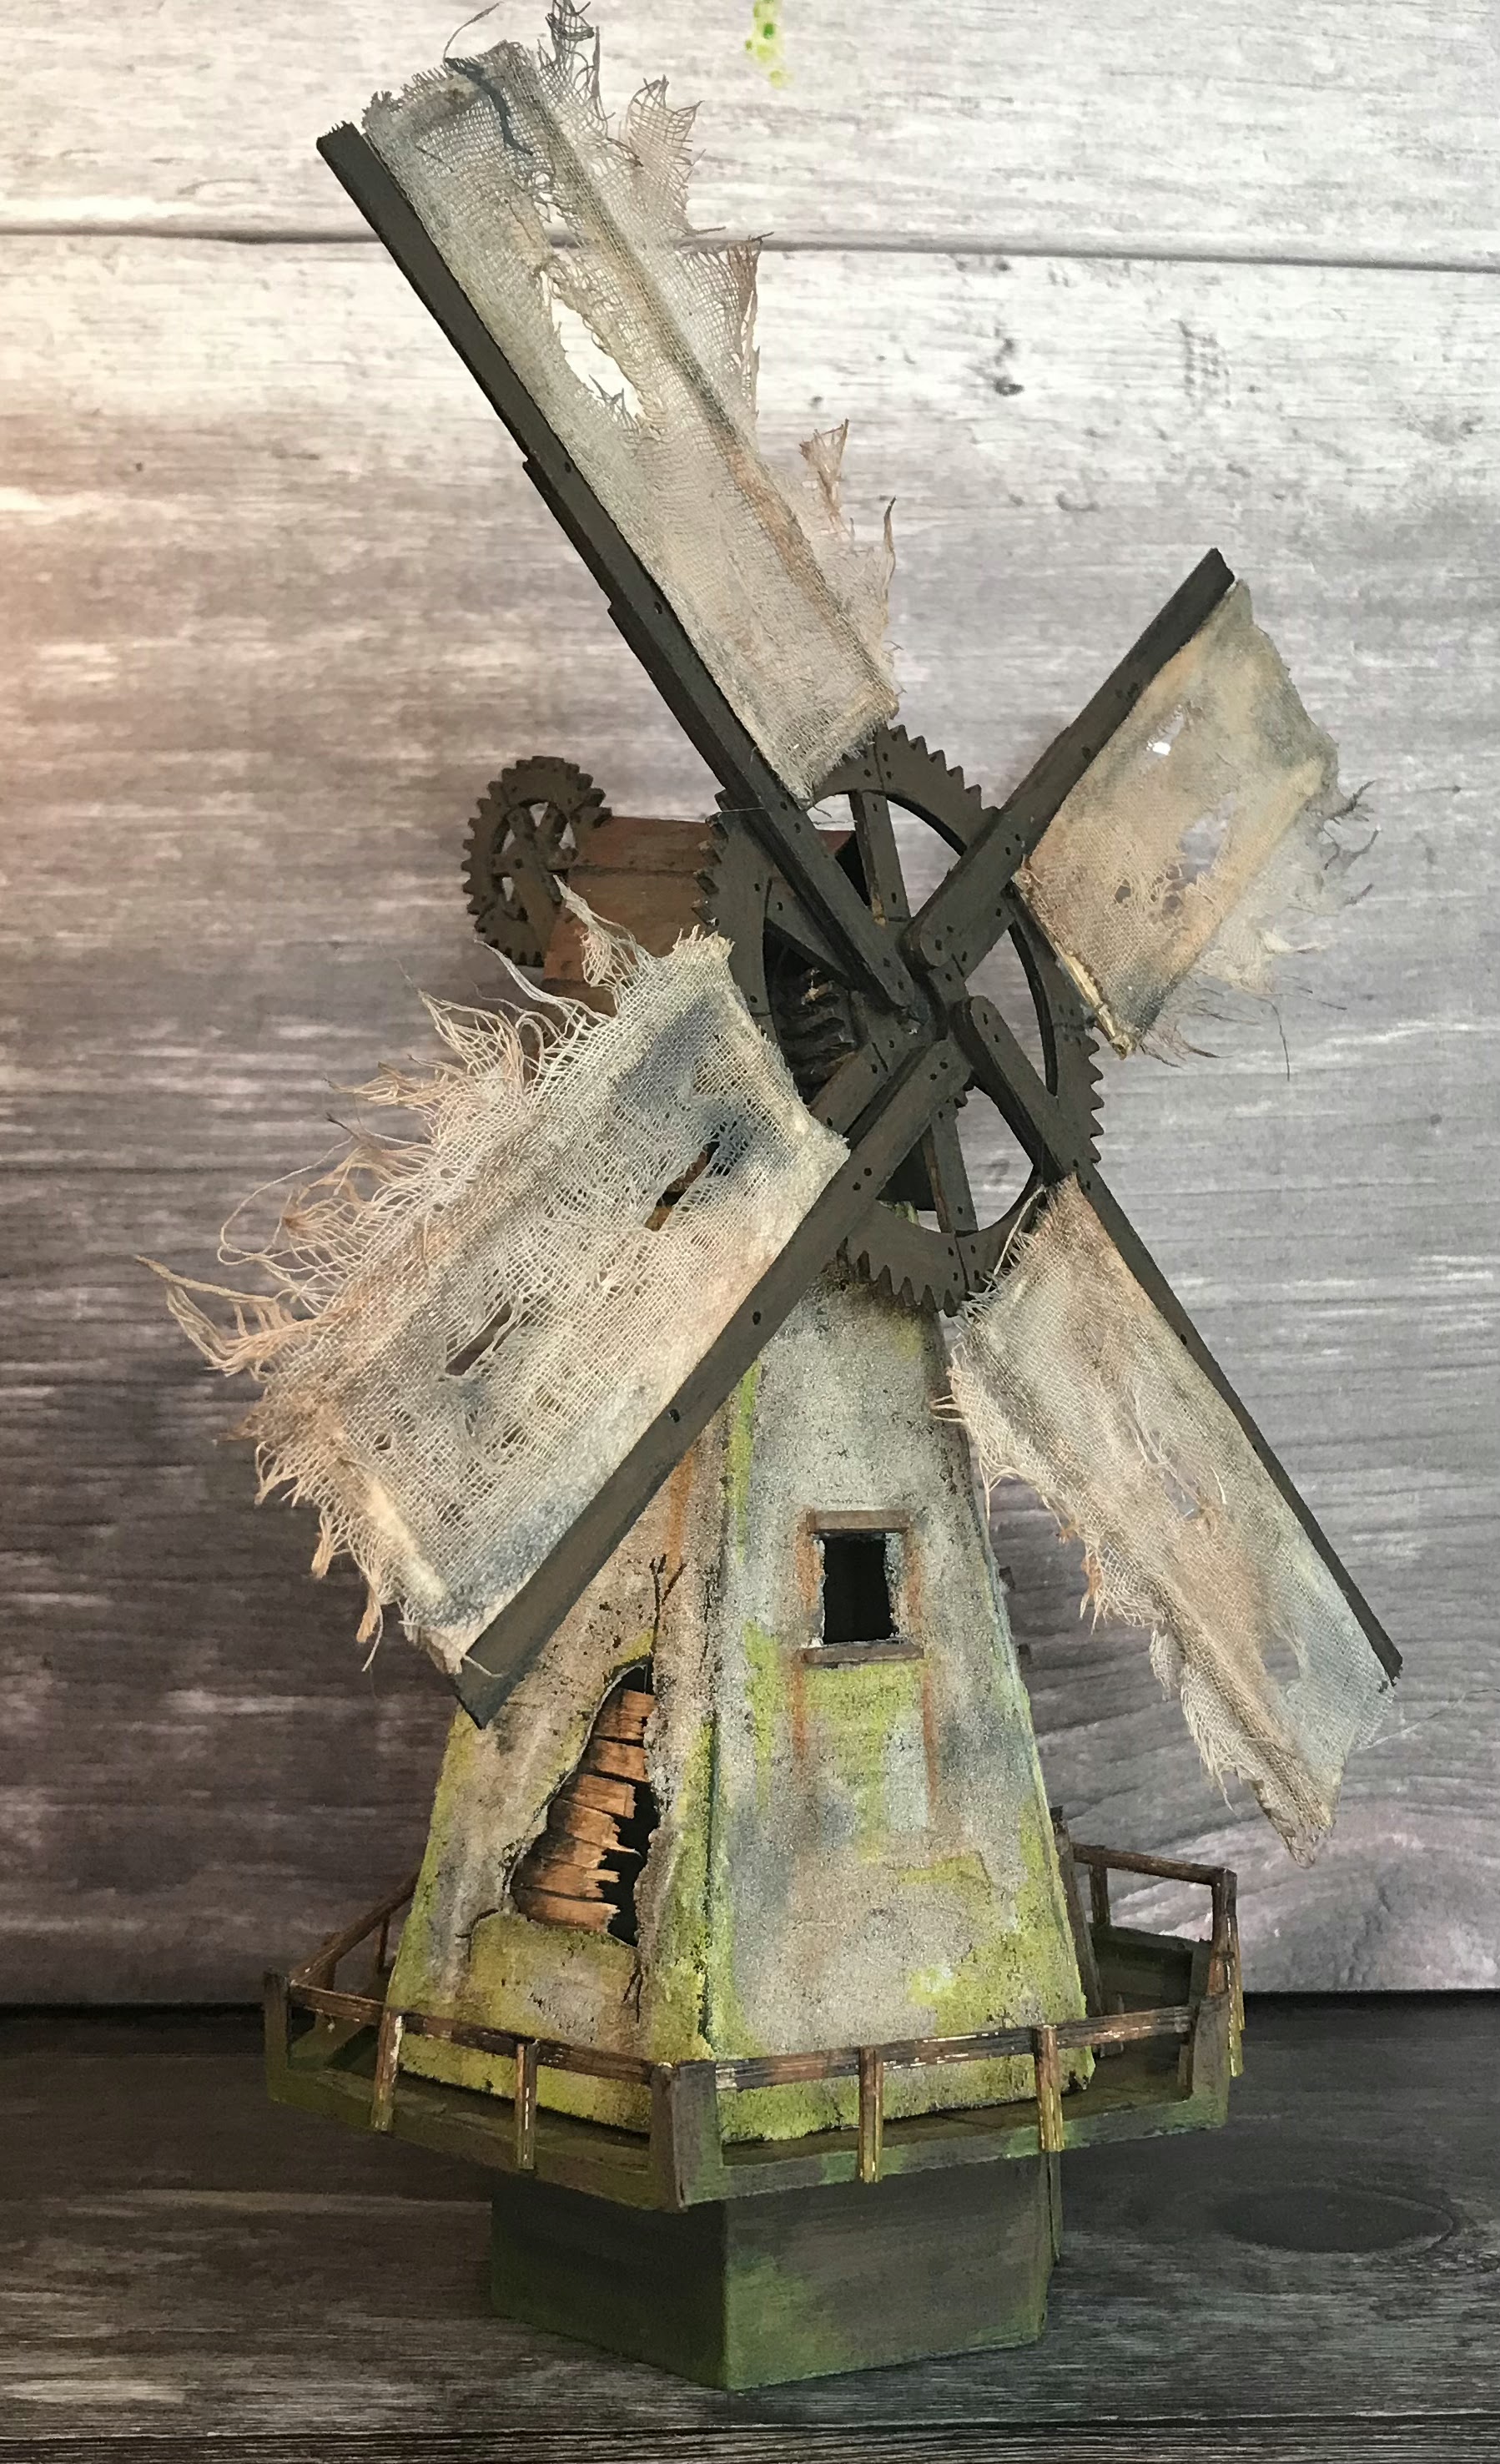
The basis for this construction is the Hexagons set from Tando Creative, and I’ve gone for the derelict, haunted look.
The main building
I used the same cereal box method of construction as I did for the lighthouse (Beacon of Hope), but this time I used the largest hex with sides of 5cm for the bottom. Make sure you use the one with a frame because you will remove the centre later, so that you can put a battery light inside.
For the top I used the centre from the smallest hex, about 2.5cm. The windmill is shorter than the lighthouse.
As an alternative method you could cut six separate side panels - and make sure you include an extra flap on one side of each one, so you have something to glue the next one to.
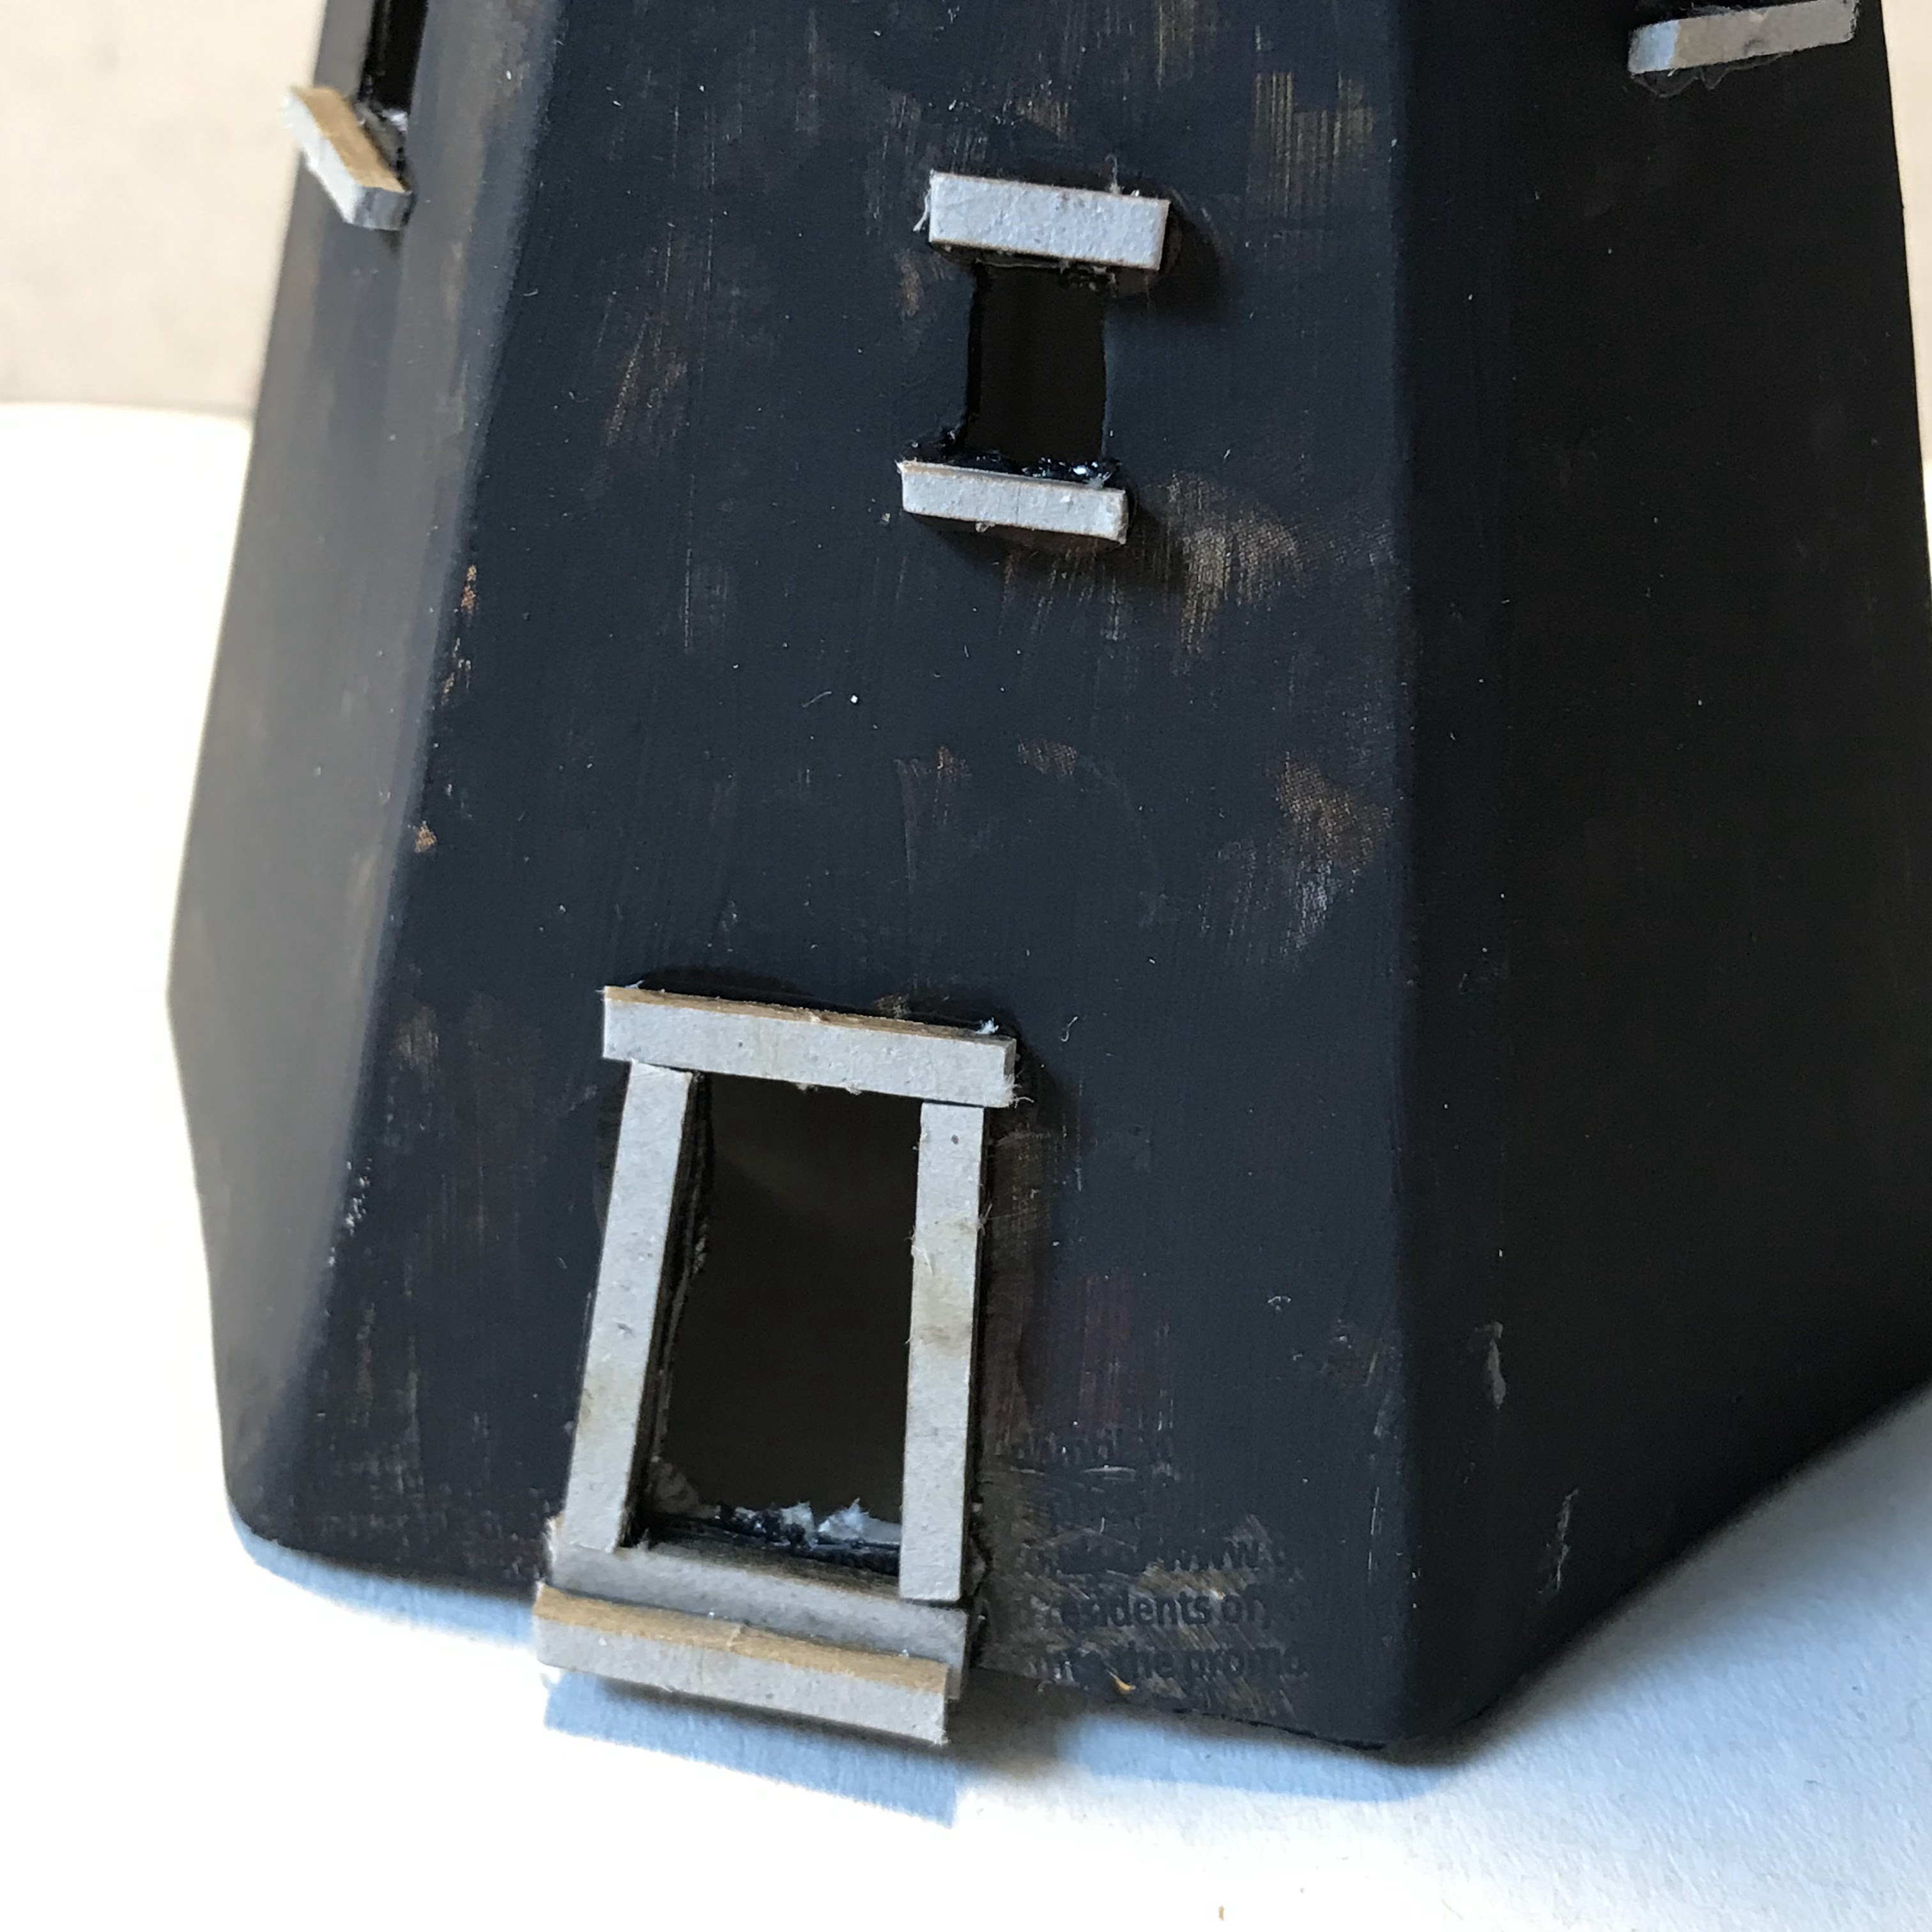
Once the glue has set I used a very sharp X-acto craft knife to cut windows and a door. I also cut a random shaped hole for added decay. I add exposed laths to this hole from the inside with broken ends. These are wooden coffee stirrers split in half lengthways with snapped off ends.
I used thin strips of waste greyboard for the door frame, windowsills and lintels.
I used solvent glue for the above because it grabs and dries quickly.
Once all the glue has set I painted black gesso all over, then plastered the outside with DecoArt Texture Sand in a rough manner to give that old ‘cob wall’ look.


The cowl
The base of the cowl is a hex with 3cm sides. To get the shape for the cowl I trimmed the top from a Tando Creative Gothic Arch Layered Frame kit.
I cut a section off the hex to get a straight front. The cowl insert is angled backwards slightly so that the sails don’t hit the building. This insert is supported with a ‘wedge’ of leftover greyboard.
Using more cereal box I used scissors to cut the roof section. These parts are glued together using as many fingers as you can muster to hold them until set.
The bit at the back (that turns the mill to face in to the wind) is made from greyboard offcuts and a small cog wheel from the Industrial Elements greyboard set.
On the front I glued 4 greyboard washers to space the arms away from the cowl. I drilled a hole in the centre for a piece of bamboo chopstick as a spindle.


The Base
I used 2 x 4cm hexes wrapped with more cereal box. I then cut a large piece of cereal box in a hex shape with 7cm sides for the floor.
To add the handrail I first had to cut a 3cm and 4cm hex frames to make support around the edges, then glued a 1.5cm strip around the outside. When I realised my first idea wasn’t going to work I cut away all but the corners then glued in some bamboo sticks (from an aroma diffuser) as they are more handrail-like.


Arms and Sails
I used a large cog wheel from Industrial Elements and a few wooden coffee stirrers for the arms. At the back I glued on 4 small cog wheels to ensure the arms could turn without hitting anything else.
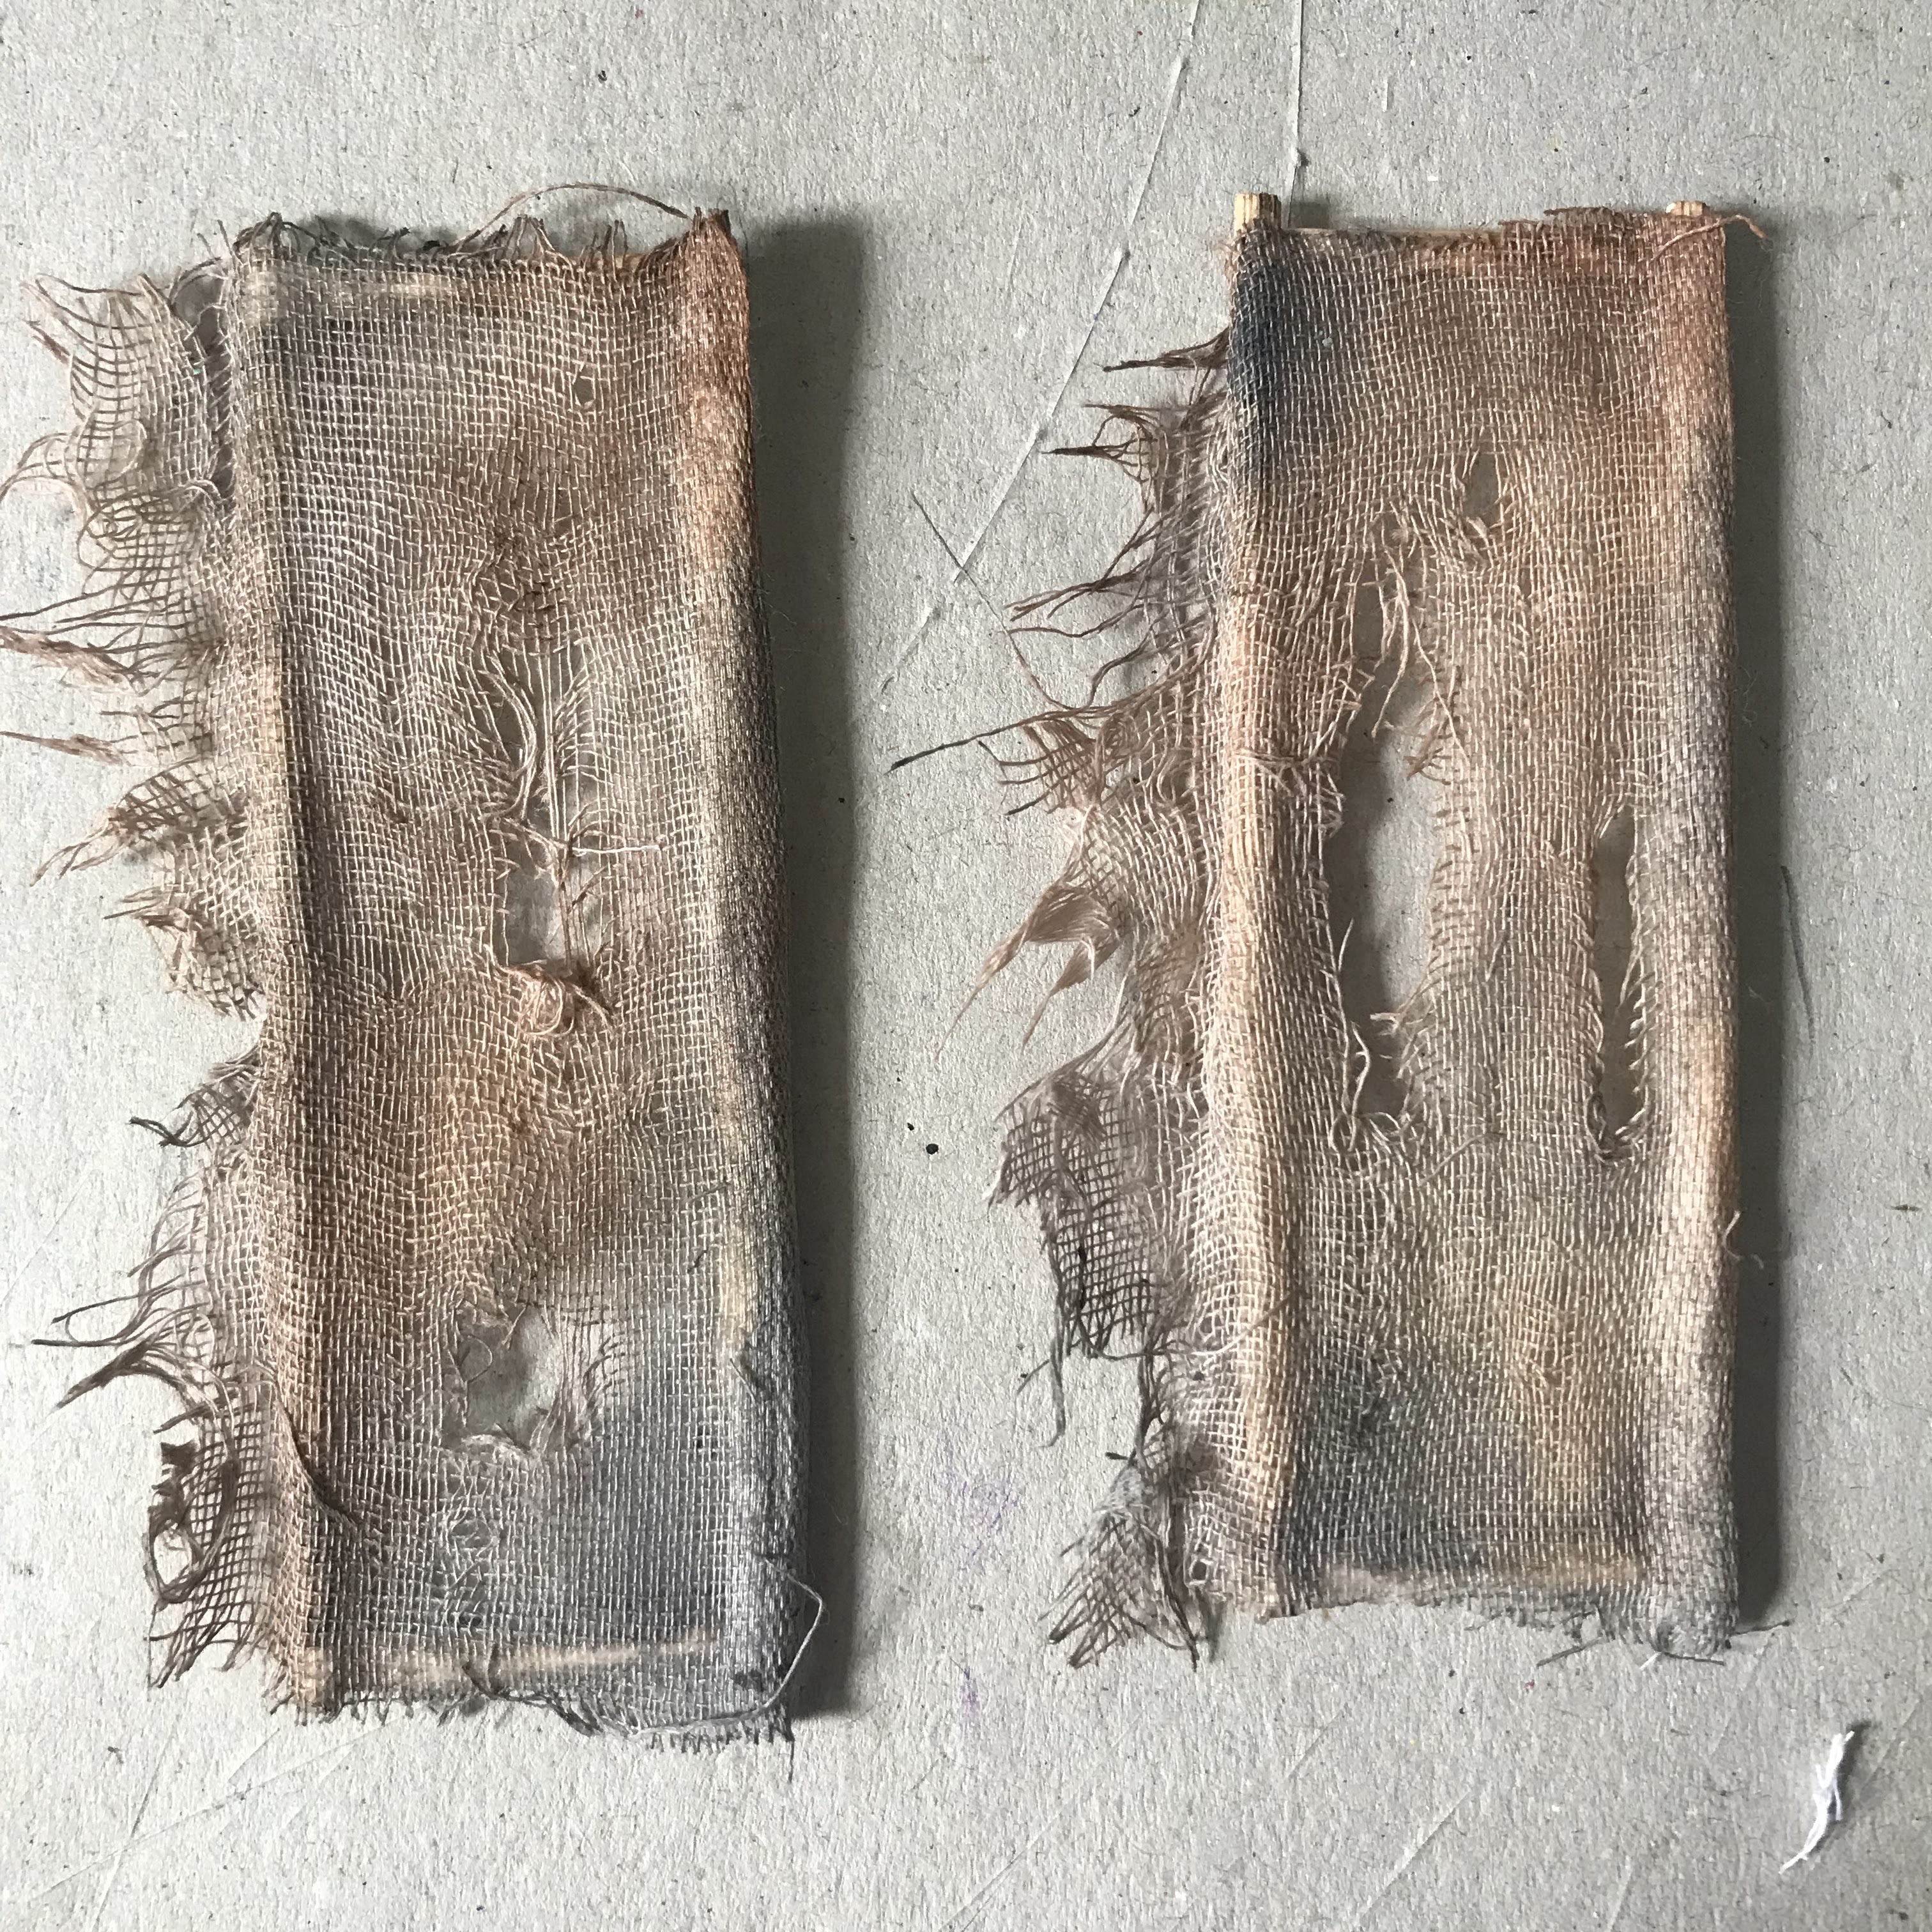
After trying all sorts of things to get the sails looking just right I went with bamboo diffuser sticks glued in to an oblong shape, with muslin glued on to the frame thus formed. I cut and slashed the muslin with scissors and a craft knife to get the frayed and torn effect.
They were glued into place on the arms - but not until they had been painted and dried.


Painting
Once the Texture Sand on the main building was dry I used DecoArt Media Fluid Acrylic in Grey Value 6 as a wash to colour the whole area - no need to get even coverage, then Grey Value 3 as a wash to add stained areas, followed by patches of Paynes Grey as a wash. Weathered stains of mould and decay were added with Burnt Umber and Green Gold Fluid Acrylics. Windows and door frames were painted with watery Burnt Umber. The broken laths were stained with Burnt Umber then shadows of Paynes Grey where they go behind the outer ‘cob’.
The cowl was base coated with DecoArt Americana Lamp Black. Americana Burnt Umber was stroked over the top of the small gear structure to give an aged wooden look. The cowl roof was stained with streaks of Media Quinacridone Gold to give a rusty tin look. Detail of nails and joins were added with a dip pen and Media Paynes Grey.
The base was base coated in Lamp Black, then Americana Burnt Umber, then Americana Espresso was stroked over to give the impression of wood. The bamboo handrails were stained with Burnt Umber. To continue the decayed look Media Green Gold was dry brushed on to look like moss and mould. A few touches of Media Paynes grey to give the rotten look to some of that wood.
The arms were base coated in Lamp Black, then Americana Burnt Umber stroked over the top. Details were added with dip pen and Media Paynes Grey to give the look of old timbers held together with bolts.
The sails were stained with washes of: Media Grey Value 6, Burnt Umber, and Paynes grey.
To finish, the centre section was removed from the base of the mill (if not already done) and a small battery powered lamp was placed on the base and covered with the mill - instant spooky!


Thanks for dropping by - take care walking home in the dark … especially if your path takes you past the old windmill!

DO NOT - DO NOT PUT A NAKED FLAME TEA LIGHT OR ANY OTHER NAKED FLAME INSIDE THE MILL - IT WILL BURN!
Products:
Random greyboard offcuts and an empty cereal box
Coffee stirrers and bamboo sticks
Tando Creative Industrial Elements - cog wheels
1 comment:
This is such an amazing project! Just love it!
Post a Comment