Showing posts with label Brenda. Show all posts

Monday, 24 June 2019

Using spray paints/inks on a project - Brenda

Today we start a new theme and this week we are using sprays on a project. I hunted out some old bottle of colour sprays and used them alongside a DecoArt white mister spray and got some really quite nice results.


I used a media board painted with gesso and when dry scraped white modeling paste through a stencil.


These pieces I took from a bits box which were already painted - leftovers from previous projects.


I also grabbed these from another bits box of Tando leftovers to add to the design. As you can see these were not painted or sealed so I started by gluing these to the media board ...


.... and when dry I gave it all a coat of gesso.


Next I sprayed some water based sprays and DecoArt white mister over the surface, dried it and repeated again to give me my base  colours ...


.... and then dribbled some watery media acrylic paints, ....


.... sanded and inked the edges of the board and finished with some splatters of titanium white.


Because the sprays I used were water based they created some lovely mottled effects together when I spritzed them and when I repeated the layer. 


Keep a lookout for some other projects coming up from the team this week.

Thanks for stopping by.

hugs Brenda xxx


Supplies from Tando Creative
Media board, chipboards.
Andy Skinner stamps and stencils
DecoArt Media gesso, misters

Monday, 17 June 2019

Anything Goes with Brenda

It's an Anything Goes week here again at Tando Creative and I'm starting the week with this little stencil set. When Di designed and cut some new stencils for Andy Skinner she also cut two covers  for them so they could be kept together as a set. I did a simple background and made the covers fairly flat so they could sit in my drawer.


Process steps
1. Take tag and give it a random coat of white gesso.
2. Paint cerulean blue acrylic paint mixed with a little water over the whole tag and dab with some kitchen paper to remove some of it from the gesso. It will of course soak straight into any greyboard that is left exposed.
3. Use a small palette knife and scrape some white gesso lightly and randomly over the surface keeping the flat of the palette knife level with the tag. Dry.

 4. Seal with a coat of decou-page.
5.  Mix a little prussian blue hue 50:50 with glazing medium and paint over the tag and gently rub back with dry kitchen roll and a babywipe keeping the dark blue to the edges.


 6. Mix a little quinacridone gold with water, dribble on one place spritz with water and move around and dab some off with dry kitchen paper before drying. Repeat in another couple of random places.


7. Mix a little paynes grey with water and dribble around the edges, spritz with water and dry. I worked on about a 2 inch spread at a time.
8. Use the two different stencils - similar to American car number plates and with a palette knife spread black modeling paste through them and leave them to dry naturally.


9. For the inside covers, use a palette knife to spread a smooth coat of everlasting chalky finish paint over the greyboard, give them a watery wash all over of cerulean blue and dry. Mix a watery wash of prussian blue hue and dabble, spritz and dry around the edges. Heat dry and finish with some stamping and some colouring and a light quinacridone wash to tie it all together..
10. Seal both the insides and outsides of the overs with a coat of ultra matte varnish. 


These are great for altering and are useful to use to cover the stencils. You pick them out in an instant when they are with other stencils in a drawer.


I hope you'll be able to pop back during the week to see what projects some of my lovely teamies are showcasing.

Thanks for stopping by.

hugs Brenda xxx

Supplies 
Tando stencils and stencil covers. 
DecoArt media fluid acrylics - cerulean blue, prussian blue hue, quinacridone gold 
DecoArt mediums - white gesso, black modeling paste, ultra matte varnish, decou-page sealer

Monday, 27 May 2019

Layers with Brenda

Here is another of the mini albums that went to Hochanda in March. This is layered up with lace and paint to create a shabby vintage look.


Process steps 

1. Take the mini boards and using matte medium some lace onto the outer covers. Let dry naturally or speed the process up with a heat gun.


2. Add a fine layer of texture sand paste in the gaps between each row of lace and again dry.


3. Take the cover boards and the page inserts and paint everything with a coat of white gesso on both sides.


4. When everything is bone dry sand the edges and any rough spots then use a natural sponge to blend over a neutral palette of media acrylic paints mixing the colours on the project spritzing and blending them together with a babywipe as you go. Dry each layer before adding another. I used burnt umber, titanium white and titan buff.


5. Because I wanted the next layer of watery paint to seep into the recesses and not into the lace I gave the covers a couple of coats of matte medium. When they were dry I dipped and spritzed the washes over them then took some time to add the colours directly into the recesses with a small brush heat drying as I went.


6. Now came the time to add embellishments to the front cover…..


7. …. and to add some collages to each of the pages and some uplifting words.


There are some close ups of the pages today over at Bumblebees and Butterflies if you'd like to see them in more detail.


Keep a look out for other makes with a layered theme this week from my fabulous teamies.

hugs Brenda xxx

Monday, 13 May 2019

Anything Goes Week - Brenda

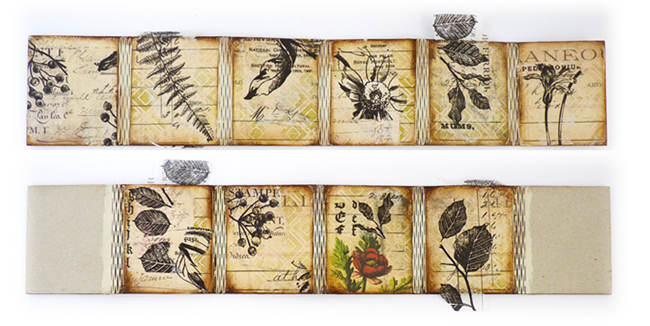
ANYTHING GOES - we love it when we get a week where we can share anything we like with you and I have chosen this mini album created by Di for one of her Hochanda shows.
This was  one of the samples I made for her.


Process steps. Pages
1. Cut panels from patterned paper, ink the edges and adhere to the album.
2. When dry sand back the edges and ink again..


3. Use snippets of Tim Holtz  botanical collage paper with decou-page  mate sealer/glue on each panel,sealing the complete surface of each one
4. Sand off any over hangs.

5. Paint the flowers and leaves with watery media fluid acrylics.
6. Add some die-cut leaves, tiny flowers and words.

7. Repeat the same process steps for the front and back covers.


I used small buttons and thin black elastic to make the closures.


Finished front cover


Finished back cover.

 This is such a cute size 8 x 9.5 cms and feels lovely to hold in the hand and is great as a quote book to give someone.


I hope you like this style journal/album.

Thanks for stopping by.

hugs Brenda xxx


Friday, 19 April 2019

Anything Goes week - Brenda

We have another anything Goes week for you where we share something that we have been working on for Di or for ourselves. Today I have a small media board I made for one of Di's Hochanda shows where she introduced a number of new stencils from Andy Skinner.
I love going over to west coast America and have been lucky enough to drive quite a large part of Route 66 so this brought back great memories. I also thought by using the design on a media board means it could be used for a journal cover.


The Route 66 badge was stencilled onto a piece of leftover painty paper using  cerulean blue, phthalo blue and paynes grey media fluid acrylics.


The quote was stenciled using black modeling paste.


The background was created using a cracked distressed technique I have used before. The blues were chosen to get a retro look.


Hope you have been enjoying AG week.

Have a great weekend.

hugs Brenda xxx

Monday, 1 April 2019

Gasolene Alley Tag - Brenda

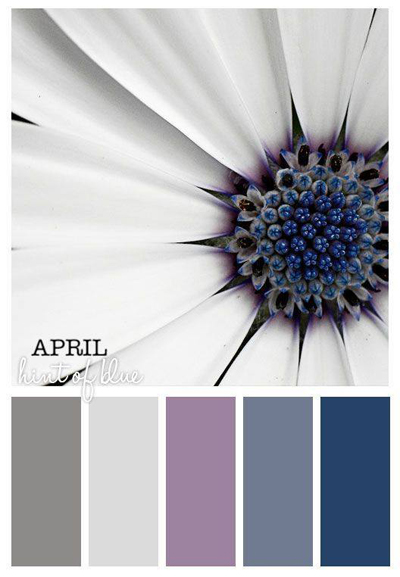
I love using a colour palette for inspiration and this time I had a new stencil as well as this tag was for one of Di's Hochanda shows.
Thestencil is a new one from Andy Skinner.


So here's how my muse took me.


Process Steps
1. Cover tag with DecoArt decou-page paper - I used text from Victorian Romance. Adhere with matte medium and seal the surface of the paper with it. When dry sand back the edges to get rid of any rough edges.


2. Paint a layer of  gesso, black and white mixed together to create a light grey  over the tag and wipe back to reveal some of the text.


3. Stamp some designs over the thicker gesso areas using watering can archival ink and scrape some white gesso over the tag with a palette knife and add a very small edging with it too using the side of the palette knife.


4.  When dry daub, spritz and dribble some paint through. I used quinacridone violet mixed with titanium white and also cerulean blue mixed with paynes grey and titanium white to get two more colours from the photo palette.


5. Blend some black geso through the stencil on the tag to look like an advert.


6. Use a stabilo pencil and wet brush around the edge of the tag to add a 'frame' it.
7. Stamp and cut out a vintage car and the fuel vendor to add as embellishments.


8. Give it a coat of matte varnish.


There are quite a few new stencils in the range from Andy and they are available in the shop.

Thanks for stopping by.

hugs Brenda xxx


Supplies
Tando size 8 tag.
Tando - Andy Skinner new 15 cm stencil - Gasoline
DecoArt media fluid acrylics - quinacridone violet, titanium white, cerulean blue, paynes grey
DecoArt Mediums - black gesso, white gesso, matte medium, ultra matte varnish
Stamps - Tim Holtz Travel Ways, Documented, Vintage Auto

Monday, 25 March 2019

New theme called Photo Booth - Brenda

This is the third tag that I made for Di's December outing to Hochanda and I just had to save it to share this week as it fits the theme perfectly. This week we are sharing projects with a photo on it ....


.... and I dug into my own collection of vintage cabinet cards to find this one.


If you have seen some of my work you will know I love vintage and mixed media and I often combine the two in my projects.


I also used one of the new long stencils that go with these cover tags and fit them perfectly. The circle design and crackle paint look fabulous together.
If you would like to see more details you can find a step by step and more photos over at Bumblebees and Butterflies.


I can't wait to see how my teamies have interpreted the theme this week, so keep popping back to see what they have been making as well.

Thanks for stopping by.

hugs Brenda xxx