Showing posts with label Printer Tray. Show all posts

Friday, 13 December 2019

Christmas Printer Tray

Hi there! Celia here,

For our Christmas Crafting theme, I have made a Christmas mini printer tray.
I started by looking through my stash for some mini Christmas embellishments. I picked a few from the Tando minis and made some with some old Christmas stamps I had.

I decorated the greyboard with embossing powder
and coloured in the stamped images with Promarkers. I varnished them with Triple Thick to make them a bit more substantial.

I primed the back of the printer tray with green chalk paint, then added Decoart green gold. Then I mono printed some other greens with textured wallpaper (a Seth Apter technique) and stamped some Christmas script with black Archival. I painted the star in gold and the tub in raw umber.

I stuck the three top parts together with mat medium, putting a heavy book on top for a while to get good adhesion. I primed it with gesso so that the finish would be nice and bright.
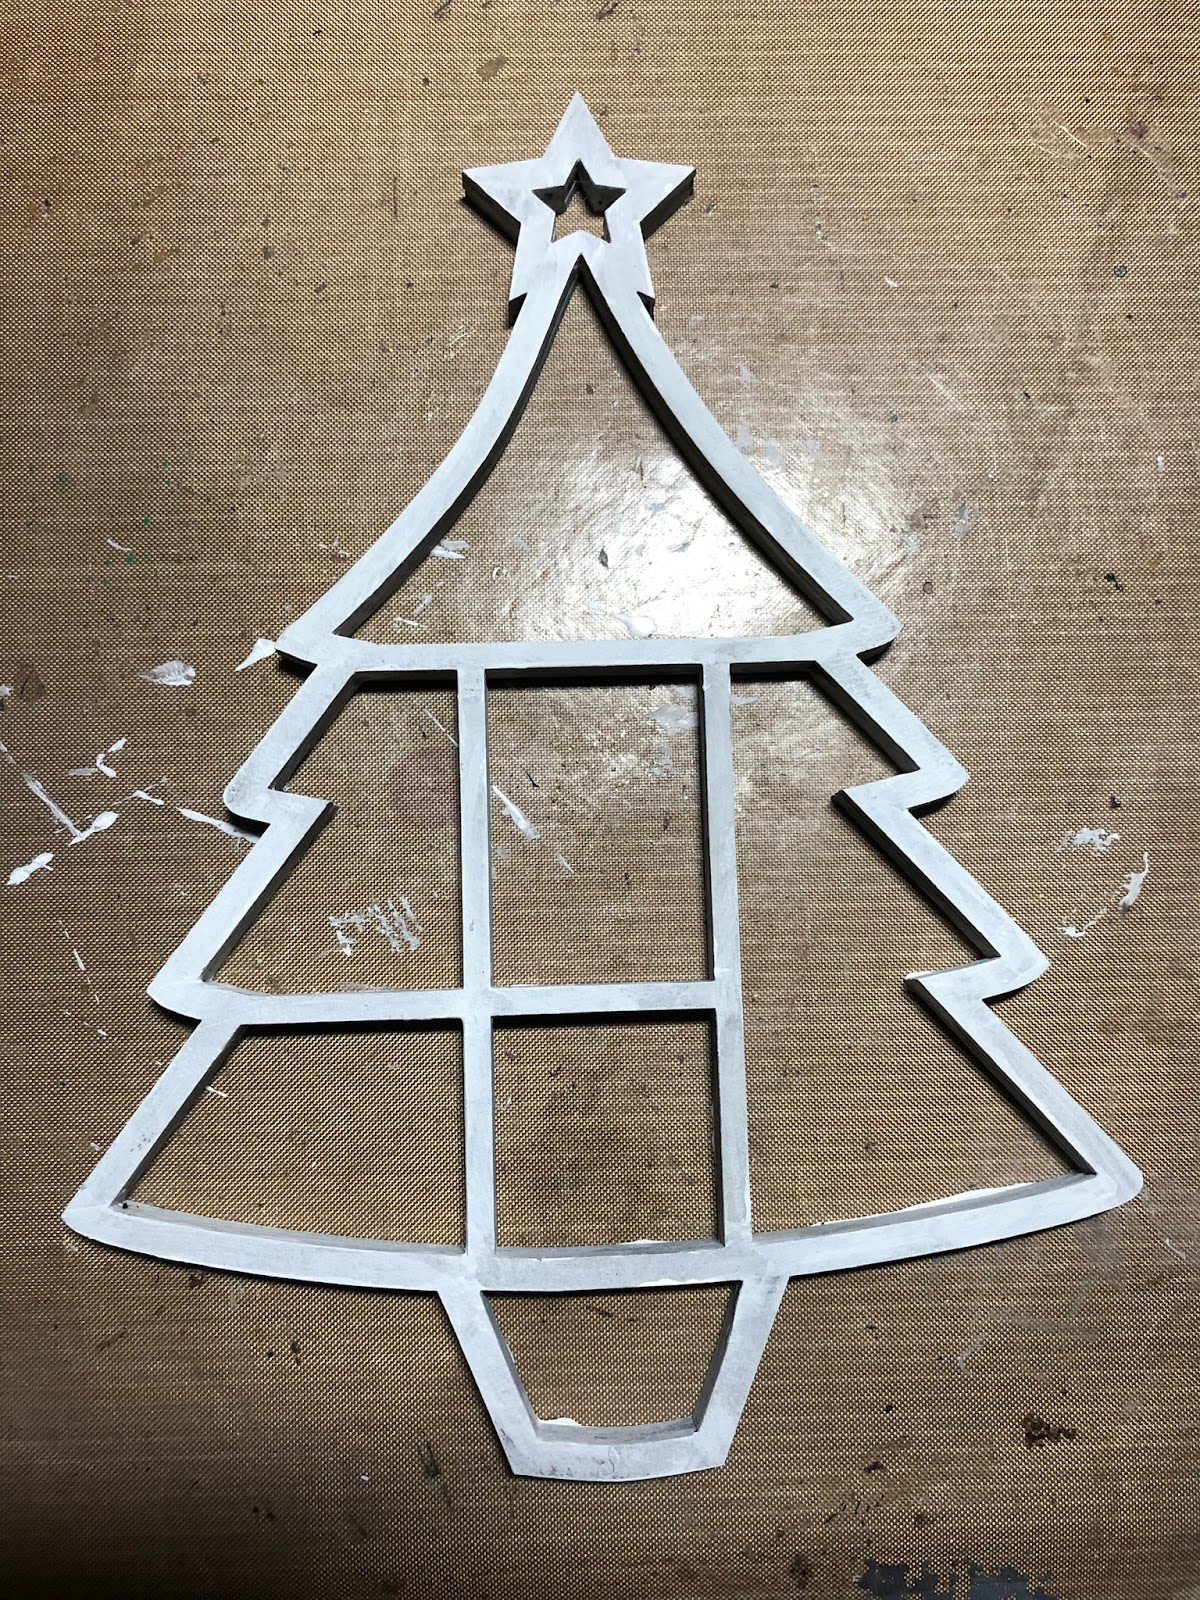
Then I painted it in a bronze paint. This looked a bit too pretty for my liking, so I rusted it instead, stippling on some media fluid acrylics in burnt umber, transparent iron oxide & quinacridone gold. Much better!
For the sparkly star, I filled it with triple thick and sprinkled glitter on top. Do this in two layers, as it shrinks a bit as it dries.
I stuck the tree together and stuck all the little decorations inside. Some of them I bumped up with sticky pads to give a bit of height.


Have a happy Christmas, and thanks for stopping by!

Celia x

Friday, 23 August 2019

France Papillon style Printer Tray


Hi there!

Celia here, with my first post on the Tando blog, and it's France Papillion week. I have decided to make a Printer Tray to showcase a few of France's stamps and stencils. I started off by choosing some small greyboard embellishments from the grab bags, minis and the new mini tags. I also chose some of the medium Steampunk Parts to add a bit of machinery. I drew around the top part of the printer tray onto the baseboard to help with positioning.

I covered some of the pieces with various embossing powders, using Versafine straight onto the greyboard. I love how this effect makes the greyboard look so expensive!

For the butterflies, I stamped directly onto the untreated greyboard to give a nice shabby effect, using France's Creepers and Crawlers stamp set. I used Di's method of putting the greyboard butterfly onto the inked stamp, so that you can position it perfectly. I decided to fray the edges by wetting them with a wet paintbrush then allowing it to soak in. After a few minutes, it separates easily and can be coaxed into place with a knife.

I stamped the bee onto grey card and cut him out. I painted the base of the steampunk parts in DecoArt black chalk paint and the grid in Decoart fluid acrylic silver. 

The cogs were given a quick rust treatment by stippling with fluid acrylics in black, raw umber, quinacridone gold and transparent yellow iron oxide.

I made some of France's trademark red hearts using Pyrole red and Raw Umber and added some one step crackle.

For the tray, I glued together all three layers and painted it in in Teal, with a coat of Crackle Paint, then some washes of Cobalt Turquoise Hue and Teal. 

I primed the base with a white chalk paint, then drew round the frame to see where the squares would be. I masked off a couple of them with post its and scraped through some Decoart modelling paste through two of France's stencils - Honeycomb and Driving me Circles.

I decided to paint the base purple, because you have to have some purple in your projects don't you! I used the new colour, Byzantium, from Paperartsy, and swished through some Teal and Magenta. Then I drew in the frame again and stamped in some of the squares with Watering Can and Cactus Flower Archival, using the post-it masking method and the Rock and Rust stamp set. Lastly, I stamped 'Little Things' from the Small Talk stamp  set, using Versamark and fine black embossing powder. (Hint - do this BEFORE you assemble the tray! 😬)

This was then assembled and all the tiny embellishments stuck in with Cosmic Shimmer glue. Here's the finished piece:

I hope you feel inspired to have a go at a Printer Tray!

Thanks for stopping by,

Celia  x 
Tando products used:
Mini Printer Tray 152x152mm
Long Tags: Arrows, Butterflies, Clocks, Hearts
Hearts grab bag
Cogs Grab Bag
Steampunk Parts medium
Tando minis keys
Tando minis butterflies

France Papillon products used:
Driving Me Circles stencil (large)
Honeycomb stencil (small)
Rusted Rivits stencil (small)
Rock n Rust stamp set
Creepers & Crawlers stamp set
Perfect Words stamp set

Monday, 28 January 2019

Let's have fun with FRAMES - Brenda

Yes we're focusing on 'frames' this week so it will be interesting to see what the fabulous team come up with. I have used the mini printers tray with cover for my sample and I think you'll see why.  For my project the trays have become 'frames' for a little set of butterflies......


 .... which makes them look as though they are floating in the frames.


Process steps
Glue two of the frame pieces together and leave one single and paint all of the pieces with a coat of primitive chalky finish paint.


Cut a cellophane bag (still with two pieces together) to fit the inside of the double frame and glue it down.


 Open the cellophane up so that you have lifted the top piece and you're working in the middle of it. Glue on some butterflies. (mine are free images downloaded from the internet).


 Then lay the top piece of cellophane back down adhering it to the outside of the frame and then glue the single top frame over it. You have now encapsulated the butterflies inside the cellophane which makes them look as though they are floating in the frames and are totally protected.


Dip all the pieces in some watery quinacridone gold and add some tissue tape to the outside of the cover.


Stamp alphabet/numbers with black archival ink and scrape gesso randomly down the front and inside left covers.


Create a darker edge to 'frame' the piece by first dabing some watery burnt umber round the edges and spritz with water - heat dry. Then mix some burnt umber with paynes grey and slide the brush around the edges.


Dabble a little burnt umber randomly on the frame, leave to dry naturally - using a heat gun could melt the cellophane!. When dry scrape some white gesso over with a tine palette knife.


Glue the layered frames onto the back cover and add some words on the inside cover .....


..... - mine are computer generated.


Create a butterfly panel as the focus on the front cover, I simply used scraps of patterned papers and butterfly from an ephemera pack. I added another computer generated saying.


There we have the outside covers ......


..... and the inside ones.


So I hope you like my interpretation of the frames theme. If you make anything similar please leave a comment below and add the link to your project so we can see it.


Thanks for stopping by  and have a great week.

hugs Brenda xxx


Bumblebees and Butterflies
Facebook Page - https://www.facebook.com/Bumblebutterfly
Pinterest Page - https://www.pinterest.co.uk/bumblebutterfly/


Supplies
DecoArt fluid media acrylic paints - quinacridone gold, burnt umber, paynes grey
DecoArt media mediums - white gesso, matte medium
DecoArt chalky finish paint - Primitive
Butterfly images
Stamped, bought or computer generated quotes/sayings.

Saturday, 19 November 2016

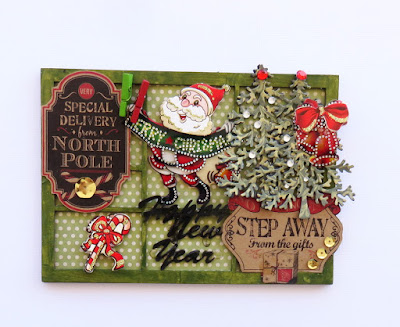
Christmas printers tray : Anything goes week with Irit


Hello my dear crafty friends and welcome to my new Anything goes post for Tando.
This is my most favorite Tando product here- Printers tray and I made it as a Christmas project with a full tutorial for you.
This is very easy to make project and it looks gorgeous with this tray and Happy New Year Tando chipboard on it.


So here is my tutorial for you!

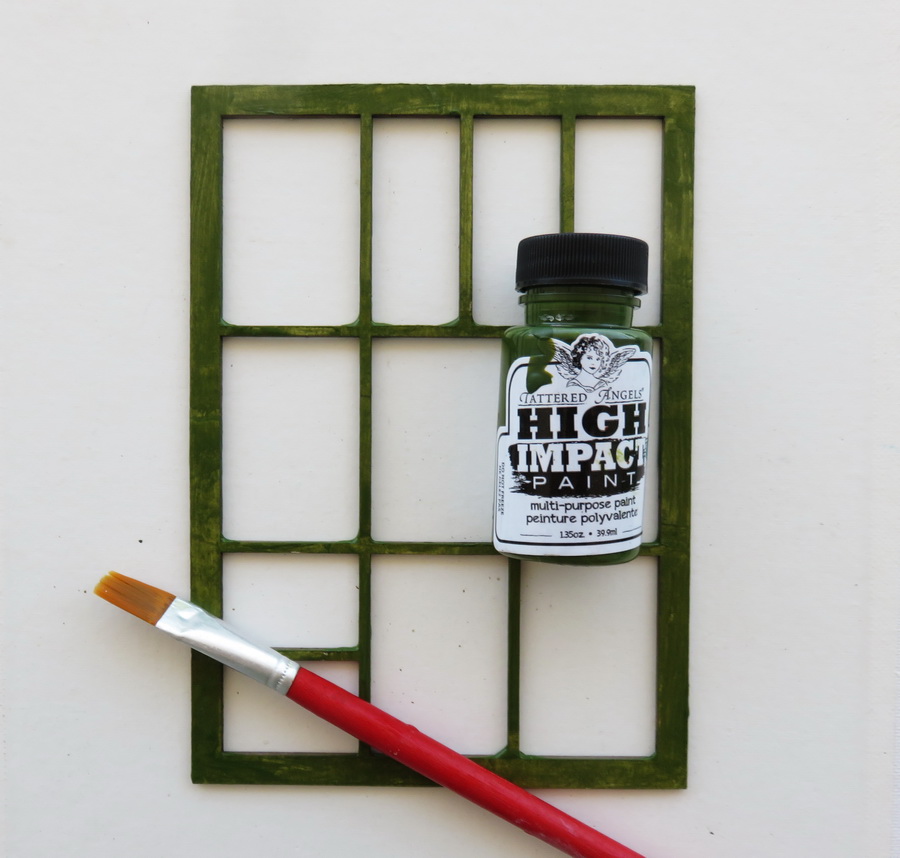
Step by step: 1. Paint the chipboard frame with green paint (Tattered Angels).


2.Glue patterned paper (7 Gypsies) over chipboard back.

 3. Glue the back to the painted frame. 


4. Die cut trees (Die Versions dies) and glue them into the frame


5. Hand cut the labels from Canvas Corp cardstock and add them over the frame. 6. Add bling and stickers.7. Heat emboss the chipboard words with black embossing powder and glue into the frame. 8. Add two small cloth pins (Canvas Corp).


Friday, 21 August 2015

NYC that never sleeps


 Hello my dear crafty friends!
Today I am going to share my eternal love aka Tando Printer's trays.
So as you can see this is a tray with a cover and I made it as my NYC love piece.
There are a few places around the world that you can love or hate.  New York is such a place for most of us. Some are just fascinated by this huge never ending city; some, like my husband, visited it a couple of times and would never come back. For me New York is the whole world! I love this city and I am in love with it. I can come back twice a year and still find new places to visit, new food to try or new shops with unbelievable sales. I love the streets, the smell and the lights of this unique city. So making New York deco was a great fun.
Others than the tray Tando products were used here too:
The scalloped frame on the cover and the Grid rectangle background in the  right inside of the cover.
I used PHP  themed papers and stickers and made a few die cuts to add to my deco piece. 


Tando products used:

Mini Printer Tray 178mm x 127mm with cover

Scalloped nested rectangles

Grid rectangle
Grid - Rectangle