Showing posts with label Acrylic Paint. Show all posts

Saturday, 5 February 2022

February Kit - Twirly Whirly by Zoë Sanderson

Hello, it is my turn today to share my take on this great kit.  At first this one really had me none plussed so before getting started I really had to think about it.  There are 4 sections to the wheel so what comes in 4s?

The 4 Horsemen? 

The 4 Seasons

The Cardinal points on a Compass

The Suites in a pack of cards.

When the kit arrived the first thing I did was dry assemble it.  There were a couple of reasons for this the main one being to get an understanding of how it will all fit together as there are couple of things you need to be aware of.


There is a base (not in the picture above) that come in 4 parts plus the turntable the large circle above. then there are the compartments and the top divider that helps secure them from above.  With the compartment ends, in each section there is a narrow piece with tabs top and bottom that is the inner end.  the outer end has a tab and a slot the 4 arm piece fits into that slot on the outer but takes a tab on the inner.  When you start gluing them all together it is important that you make sure each section piece has one of each kind of narrow piece attached.


In the picture above you see the top and bottom sections.  The bottom is a solid circle with 3 rings on top this makes space for the long bolt head that everything else fits over.  The top is in 3 pieces each smaller in diameter and with a central hole for the end of the long bolt.  When assembled there is a butterfly screw to hold everything in place on the bolt.

First of all then the 3 main elements were stuck together, ready to be painted.  I did take a photo of this stage but my iPhone camera decided to make it a 1 second movie which will not upload here, sorry.  The stage was with all the compartments completed but before the top arms were added, made it easier to paint.  Anyway when I looked at it like that a fort came to mind and for a while I considered not putting any of the top on.

The fort idea also solved a couple of other issues the paint work became fort walls with plant life at the bottom and the theme became the 4 seasons.   After fiddling around with air dry clay models and things the idea of making a wire tree for each section presented itself.  With that an old compass stamp suggested itself for the very top and the dragon as a weather vane.
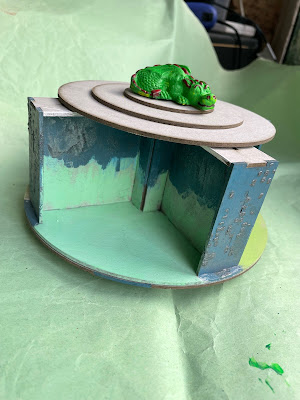


Main body painted, a stencil used on the ends with an embossing paste and mica powder.
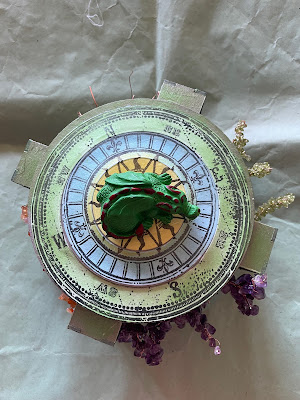

The compass stamp die cut into 3 sections slightly smaller than the top circles so the larger 2 are attached to the one above and then "their own" part.  This helped blend the top into one piece.   clay dragon hollowed out to sit on top of the bolt.  Butterfly screw not needed in this case.
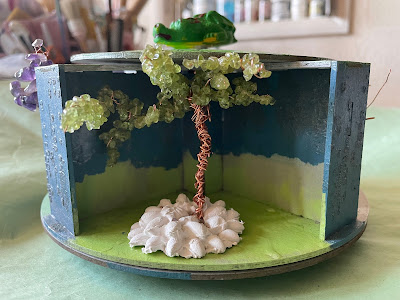

First tree Spring with Peridot and then I needed to make it stand up.  Air dry clay moulded in a broach mould and while wet the tree pushed into it.  That works so just 2 more moulded pieces needed.  Winter is a bare tree that was attached with heavy body gel medium.
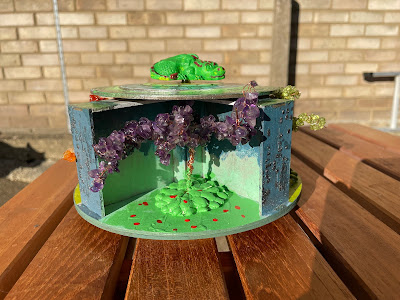


Summer with Amathyst
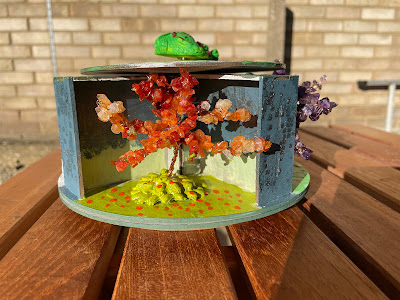

Autumn 
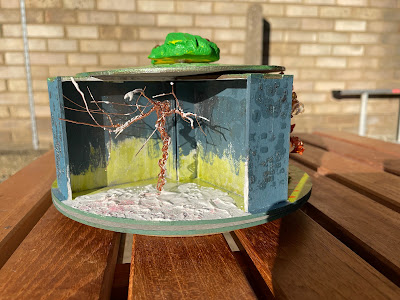


Winter, Structure paste
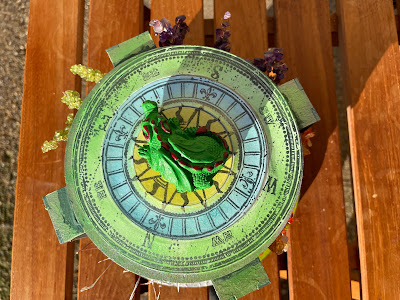

North is Winter, East is Spring, South is Summer and West, Autumn.

Although it was January it was a lovely sunny day so the back garden was the perfect spot to take the finished piece pictures.

For me this was a little more challenging than most but that made the final result even more of a pleasure.  

Products used.


Various Gels and Pastes

 Gem stone chips, copper wire, air dry clay and other elements from my personal stash.


Saturday, 4 December 2021

Whimsical Birds, kit of the month - Sharon Nettleship

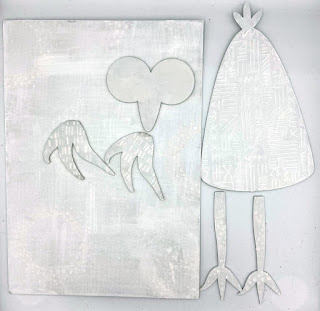
 This month's kit is the Whimsical Bird kit and it has 3 birds to make up and 3 A4 backboards. They are so versatile and you can dress them up any way you want. You could even make them festive! So now I have to confess I mucked up on one of them so I have just the two to show, sorry. 


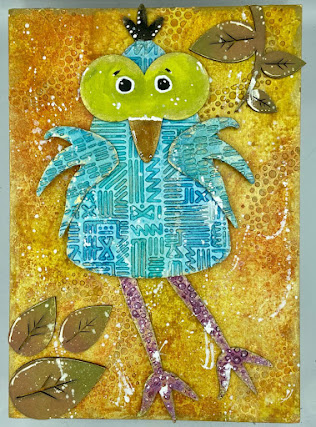
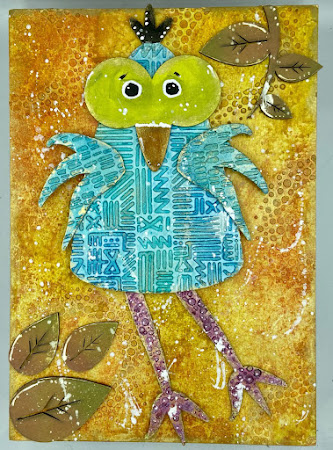
 For my first whimsical bird I gessoed all my pieces and then used stencils and texture paste. I've used Tando's  background stencils for the legs,wings and backboard.


I then used gloss sprays all over the backboard in Autumnal colours. I left this to dry while I worked on the other pieces. 


Again for the body, legs and wings I've used gloss sprays and gold wax to edge it. I highlighted his crest with a white pen and painted it with black acrylic. For the head and beak I've used some acrylic paint and gold wax for the edges.


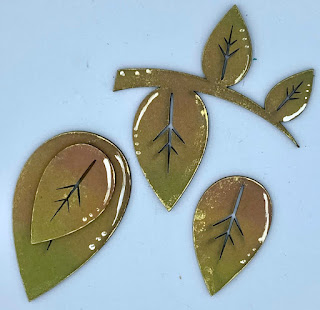
I've used the Tando leaf branch with 3 leaves  and inked them up with distress oxides and gold wax. 


Once the backboard was dry I adhered the bird and leaves and here is the final piece.


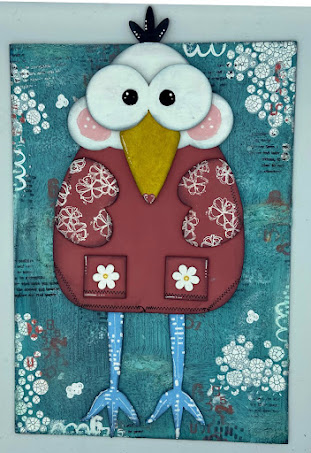
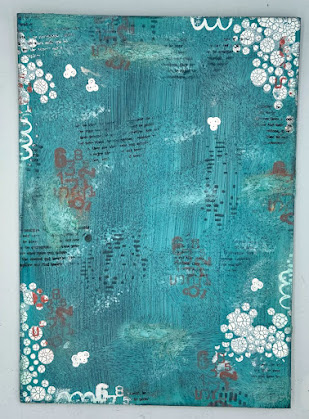
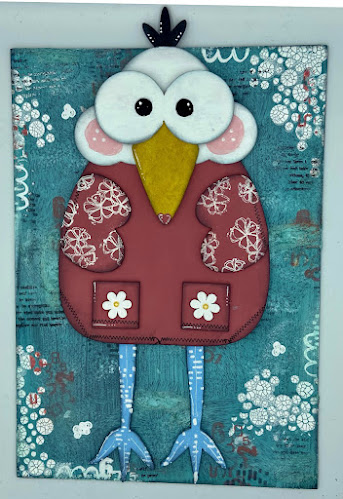
For my pretty little girl bird I gessoed all the pieces first . For the backboard I have used 3 shades of Pentart antiquing gel. I then used one of the Tando stencils and crackle texture paste in white. When this was dry I stamped some images randomly. 


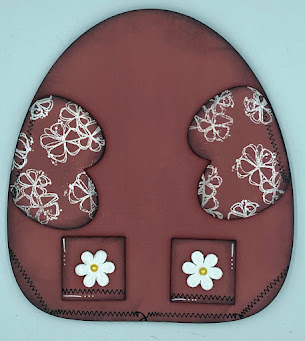
I painted the body and wings with a chalk paint and edged them with black ink and rub on stitching. For the wings I white embossed them with a flower stamp. The pockets and little flowers have been made using grab bags from Tando.


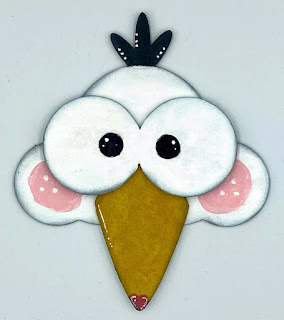
The head and eyes/beak came seperate in my bird so I painted them white exept the beak and crest. I added black paint for the eyes and gave her pink, rosy cheeks. I dabbed on some texture sand paste for the beak and then painted it. Again it was all edged with black ink and highlighted with a white pen. 


The legs have also been painted and I've used the Tando stencil with white paint.


Once everything was dry I adhered the bird to the backboard. And here she is. 

Products used:

Acrylic paints - https://www.tando-creative.co.uk/premium-acrylics.html
Tando Creative - Grab bags

Friday, 8 May 2020

May Colour Theme - with Nikki


Morning everyone,

I made something for the colour theme week, I don't usually do these as I struggle sticking to 'rules'.. lol.  But these colours were so good together I couldn't resist.

I started with a media board that I had already put some modelling paste on, with the Clock stencil, and painted in magenta and turquoise, for a different project.  But something told me it would work well, so I stuck with it.

To disguise the turquoise (as it wasn't in the theme), I added pale grey/blue chalk paint and yellow iron oxide to areas just really roughly with the paintbrush.  A bit like the theme above!

Once I had finished messy painting, I added transfers to certain areas in keeping with the time theme, and stamped in a dark burgundy in random places.

I painted a Tando ATC coin in the grey, then stamped in yellow chalk paint with a distressed wallpaper stamp.  These pics are taken in the evening so the colours are more vibrant when seen on the finished piece.


This picture shows the background detail and layers on the media board background.


I took a plaster crown from my stash, and painted in a mulberry pink chalk paint, then finger painted over the relief bits with purple.  On top of this I highlighted in gold.  This was glued to the ATC to finish, and a final transfer number added for detail.


I absolutely love how busy and vibrant this is, and that depending on where you start with a piece of art you never know where it is going to end up.

Best Wishes,

Nikki K.
xxx

Products Used:

Tando Creative:
Media Board
ATC Coin
Clock face Stencil

Andy Skinner/Creative Expressions:
Enigma stamp.
Mixed Media Transfers
Distressed Wallpaper Stamp
Andy Skinner Structure Paste
Artist Pigment Yellow Iron Oxide Paint
Artist Pigment Paynes Grey
Quick Grab Glue

DecoArt Media:
Primary Magenta
Quinacridone Violet
Tinting Base
Cobalt Turquoise Hue (under layer).
Metallic Gold
Dioxazine Purple


Friday, 19 April 2019

Anything Goes week - Brenda

We have another anything Goes week for you where we share something that we have been working on for Di or for ourselves. Today I have a small media board I made for one of Di's Hochanda shows where she introduced a number of new stencils from Andy Skinner.
I love going over to west coast America and have been lucky enough to drive quite a large part of Route 66 so this brought back great memories. I also thought by using the design on a media board means it could be used for a journal cover.


The Route 66 badge was stencilled onto a piece of leftover painty paper using  cerulean blue, phthalo blue and paynes grey media fluid acrylics.


The quote was stenciled using black modeling paste.


The background was created using a cracked distressed technique I have used before. The blues were chosen to get a retro look.


Hope you have been enjoying AG week.

Have a great weekend.

hugs Brenda xxx

Monday, 25 March 2019

New theme called Photo Booth - Brenda

This is the third tag that I made for Di's December outing to Hochanda and I just had to save it to share this week as it fits the theme perfectly. This week we are sharing projects with a photo on it ....


.... and I dug into my own collection of vintage cabinet cards to find this one.


If you have seen some of my work you will know I love vintage and mixed media and I often combine the two in my projects.


I also used one of the new long stencils that go with these cover tags and fit them perfectly. The circle design and crackle paint look fabulous together.
If you would like to see more details you can find a step by step and more photos over at Bumblebees and Butterflies.


I can't wait to see how my teamies have interpreted the theme this week, so keep popping back to see what they have been making as well.

Thanks for stopping by.

hugs Brenda xxx

Monday, 28 January 2019

Let's have fun with FRAMES - Brenda

Yes we're focusing on 'frames' this week so it will be interesting to see what the fabulous team come up with. I have used the mini printers tray with cover for my sample and I think you'll see why.  For my project the trays have become 'frames' for a little set of butterflies......


 .... which makes them look as though they are floating in the frames.


Process steps
Glue two of the frame pieces together and leave one single and paint all of the pieces with a coat of primitive chalky finish paint.


Cut a cellophane bag (still with two pieces together) to fit the inside of the double frame and glue it down.


 Open the cellophane up so that you have lifted the top piece and you're working in the middle of it. Glue on some butterflies. (mine are free images downloaded from the internet).


 Then lay the top piece of cellophane back down adhering it to the outside of the frame and then glue the single top frame over it. You have now encapsulated the butterflies inside the cellophane which makes them look as though they are floating in the frames and are totally protected.


Dip all the pieces in some watery quinacridone gold and add some tissue tape to the outside of the cover.


Stamp alphabet/numbers with black archival ink and scrape gesso randomly down the front and inside left covers.


Create a darker edge to 'frame' the piece by first dabing some watery burnt umber round the edges and spritz with water - heat dry. Then mix some burnt umber with paynes grey and slide the brush around the edges.


Dabble a little burnt umber randomly on the frame, leave to dry naturally - using a heat gun could melt the cellophane!. When dry scrape some white gesso over with a tine palette knife.


Glue the layered frames onto the back cover and add some words on the inside cover .....


..... - mine are computer generated.


Create a butterfly panel as the focus on the front cover, I simply used scraps of patterned papers and butterfly from an ephemera pack. I added another computer generated saying.


There we have the outside covers ......


..... and the inside ones.


So I hope you like my interpretation of the frames theme. If you make anything similar please leave a comment below and add the link to your project so we can see it.


Thanks for stopping by  and have a great week.

hugs Brenda xxx


Bumblebees and Butterflies
Facebook Page - https://www.facebook.com/Bumblebutterfly
Pinterest Page - https://www.pinterest.co.uk/bumblebutterfly/


Supplies
DecoArt fluid media acrylic paints - quinacridone gold, burnt umber, paynes grey
DecoArt media mediums - white gesso, matte medium
DecoArt chalky finish paint - Primitive
Butterfly images
Stamped, bought or computer generated quotes/sayings.