
Hello, it is my turn today to share my take on this great kit. At first this one really had me none plussed so before getting started I really had to think about it. There are 4 sections to the wheel so what comes in 4s?
The 4 Horsemen?
The 4 Seasons
The Cardinal points on a Compass
The Suites in a pack of cards.
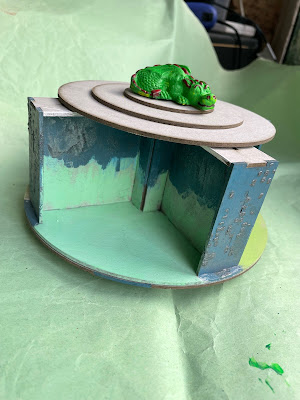
When the kit arrived the first thing I did was dry assemble it. There were a couple of reasons for this the main one being to get an understanding of how it will all fit together as there are couple of things you need to be aware of.


In the picture above you see the top and bottom sections. The bottom is a solid circle with 3 rings on top this makes space for the long bolt head that everything else fits over. The top is in 3 pieces each smaller in diameter and with a central hole for the end of the long bolt. When assembled there is a butterfly screw to hold everything in place on the bolt.
First of all then the 3 main elements were stuck together, ready to be painted. I did take a photo of this stage but my iPhone camera decided to make it a 1 second movie which will not upload here, sorry. The stage was with all the compartments completed but before the top arms were added, made it easier to paint. Anyway when I looked at it like that a fort came to mind and for a while I considered not putting any of the top on.
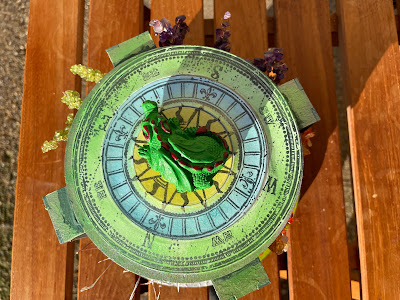
The fort idea also solved a couple of other issues the paint work became fort walls with plant life at the bottom and the theme became the 4 seasons. After fiddling around with air dry clay models and things the idea of making a wire tree for each section presented itself. With that an old compass stamp suggested itself for the very top and the dragon as a weather vane.
Main body painted, a stencil used on the ends with an embossing paste and mica powder.
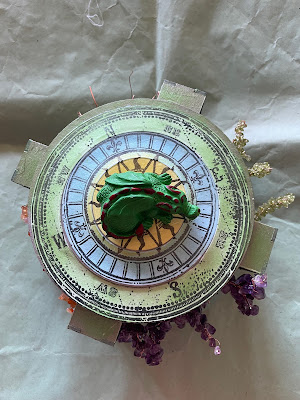
The compass stamp die cut into 3 sections slightly smaller than the top circles so the larger 2 are attached to the one above and then "their own" part. This helped blend the top into one piece. clay dragon hollowed out to sit on top of the bolt. Butterfly screw not needed in this case.
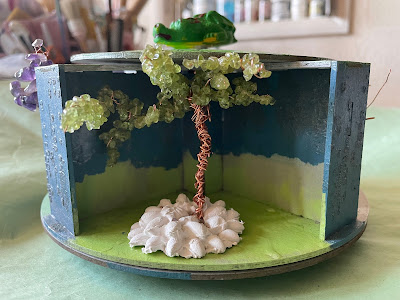
First tree Spring with Peridot and then I needed to make it stand up. Air dry clay moulded in a broach mould and while wet the tree pushed into it. That works so just 2 more moulded pieces needed. Winter is a bare tree that was attached with heavy body gel medium.
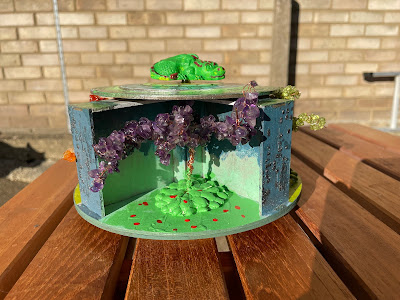
Summer with Amathyst
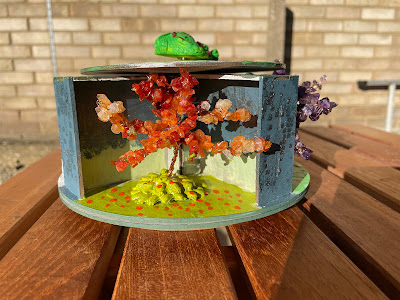
Autumn
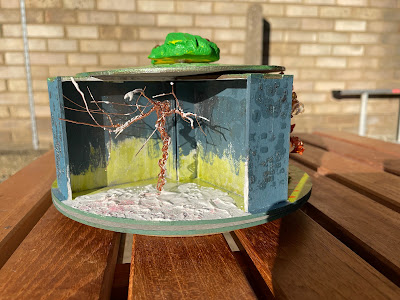
Winter, Structure paste
North is Winter, East is Spring, South is Summer and West, Autumn.
Although it was January it was a lovely sunny day so the back garden was the perfect spot to take the finished piece pictures.
Products used.
Tando Twirly Whirly Art Stand
Various Gels and Pastes
Gem stone chips, copper wire, air dry clay and other elements from my personal stash.
No comments:
Post a Comment