Tuesday 26 May 2020

Medieval Arches-Fiona Randall


Morning All. The theme this week on the Tando Blog is Arches.


This theme lends itself to so many ideas. I decided to go down the Medieval theme route for my project. I used the inner cut  frame inserts that come with the Tando Triple Arch Layered frame. These are great to use for additional projects. I incorporated some Tando Grey Board cut from a sheet and some die cuts, then stamped, stencilled, embossed, inked and painted. All the elements were then layered up with off cuts of grey board to give depth and dimension. Tiny gems and some ink dyed cheesecloth was then added to finish.
 
Thanks for stopping by today.
Stay Safe
Fiona xx
 
Products used.


OTHER PRODUCTS USED.
 
Ranger Tim Holtz Distress Spray Stain- Vintage Photo, Frayed Burlap.
 
Ranger Tim Holtz Distress Oxide Spray- Weathered Wood.
 
Ranger Archival ink Pad- Coffee, Black.
 
Paper Artsy Stamp- Lynne Perella- Collection 008
 
Finnabair Stencil- Prima Marketing
 
Stamperia- Gold Crackle Paste.
 
Spellbinders Dies.


Monday 25 May 2020

Arches

The theme this week is arches:


I applied Modelling Paste through one of the Flourish Layering Stencils and when that was dry, everything had a coat of Everlasting Chalk Paint.

When that was dry I applied some Brusho powders in Turquoise  and Lime individually and sprayed them with water, letting them flow around the stencilled parts. 

I added some spray inked splatters and doodled the edges, finishing off with a stamped image and a quote.

Friday 22 May 2020

Anything goes By Dee

Hi everyone Dee here with my anything goes post I used a Tando creative media board and an ATC.
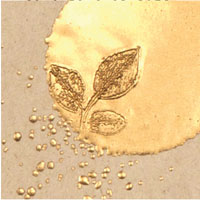
I was playing with #Seth Apter's beeswax embossing powders he had done a demo and I loved what he had done so thought I would have a go. The one on the left hasn't got mat Varnish on it the one on the right has,


The media boards are brilliant for trying out new techniques as the size is brilliant i just love them.

Thursday 21 May 2020

Anything Goes Week- Triple Spine Binder- Fiona Randall


Following on from Di's successful shows on Hochanda Sunday and Monday of this week I have decorated another of the Triple Spine Binders from the shows.
 
 
I absolutely love these binders both the large and the small version. You can decorate them in so many ways even adding extra embellishments like die cuts, chipboards and moulds to create a 3d ornate effect as  I have done on this one. You can be as complex or as simple as you like, decorating with paint, mediums or scrapbook papers, they look great either way.
Di also has a great workshop you can purchase which includes the binder HERE  it is a fabulous workshop and you won't be disappointed. I have taken the workshop myself and thoroughly enjoyed it. To say I am hooked is an understatement and I will certainly be making more.
 
Thanks for stopping by today
Stay Safe
Fiona xx
 
Products Used.


DecoArt Media Fluid Acrylics-


Wednesday 20 May 2020

Anything Goes Week - Binder Step by Step


Morning all,

I have a Step by Step on Di's Binder from Hochanda last week for you today,  the way I have decorated the outside of mine.

Make sure you lay the kit out, and work out which hinges fit which side to line up with their corresponding stitching holes, and your book covers are the right way up.  Continue to work on them as you have laid them out so you don't do any stamping/stencilling etc upside down. (if you choose stamps that need to be the right way). I'm talking from experience on a previous project here :)

Step 1.
Using Di's long tag Numbers stencil, put Structure Paste through onto the book covers in random areas.  Then take Crackle Paint, and using a palette knife, add random patches all over the two covers, and then more on all the hinges to cover (not the bendy spine).

Step 2.
Paint the whole book in white Tinting Base, paint or gesso, your preference, it won't make much difference to the finish.

Step 3.
Dry Brush everything, using Carbon Black paint.  This brings all the little crackle to life, and highlights the numbers.

Step 4:
Stencil using Quinacridone gold, through the coffee stains stencil, in random areas all over. 


Assemble the book, using pegs or clips if needed to hold the hinges in place while drying, I did one side of the book then turned to do the back.  Once all glued, you can stitch through the holes, giving extra strength and character to the binder.  Use Ribbon or Elastic, or you could stitch a button to the back latch and use as a hook from the front.  (I haven't stitched mine yet).


You can still purchase your binders, and get Di's online workshop with this link.   It's well worth it, and Di's folder is beautiful and easy to follow.  (I did the workshop myself :)

Best Wishes,

Nikki K
xxx

Products:
Di's Binder & Workshop Kit
Long Stencil - Numbers
Long Stencil - Rings

DecoArt Media Crackle Paint
DecoArt Media Tinting Base
DecoArt Media Carbon Black
DecoArt Media Quinacridone Gold

Andy Skinner Creative Expressions Structure Paste
Andy Skinner Creative Expressions Quick Grab Glue


Tuesday 19 May 2020

Concertina Mini Book

I've made a concertina mini book for this week's Anything Goes. The Mini Book is part of the Mini Book Mega Pack.

I decorated the book very simply with white acrylic paint and added a stamped image that was stamped onto a gessoed book page. I added a doodled border and coloured everything with watercolours.


The pages of the mini book have been made attaching gelli prints together end to end and folding them concertina style. The first and last folds have been glued to the mini book pages. The back page has a piece of ribbon stuck behind it to keep the book closed when not used.


I then gessoed some book pages and sheet music and stuck them together end to end to the same size as the gelli prints. I then smooshed them into some watery ink.

They were then stuck back to back so I have double sides to use.


I've started to fill the pages with collage and doodles.

Friday 15 May 2020

Rust Week by Dee

Hi guy's Dee here with my piece for Rust week this one i Have really gone for the rust theme so i hope you like rust and a bit of patina. 


This was an old piece I had done for Andy Skinner and i wanted to recycle it up. the corners and frame of the box were triple embossed and not fully stamped so they look weathered.


The frame of the box was stamped with Andy's Cracked up stamp and was fully pressed to give a definite pattern.


I used black sand paste on the rust bits as it is a more gritty paste which is what i wanted i used a mix of paints I used Pentart rust and patina sets and Deco art quinacridone gold.


As there was so much detail on the frame i decided to just paint the inside with titan buff and used a mitform cog for the centre and a gem just for girly bling.


I hope you all enjoyed my rust week art.
Cheers Dee


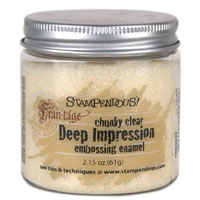
Chunky Clear Deep Impression Embossing Enamel


Thursday 14 May 2020

A Tray Full of Rust- Fiona Randall


Morning Fiona Here bringing you a Rusty Treat for this weeks theme on the blog RUST.
 
 
I decided to add a Rusty treatment to this Kate Crane Divided Box Kit using my favourite colours of DecoArt Media Fluid Acrylics. The combination of colours used gives that rusty patina effect that I love with added grunge as a bonus. A nice little tray to store tags on my desk.
 
 
Thanks for stopping by today.
Stay Safe
Fiona xx
 
 
Products Used.


Quinacrodone Gold
 
Burnt Sienna
 
Cobalt Turquoise Hue
 
Titan Buff
 
Transparent Yellow Iron Oxide
 
Raw Umber


Sunday 10 May 2020

Sundays colour post

Hello, Carol with you bringing this colour themed week to a close.

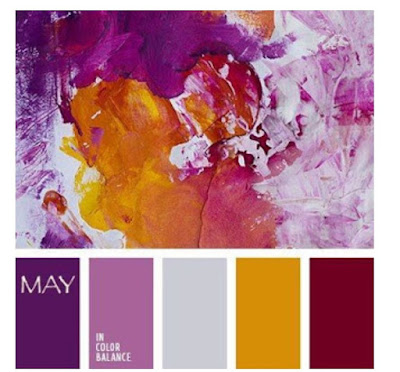
The colour palette this week has been:-


Gorgeous colours for May - lovely painty picture too…

So, here is number five of the files and folders for the Tando 366 Challenge:-


All ready for my May daily prompts.

You can find the products here:-
Challenges here and here…

TFL and stay safe. xx


Friday 8 May 2020

May Colour Theme - with Nikki


Morning everyone,

I made something for the colour theme week, I don't usually do these as I struggle sticking to 'rules'.. lol.  But these colours were so good together I couldn't resist.

I started with a media board that I had already put some modelling paste on, with the Clock stencil, and painted in magenta and turquoise, for a different project.  But something told me it would work well, so I stuck with it.

To disguise the turquoise (as it wasn't in the theme), I added pale grey/blue chalk paint and yellow iron oxide to areas just really roughly with the paintbrush.  A bit like the theme above!

Once I had finished messy painting, I added transfers to certain areas in keeping with the time theme, and stamped in a dark burgundy in random places.

I painted a Tando ATC coin in the grey, then stamped in yellow chalk paint with a distressed wallpaper stamp.  These pics are taken in the evening so the colours are more vibrant when seen on the finished piece.


This picture shows the background detail and layers on the media board background.


I took a plaster crown from my stash, and painted in a mulberry pink chalk paint, then finger painted over the relief bits with purple.  On top of this I highlighted in gold.  This was glued to the ATC to finish, and a final transfer number added for detail.


I absolutely love how busy and vibrant this is, and that depending on where you start with a piece of art you never know where it is going to end up.

Best Wishes,

Nikki K.
xxx

Products Used:

Tando Creative:
Media Board
ATC Coin
Clock face Stencil

Andy Skinner/Creative Expressions:
Enigma stamp.
Mixed Media Transfers
Distressed Wallpaper Stamp
Andy Skinner Structure Paste
Artist Pigment Yellow Iron Oxide Paint
Artist Pigment Paynes Grey
Quick Grab Glue

DecoArt Media:
Primary Magenta
Quinacridone Violet
Tinting Base
Cobalt Turquoise Hue (under layer).
Metallic Gold
Dioxazine Purple


Tuesday 5 May 2020

May Colour Theme Twinchie

This is the gorgeous colour theme for this month:


I've continued with the Twinchie theme:


I started off by painting the twinchie from dark to light with acrylic paints, then took a semi-circular piece from the Organic Twinchie  pack and painting it with acrylic paint.

Once everything was dry, I doodled just about everything and finished off with a stamped image and a quote.

I hope you are staying safe x.