Sunday 26 February 2023

February Colour Challenge 2023- Fiona Randall


Hello and welcome to my contribution for the February colour challenge.

Here are the colours provided and it is up you if you choose two, three or all of them the choice is yours.

I chose to use three.


For my project I decided to create a layered tag.


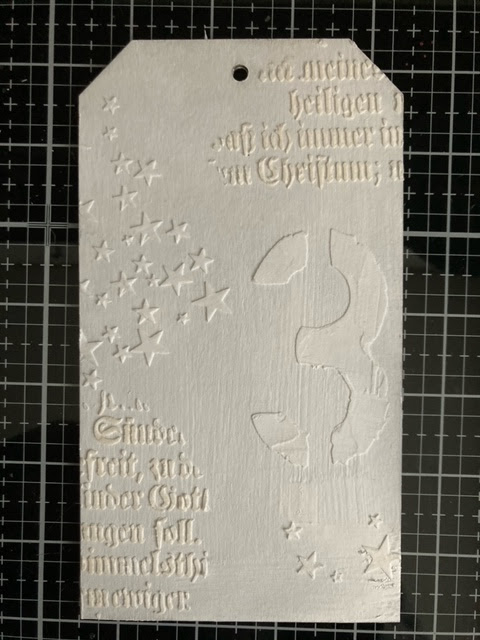
I started with creating an inky background using Distress spray stain in speckled egg and weathered wood. I then cut this to fit a Tando size 9 tag by tracing around it and then cutting and glueing to the tag base. I then added stamping with cobalt Archival ink to opposite corners as shown and edged the tag with the same ink.
Next step was to take a Tando layered butterfly and a Tando Small bookplate. I added  versamark Ink and sprinkled each with prize ribbon distress embossing glaze and heat set to give an enamelled look.
I then added a piece of the leftover inky background to the base of the butterfly and added some script stamping with the Cobalt Archival ink before adhering the top part of the layered butterfly.
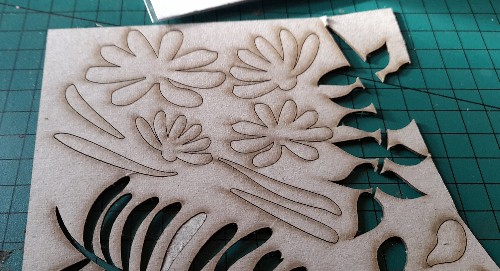
Next I cut a large tag from Tando grey board sheets and gave it a coat of DecoArt chalky finish in Honour. I then applied Speckled Egg distress paint with a sponge to add interest and dried with a heat tool.
The elements were then layered onto the size 9 tag as shown and this was then added to the large tag using off cuts of grey board to give depth and dimension.
To finish I added a few glass pebbles adhering with glossy accents as this dries crystal clear.

Thanks for taking the time to stop by and read. It is so appreciated.

PRODUCTS USED.


OTHER SUPPLIES.

Ranger Tim Holtz Distress Embossing Glaze Prize Ribbon.

Ranger Tim Holtz Distress spray Stain- Speckled Egg and Weathered Wood.

Ranger Tim Holtz Distress Paint- Speckled Egg.

Tim Holts Stampers Anonymous Stamp Set-Gothic Tapestry

Finnabair Studio- Glass Pebbles


Friday 24 February 2023


February Colour Challenge Tag by Bernadette


Good Morning Crafters :)

I have had a couple of days off work this week so thought I would make something and give the colour challenge a go.  Actually trying to match up some colours was a challenge in itself!  As the colours pictured in the Creative Zone on the Facebook page are only a guide, I chose what I had that was as close as I could be.

I don't really have many paints, Those that I have, I've collected when I've seen a make that I really like, usually a gelli plate print. I've got a few different brands and the ones I used for this project were Tim Holtz speckled egg, uncharted mariner and rusty hinge and a midnight blue colour from Americana.

I used a Tando size 10 greyboard tag (my favourite) https://www.tando-creative.co.uk/TAGS120X60.html  and covered it with some white gesso and let it dry.


To add some texture, I chose some stencils and stencilled over the gesso using a smooth white texture paste and let that dry.


I added the colours starting with the lightest then adding bits of the darker colours randomly.  I did quite a few coats letting colours dry in between applications.  I used a stencil brush and my fingers for dabbing bits of paint over the textured areas and wiped bits off using a damp piece of paper towel to give variation here and there.


Piece the paper doll is sitting on, I used an off cut piece of greyboard and added a stamped ruler piece with glue then blended some dark blue ink around the edges.  I coloured the paperdoll's dress and basket using Tim Holtz watercolour pencils.


The stars are from the from the Tando mini stars pack https://www.tando-creative.co.uk/TMSTARS.html 

I painted the stars in the midnight blue paint, using my fingers, and gave them a couple of coats.  I then added the bronze paint over the top, again using my fingers.  I stamped the words from a sentiments stamp set, cut then out then added some blue ink around the edges before gluing them to the tag.


To finish, I used a blending tool to add black ink around the edges of the tag and tied some dark blue ribbon through the hole at the top of the tag.


Bye for now, Bernadette xxx

Tuesday 21 February 2023

Hex Tech Tuesday - Helter Skelter by Kim

 Do you remember that before Christmas (1st November) I showed you how to make a useful tower using Tando hexagons?

I’ve already made a lighthouse and a haunted windmill so this time I went for a derelict heater- skelter. 


Using the basic hexagon tower I decided that rickety old fairground rides would need to be built with boards, so my collection of coffee stirrers got put to good use.


Rather than cut the ends neatly I measured and snapped the stirrers. To make the planks look even older and more decayed. I used a sharp craft knife (being very careful, of course) and took a few chunks out of the edges. To vary the design I made some joints and some missing and loose planks. 


This was a long job and took maybe 150 planks from around 50 stirrers. I used PVA to stick them to the tower.


The top of the helter-skelter is make from Tando Creative birdcage shapes I had lurking. I cut out the centre cage bars and trimmed the top and bottom to be straight. I stuck five of them together using small hexagons as a former. The roof is made of thin card, curved to make a cone shape.


The broken slide sections are cut from Tando greyboard offcuts, with coffee stirrer sides.


I used DecoArt Modelling paste to add texture to the rotting roof. When dry it was painted black, before adding the other colours.


I painted the red diamond shapes on the tower with a diluted Santa Red, to give the patchy, peely look. The sides of the slide are in Forest Green, with Burnt Umber for the slides. The sides were aged with diluted washes of Burnt Umber and Lamp Black.


To add the mouldy, stained look I used DecoArt Media Fluid Acrylics; Quinacridone Red, Paynes Grey, Transparent Yellow Iron Oxide, and Green Gold.


All finished with a distressed ‘Hell-ter Skelter’ sign.


Thanks for visiting. What would you build from Tando's hexagons?


Friday 17 February 2023

Pieces of ME


For this month's Colour challenge i decided to try something new, especially as i was pushed out of my comfort zone with the colours. 


This one is quite personal too me. Not many people know this but i am Dyslexic. At the grand old age of almost 48 i have many stratergies and tactics that help me cope with it on a daily basis but every now and then life just overwhelmes my neurodivergent brain and i have a mini meltdown. But Dyslexic folk have a great imagination and are very crafty which is very helpful when you just need to let it all go. So this is how pieces of me started, I am calling her Agatha, after my love of Art Deco as she has that flapper girl vibe i think x


Materials


Posca pens

Pom pom trim

Hot glue gun

Paper flowers and leaves

Journalling


Instructions

I had a half preped polystyrene head in the craft room, ( Dont ask about the random late nigh Ebay purchase of 5 heads 10 years ago!) I painted it all peach. 


Once dry, i sketched in a face roughly


Once I was happy with my sketch i began to paint in my face. i used the colours from the monthly challenge. I went all abstract ish to represent how we can be all over the place and in pieces. Once the paint was dry i doodled around the features with posca pens

Next i took a selection of Tando flowers and leaves and painted them in blues and peaches. I cheated and added a pop of green too. I cut a selection of paper flowers and leaves out at the same time. 


I added a pom pom head band to my head and then started adding all the paper and Tando flowers and leaves to the head as a large side decoration


I then typed a big list of all the positive aspects of Dtslexia such as my creativity and love of science and then another list of all the things that  i had felt during the last week at work where i had really struggled and was drawn to the craft room for escape.


I hope you like how Agatha turned out and i have to say the colour combo grew on me in the end


Thanks for looking

Sarah xxx