Today i want to show you how i made a collection of cards and tags using just one ornate flourish stencil from the Tando Creative set of 4 stencils.
Materials
Set of 4 background and flourish stencils by Tando Creative
Tando Tags
Distress Oxide sprays or Inks
Modelling Paste
Flowers
Ribbon
Tando Mini's- Butterflies
Tando Mini's- Hearts
Polymer frames
Resin or air dry clay
Journaling cards and text
Wow Embossing pad and Wow embossing foils
Bakers twine
Before i started the projects i made a selection of embellishments with white resin and grey air dry clay and sprayed a selection of plain flowers to match my projects.
Instructions for project 1
I began by spraying my tag in different blue distress oxide sprays and water sprays to give that mottled distressed look. i dried it with a heat gun. i went over the top with a green colour and water, building up the layers. When it was dry i dry brushed on some yellow distress ink in the area i wanted the stencil to sit, sort of around the left but off the tag a bit. I added drips of green distress ink back over the yellow and dried it all with the heat gun again.
Next i took the stencil and modelling paste and carefully stencilled over the tag. Once dry, i placed the stencil back over the paste and sprayed over the top with pink distress ink spray
I then began to layer up a selection of embellishments, journaling cards, frames and flowers.
To finish i mounted the tag on a tall card blank covered in coordinating scrapbook paper.
Instructions for project 2
I began by inking my tag in blue distress inks this time with a hint of pinks and greens dabbed around the outside edges. Next i took a Wow embossing pad and embossed thru the stencil onto the tag. I then used WOW bonding powder and a heat tool on the tag before applying a gorgeous WOW foil in greens and gold's direct to the bonding powder. I love the shabby chic effect i achieved.
Next i began to decorate the tag. I added a journaling sentiment, some bakers twine and lots of flowers.
I trimmed of the tag to make it square as it was too tall for my 6" x 6" square card. I added some coordinating scrapbook paper to the card before mounting my tag direct to finish.
Instructions for project 3
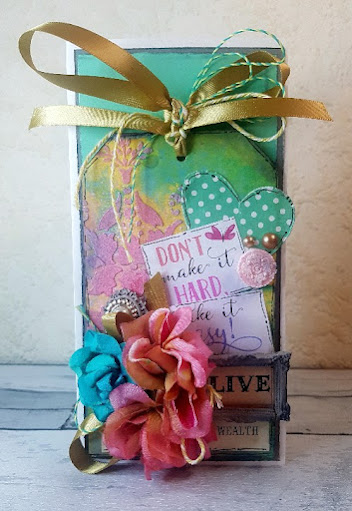
I began by colouring my tag blue. I then placed my stencil in the centre of the tag and applied modelling paste through the stencil again. Once dry i placed the stencil back over the paste and sprayed green and pink distress ink sprays
At the same time i also sprayed a selection of Tando mini hearts to use later
Next i took some scrapbooking embellishments and sentiments and began adding them to the tag. i added them with foam pads to build up the layers. i added the Tando hearts, flowers and Bakers twine to finish. I left this ass a tag but again it could easily go onto another card blank.
Instructions for project 4
This tag back ground actually started life as a piece of Amazon kraft packaging paper that i used in my box for all the oxide spraying i was doing for these projects. I just loved the mix of kraft and the pinky/blues so i dried it and stuck it to a Tando tag.
I then stencilled through with white modelling paste again. I wanted the stark white to stand out but there was so much pink ink soaked onto the Kraft paper that in began to leech into the white modelling paste. But hey it was a happy accident as i rather liked it. I had two stencils patterns side by side on the tag so decided to spray one again to make it slightly darker that the other.
Next i added a resin trim, some bakers twine, and sentiments to the tag
I sprayed some Tando Mini Butterflies and added them to tag and sprayed some more flowers and added them to the resin trim to finish.
Instructions for project 5
Again this tag background started life as kraft paper from my spray box. I just loved the teal blue and pink combination of splatter mess so stuck it to a Tando tag. Once dry i used the Wow embossing products and a lovely raspberry pink/purple embossing foil with the Tando stencil to create this stunning effect.
I trimmed the tag square as i was a bit stumped as to what to actually make with it in the end. I matted it on some plain pink cardstock and some teal scrapbook paper.
I matted the tag off cuts onto my clay and resin frames and embellishments and set aside for later. I also gathered some more coordinating scrapbook paper too which i added to my 6" x 6" card blank.
I added the "tag" matt to the scrapbook paper matts. I added some bakers twine around the bottom and some sentiments. I added the resin and clay frames up the right hand side of the card before adding a bundle and dyed flowers and Tando butterflies to finish.
And there you go, 5 different projects using the same stencil. I hope you have enjoyed seeing the very different things you can make with just one main product
Thanks
Sarah


