Showing posts with label chipboard. Show all posts

Monday, 24 June 2019

Using spray paints/inks on a project - Brenda

Today we start a new theme and this week we are using sprays on a project. I hunted out some old bottle of colour sprays and used them alongside a DecoArt white mister spray and got some really quite nice results.


I used a media board painted with gesso and when dry scraped white modeling paste through a stencil.


These pieces I took from a bits box which were already painted - leftovers from previous projects.


I also grabbed these from another bits box of Tando leftovers to add to the design. As you can see these were not painted or sealed so I started by gluing these to the media board ...


.... and when dry I gave it all a coat of gesso.


Next I sprayed some water based sprays and DecoArt white mister over the surface, dried it and repeated again to give me my base  colours ...


.... and then dribbled some watery media acrylic paints, ....


.... sanded and inked the edges of the board and finished with some splatters of titanium white.


Because the sprays I used were water based they created some lovely mottled effects together when I spritzed them and when I repeated the layer. 


Keep a lookout for some other projects coming up from the team this week.

Thanks for stopping by.

hugs Brenda xxx


Supplies from Tando Creative
Media board, chipboards.
Andy Skinner stamps and stencils
DecoArt Media gesso, misters

Thursday, 19 March 2015

Anything Goes - Tick Tock

Hi all

It's Anything Goes week and I have been playing with this lovely big (294mm x 294mm) clock face on a plain wooden clock.  It is still a work in progress.


I stuck the clock face on with silicone glue and then covered over the whole thing with plain white paint.  And that's it.  I need to decorate it some more but can't decide what else to do with it!!


3 Clocks in 1

What do you think I should do with it now??!  Any help appreciated! :)

Caroline

Thursday, 27 November 2014

Christmas - A bit potty!

Hi there!

I have posted one of these pots for this months Tando Challenge also, so pop along there if you want to take part.  But I thought it fitting if I showed you more of them here, to fit in with the Christmas theme.

Shabby Chic your pots with some Tando chipboard!


They started life as plain wooden pots and with a little bit of Annie Sloan chalk paint and a Tando chipboard shape they ended up as nice little pots, ideal to pop a little plant in and give as a gift!

I used Tando Creative Reindeeer Large Running...


and a pack of 5 Snowflakes...


Caroline ♥

Tuesday, 24 July 2012

In a roundabout way!

Some of the design team have been going round and round this week as we've chosen the theme of circles for our inspiration - lots of scope here!

I've used the fused circles of one of the jewellery shapes and married up with a theme that continues to be popular for a steampunk style pendant.

Complete list of supplies etc is in this post on my blog if anyone would like it.

Pop back later this week for more inspiration in the round from some of my talented design team buddies.

Thanks for stopping by!

Saturday, 14 April 2012

Pin Cushion Houses

Helloooo! I have been playing with fabric again :-D This time I used 3 of the little 3D Tando Houses and turned them into pin cushions! Such a lot of fun to do.


For all 3 I assembled the houses first (discard the roof pieces). I attached the doors, windows & any embroidery to the fabrics before I glued onto the bases. It was a little trickier to make the cushions for the rooves but I ended up making long sausage shapes and then just glueing them in the roofspaces. You can see that the one on the left was the 1st one as the others are a little neater hahaha! I just had to make a little needlecase to match as I had one house left! I cut it down and just covered with fabric, using felt for the 'pages'.


The very pretty fabric came from the lovely Sandy at the Craft Barn (do a search for the fabric if you can't find it). Here are the ~Tando Creative~ pieces I used...nekkid...


If you are going the The Craft Barns Extravaganza this year you can have a good look at these houses as they will be on display :-D

Thank you so much for taking a look today, HUGS, Karen xxx

Monday, 27 February 2012

Mini Village Scenelit

As soon as I saw this new release I knew I 'needed' to have a play with it :-D  How much fun is this????


It measures roughly 19x9cm and is about 1cm deep when finished.  I used a mix of papers this time and then doodled the doors & windows.  Like always, when it was finished I looked at it and thought of all the other things that I could have done hahaha!  A book, a wintery Christmas theme, used acetate and of course texture paint!

Thank you for popping by, HUGS, Karen x

Wednesday, 12 October 2011

Mirror,mirror on the wall...

Helloooo, its Karen here again at last!!!  Now I started this project a few months ago and have been dipping in & out of it while involved in other things.  Its a tarted up Ikea frame I found in a charity shop for 50p....too good a bargain to miss eh?  I found that the Tando twinchies fit very neatly along the edges and, after painting & sprucing, I added lots of little Tando pieces....flowers, butterflies, frames, birds, hearts & a house.  Oh and that large frame is just perfect for the centre!


Sorry that I am in it....now I know how hard is it to photograph a mirror hahaha!!!  Thank you for taking a look....please leave a message to show you have been and don't forget the Tando Challenge will you. HUGS xxx

Thursday, 8 September 2011

Say what?

The speech bubbles are great fun to use with character stamps to have them "say" the sentiment on a project. I used a shape from the small selection but if you're a scrapper you could try combining one of the larger ones with your photos for little bits of journaling, too!

This is a birthday card for a boy celebrating his seventh birthday - very simple with just a stamped image and the chippie speech bubble coloured with a Copic marker and stamped with the birthday greeting. A bit of inking through the smallest holes on the sequin waste mask finish off the image panel and the chippie. I couldn't resist a little Kaz-style doodling for a border.

Tando stuff used on this project: Speech Bubbles Small, Sequin Waste mask

Other stuff: CHF stamps (retired), Versacraft Spring Green ink, Brilliance Graphite Black ink, Copic markers, Copic Multiliner, white and black card


Saturday, 25 June 2011

Pretty vintage hanger

The lovely Tando chipboard tree and a sheet of bare chipboard were perfect pieces for me to use as the base for some pretty papers and an image from Crafty Individuals in their 'Vintage with a heart' challenge this week.
I inked all of the chipboard edges with my ink pad and added some beads and paper hearts to the wire hanger. 

Love love love this tree :D


Chris xx

Wednesday, 11 May 2011

Paint Job

Hello, welcome to another Wednesday with me and Carol. We've had the paints out this week (and probably both have the gunky fingers to prove it!).

Carol has made this fabulous piece with a beautiful weathered verdigris look to it.

She started by painting four wavy twinchies with Claudine Hellmuth Traditional Tan acrylic paint, then spritzed with Adirondack colour wash and Dylusions peridot ink spray. The pieces were then blotted dry, pieced together and stamped.

Carol used with watercolour pencils and Neocolour 11 watersoluble wax pastels to enhance the image, sanded back the edges of the pieces and finished with some gold acrylic paint.

Gorgeous, isn't it? Stop by {Carol's blog} for more details.


I went for texture with my paint by painting a heavy layer of gesso onto my journaling block and stamping into it with a background stamp. Once dry, I added a layer of crimson acrylic paint and when that was almost dry, dabbed gently with a baby wipe to highlight the texture.

I've added stamped images, punched stars and some gold Rub n Buff around the edges to finish.

Full supplies etc listed {here} on my blog if anyone would like them.

Thanks for stopping by today, hope to see you again soon!

Tuesday, 3 May 2011

Canvas with a scallop!

Hellooo, its Karen here and I have been playing with bunting again but this time some very teensy bunting that you can use on a card or for scrapping.  This comes in 2 sizes but I have chosen the little one to work with at 12.5cm across.  I have decorated myself an 8x8inch canvas & I have used 2 lengths to make up the width I needed. As it has a whiteboard finish all I needed to do was spray it with mica mists then overstamp it.

I also used some little flower centres from Tando down near the bottom.  The heart chippie was from my stash!  Here it all is nekkid haha

More details on how I made up the canvas are on my blog if you want to have a looksee!  Thank you for popping by today, HUGS xxx

Thursday, 28 April 2011

SCALLOPED BANNERS!

Helloooo, its Karen here today and I have been having a lot of fun creating banners for my niece & nephews new bedrooms!  I used the amazing single banner pieces that come in a pack of 5.  Each one comes in 2 pieces for decorating and they already have holes at the top for threading.  You can see the blanks ~HERE~. Here is Millie's, who is 3...


Here is a close up...


I painted the scalloped piece & dabbed chalk ink along the scallops to define them.  The upper piece was covered with paper and  painted grungy letters added.  Then a Prima flower popped on the bottom.  I threaded the whole thing with ribbon.  Although it doesn't show, its pretty glittery!!!  Then I couldn't leave little Max out could I?  Here is his...


Not so much glitter this time and buttons instead of flowers hehe!  Have to say that I do like the vobrant colours of this one!  So there you have 2 different takes on the banner!  Thank you so much for popping by today and do come back soon as we have something new nearly every day!!!! HUGS XXX

Wednesday, 27 April 2011

Hot stuff

We thought we'd go along with the weather this week and turn up the heat for some embossing on our pieces.

Carol used an arch for her first piece. The images have been stamped and embossed with clear and then the arch is coloured with Distress inks. The embossing resists the ink to reveal the images still showing the white of the board.

The Grungepaper butterfly at the top is coloured using Distress Stains and she's finished the piece off with a beaded pin and some steampunk cut outs.


Carol's second piece today cleverly uses a wavy twinche as a focal point on a card. The twinche was coloured with Distress Stains and then stamped and embossed with gold powder.

The twinchie is lined up over the same image stamped onto the base, making a fab textural contrast for the card.

Please pop over to {Carol's blog} if you'd like more details.


I chose an ATC to work with and also used emboss resist. The sentiment and flowers were embossed with white powder. I flooded each petal area with watercolour and then used a drop of reinker to colour the background before sponging over some sequin waste with a second shade of green. I also "stamped" a couple of leaves by pressing an inked-up skeleton leaf on there.

Full details of supplies {here} on my blog if you would like them.

The beauty of the white lined board for projects like these is that you get a really solid base that doesn't warp at all when you apply heat for the embossing and your colours go on true to form with no preparation needed - gotta love something that lets you stamp and go!

Thanks for joining us again this week!

Saturday, 16 April 2011

Bookplate on a box!!!

Hellooooo, these bookplates are really pretty and really versatile for all your projects!  Here I have used one of the small bookplates that come in a pack of 4, 2 each of 2 styles.  Don't be fooled into thinking that these are really small as they measure 7.5 cm each way, a really good size I think.  Here I have used one on the top of a 9cm x 9cm wooden box...


I kept it simple by just embossing the bookplate with silver.  I only did one coat as I quite liked the 'beaten' look it gave.  The box has ben sprayed with mica paints.


Looking at it now I can see that I should have gone round the edge of the word with ink but hey-ho, these things happen don't they? haha.  Oh and, yes, something precious is going in there!!!  Thank you for taking a look today and remember that there is something new posted most days so do come back!  HUGS XXX

Wednesday, 13 April 2011

Masquerade!

Hello, Joanne and Carol here again with the next of our technique pieces. We decided to play with masking this week.

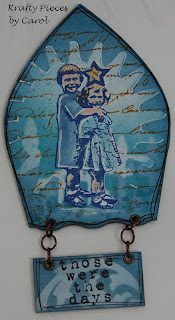
Carol has used two sorts of masking on her fab piece and taken advantage of the fact that the white lined board means there's no prep to do if you want to use something like Distress inks straight on to the piece.


The girls were stamped and then masked with a hand cut mask. Some Tim Holtz masks have been laid over the top and then Carol has built up the effect with different shades of blue and some stamped text.

Carol used Distress inks to colour the girls and then stamped the sentiment on a domino shape that has also been masked and inked and then added it to the arch with with jump rings - doesn't that look fab?

Check out {Carol's blog} for more information.

I chose one of the journaling block shapes to play with.

I spray painted my piece black, then used some Tim Holtz masks (we didn't have a confab, honest - we just happened to both choose the big pointy cog!) and sequin waste and sponged silver acrylic paint on there. A stamped and heat embossed sentiment and a collection of random bits and pieces finish it off.

More details {here} on my personal blog if anyone would like them.

Thanks for joining us today, I hope you'll pop by again next Wednesday for the next in the series!

Saturday, 12 February 2011

ROUND MULTI-FRAME

Hi!  its Karen here!  Haven't there been some amazing examples of what you can do with the multi-frames?  I have been working on the round one and have tried to do something a little different with it.  I hope that the Boss doesn't mind that I discarded the stand, but I thought it would look pretty hanging up xxxx 


After covering the frame with gesso, I tried watersoluble wax crayons on it and I quite like the shabby look it gives.  Tando chippie can take all kinds of abuse & I used a fair bit of water hahaha!

All the objects in the little apertures tell something about me which I will explain more on my own blog.  Spot the teensy Tando chippie on there???  Here is what the blank looks like...


Thank you for popping by...please leave a comment to say that you have been...we love comments hahaha!!! HUGS XXX

Sunday, 6 February 2011

Julie's leaf necklaces

Just take a look at these necklaces!!

Julie has make them for Bubbly Scrumptious using our long leaves.  Tando chippie is so sturdy it is perfect for making jewellery and Julie's necklaces are stunning.

Pop over to the Bubbly Scrumptious blog HERE for detailed instructions.