Showing posts with label White Gesso. Show all posts

Friday, 7 June 2019

June Colour Theme ATC

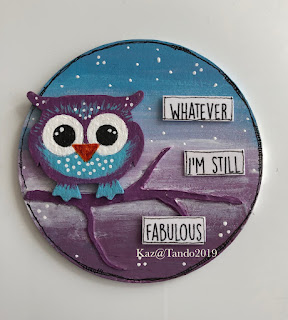
Another {Artist Trading Coin} from me for the colour theme this month:


I used the tree component from the {Tree and Leaves 3 Part Stencil} and put a really thick layer of {White Modelling Paste} through it. Once dry I gave it all a good coat of {White Gesso}.

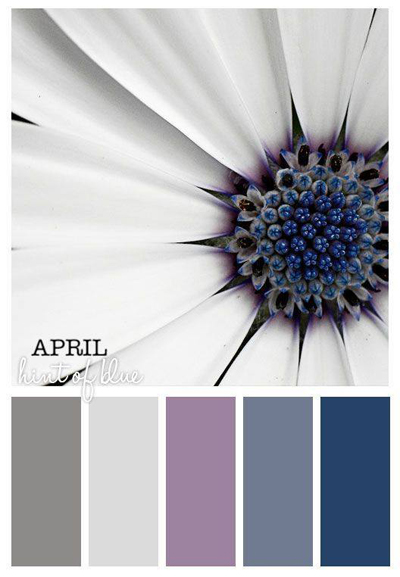
 I then painted the base and blended the colours to match the theme image and painted the branch the darkest colour.

The small owl from the {Mini Owls} was painted with acrylic paints and finished off with pens, then sat on the branch with a computer generated quote.

Monday, 29 April 2019

May Colour ATC

This is the colour theme for this month:


I've continued with the {Artist Trading Coins}:


Everything had a coat of {White Gesso} and then I added a base layer of paint to the ATC followed by a partial layer of {White Crackle Paste}

When that was dry I watered down a drop of {Quinacridone Magenta} and rubbed it into the cracks, then wiped the paint from the surface. I've painted, stamped and doodled on the rest of the background.

I've painted one of the flowers from the {Flowers With Stems Grab Bag}, added doodles and edged with oil pastels.

I've finished off with a word cut from a book.

Monday, 1 April 2019

Gasolene Alley Tag - Brenda

I love using a colour palette for inspiration and this time I had a new stencil as well as this tag was for one of Di's Hochanda shows.
Thestencil is a new one from Andy Skinner.


So here's how my muse took me.


Process Steps
1. Cover tag with DecoArt decou-page paper - I used text from Victorian Romance. Adhere with matte medium and seal the surface of the paper with it. When dry sand back the edges to get rid of any rough edges.


2. Paint a layer of  gesso, black and white mixed together to create a light grey  over the tag and wipe back to reveal some of the text.


3. Stamp some designs over the thicker gesso areas using watering can archival ink and scrape some white gesso over the tag with a palette knife and add a very small edging with it too using the side of the palette knife.


4.  When dry daub, spritz and dribble some paint through. I used quinacridone violet mixed with titanium white and also cerulean blue mixed with paynes grey and titanium white to get two more colours from the photo palette.


5. Blend some black geso through the stencil on the tag to look like an advert.


6. Use a stabilo pencil and wet brush around the edge of the tag to add a 'frame' it.
7. Stamp and cut out a vintage car and the fuel vendor to add as embellishments.


8. Give it a coat of matte varnish.


There are quite a few new stencils in the range from Andy and they are available in the shop.

Thanks for stopping by.

hugs Brenda xxx


Supplies
Tando size 8 tag.
Tando - Andy Skinner new 15 cm stencil - Gasoline
DecoArt media fluid acrylics - quinacridone violet, titanium white, cerulean blue, paynes grey
DecoArt Mediums - black gesso, white gesso, matte medium, ultra matte varnish
Stamps - Tim Holtz Travel Ways, Documented, Vintage Auto

Friday, 4 January 2019

January Colour ATC

I'm aiming to try and do more art this year, so what better than do things for the design team I'm meant to be a part of! I'm doing the monthly colour challenges for a start and I'm going to do a series of {Artist Trading Coins}:


I started by using {White Modelling Paste} through the {Flourish Mini Mask} and when dry, {white gessoed} over the whole thing. 
I then added layers of paint until I was happy (it took a bit, I'm out of practise). I finished with doodles, a stamped image and some words from a book.

Friday, 21 July 2017

Anything Goes - Sunbeam Mixed Media Board

Sunbeam Mixed Media Board by Dana Tatar

Hi! Dana here toady sharing the Mixed Media Board I altered for the Anything Goes theme this week. I primed my board with DecoArt White Gesso. Once that was dry, I used a spatula to spread on blue, silver, and pink paint that was very close to being dried up completely. This old paint was a fun way to not let my supplies go to waste and also create some cool texture at the same time!

Next, I spread more chunky paint over the Kaz Boughton Dotted Star Mask. I topped the sun with a chipboard circle from the Andy Skinner Industrial Elements Set that I colored with liquid inks. I finished this board with some black and white doodles and a hand-written quote.

You can find the products I used for this project in the Tando Creative Retail Store. We'd love to see your creativity! Share your work with us in Tando's Creative Zone on Facebook.

Tuesday, 18 April 2017

Anything Goes - Cherry Blossom Arch


Hi friends! Dana here today sharing the arch I created for the Anything Goes theme this week. I have a gorgeous cherry blossom tree in my front yard. I wait all year for the couple of weeks that this tree is in bloom. The beautiful flowers are beginning to open up and I just can't stop looking out my window. The view from my front windows was my inspiration this week.


I started this project by gluing together 4 outer cuts from the Arabian-Style Layered Arch Frame. Then, I painted the frame with a layer of Gesso. Once the frame was dry I added color by brushing on Tattered Angels Espresso Bean Glimmer Glam Glitter Paint. I decided to only use the outer frames, no inner cuts (backing) for this project to create a cool see-through window effect.


I gathered some small branches from my yard, trimmed several of them to fit inside the frame, and then secured them with hot glue. I used Tattered Angels Leaf Plain Jane Baseboard Mist to color a segment of Grass Flexistrip. I dried the chipboard with a heat tool and then secured the ends of the grass strip to the bottom of the arch. This flexible chipboard is super fun to work with! Attaching only the ends of the strip created a narrow gap between the base of the frame and the grass border, which helps this arch to stand.


Next, I glued pink flowers and white leaves to the branches. Finally, I added a glass blue bird and a metal bird cage stick pin to complete the design. To finish, I lightly splattered the arch with white mist.

You can find the chipboard I used for this project in the Tando Creative Retail Store. There are several different styles of arches available. We'd love to see your creativity! Share your work with us in Tando's Creative Zone on Facebook.

Sunday, 20 November 2016

Altered Book Box

Happy Sunday! Hi Gez here sharing an altered book box with you today for the anything goes theme..

First thing to do was to design a layout of chipboard pieces, this was so much fun! I've included pieces from the [3 clocks in 1] set, a lock from the [Locks and Latches] set, a heart from a [Grab Bag of Hearts], four of the gorgeous arrows from the [Arrows Grab Bag] and pieces of one of the fabulous [Lace effect borders].

I then added some textured stencilling through the [Letters] mask and also the [Sequin Waste Mask] so much fun!

Everything was glued into place and given a generous coating of white [Gesso]

While this was drying I added scrunched up paper to the spine using [Matte Medium]


 I added as much texture as possible!


Once everything was thoroughly dry I set about painting the box with a few chosen colours, [Primary Yellow], [Green Gold], [Cobalt Teal Hue] and [Quinacridone Magenta]


Then...................... getting LOST in the PROCESS !! My photographing ceased !!!!!!

And for a while everything turned pretty ugly !!!!! 


After too-ing and fro-ing with [Titanium White], [Carbon Black] and even a little [Gold Metallic] paint.. I was happy !

A couple of butterflies were added to the finished dry book box for decoration and embellishment from the [Butterfly Grab Bag] they were treated to a delicious coating of Stampendous [Spoonful of GOLD DUST] and [Aged Rose Embossing Enamels] oh my goodness they are so yummy!

 
Oh !!!! Those textures shine through !!

 click to enlarge..
Love the brush strokes on the spine!

 click to englarge.. 

Such a fun project! 

Thank you for calling and leaving a comment if you get the chance.

 Happy creating, Gez ♥


Sunday, 23 October 2016

Dream Big!

Happy Sunday!

I am delighted to be sharing a project and step by step with you today. 

All this week the Design Team having been having fun with the 'Anything Goes' challenge theme.. I decided to decorate the inside front journal cover of the [Ministry of Mixology Kate Crane Journal] I've been working on.. you can see the front cover [HERE]


First of all I glued some random pieces of plan paper to the journal page using [Clear Matte Medium]


Next I added a layer of [White Gesso] and stamped various stamps around the edges to create a border.


Then I set about choosing the colour palette.. 


Once dry I added some stencilling to the journal cover using Andy Skinner's [Burning Rubber] stencil and also the [Sequin Waste] mask and some of the DecoArt fluid acrylic paint.


 While this layer was drying I picked out [Carbon Black] and [Pyrrole Red]
 to add a contrast to the page..


I also couldn't resist adding some [Clear Crackle Glaze] inside the black circles!!

I noticed the washi tape kept peeling so I gave it a coating of [Clear Matte Medium] et voila! 


close ups of the crackles ! I could hardly wait...


 The texture is lovely and so tactile..


 Last of all I added a central image to the page as a focal point..


 My finished inside cover..


Thank you for calling and leaving a comment if you get the chance.
  Happy creating, Gez ♥

Wednesday, 1 June 2016

Pastel Journal Page

 I made a journal page for this month's colour scheme:


I used ~{Modelling Paste}~ through the ~{Letters Stencil}~ and the circles from the ~{Tree and Leaves 3 Part Stencil}~. Once dry, I've used ~{White Gesso}~ over the whole page.
I used my fingers and acrylic paint to add colour to the page then used 2 of the stamps I made using Tando chipboard from ~{this post}~ with paint.
I added some washi tape, doodles, a cow stamp and a quote from Pinterest.

Kaz xxx

Thursday, 21 January 2016

Art Journal for anything goes

Hi guys,Liz here for this weeks anything goes theme and I decided to have a go this year at a Art Journal,
I am fairly  new to mixed media so i thought this would be a fab way to try things out,
I have made a cover for it first keeping it fairly flat so it doesn't stop me using the inner pages,
I wanted the Baroque mask to be the main feature so i have kept the background subtle to make her stand out,
I started with some white gesso, when dry i went over with some water based paints and also used some of the purple from a mister but I took a little of the paint out and painted it on with a brush here and there,
I used the Sequin Waste mask with some of the same colours and stenciled it here and there for a little interest,
I then used the Distressed mini Diamond mask with modeling paste and went over with some fluid acrylics when dry,
I used a couple of my stamps in my stash, then stenciled on the Baroque mask using black Gesso,
A few watered down white gesso drips of my paint brush finish it off,

Hugs Liz xx
PS: If you fancy joining us we would love to see your work, just click the link above,


Thursday, 17 December 2015

Winter Holidays

Hi all, Liz here today with a project for our theme Winter Holidays,
I just couldn't resist this lovely Mini Christmas scenelit to alter,

It comes in layers which you glue together, so gives a fabulous 3D effect when finished,
I started with the back and worked to the front, the frame would be covered up so i just did the moon, which I stippled with some texture paste then when dry coloured with some of the Deco Art paynes grey, Titan buff and then finally with some Raw/umber antiquing cream wiping some off with a wet wipe,
The house roofs have Modeling paste through  a mini distressed sequin mask, then when dry I painted them with Deco Art white Gesso and lastly some glamour dust glitter, these sparkle lovely in real life, the bottom of the houses have been painted with Titan buff and Burnt umber,

The fur trees in the middle were painted with blue/green light acylics and Titan buff then I added some liquid applique over the top for a snow effect,

The wooden fence and Gate have been given some crackle paint then when dry painted with Burnt umber over the top, this looks like aged wood in real life, again i added liquid applique here and there for effect, the bells are painted with Silver fluid acylics,
For the Snow effect on the base I used some of the Modeling paste, making it thicker in some places using my knife to create ridges here and there too, again I added a hint of glitter, 
I then painted the tree on the frame with crackle paste and when dry painted it with white gesso, then when dry some  Raw umber antiquing cream swiped over with a wet wipe, the frame is also first colured with white Gesso then I added a little of the silver fluid acrylic onto the wet wipe and swiped this over the top, this just gives a hint of colour,

I finished off the display with some die cut leaves and flowers from The Ribbon Girl,

We have had a lot rain but no snow so at least this makes me feel like a Christmas morning,
This is my last post before Christmas, so I wish you all a lovely and Happy Holiday season,
Hugs Liz xx