Showing posts with label Mini Album. Show all posts

Monday, 27 May 2019

Layers with Brenda

Here is another of the mini albums that went to Hochanda in March. This is layered up with lace and paint to create a shabby vintage look.


Process steps 

1. Take the mini boards and using matte medium some lace onto the outer covers. Let dry naturally or speed the process up with a heat gun.


2. Add a fine layer of texture sand paste in the gaps between each row of lace and again dry.


3. Take the cover boards and the page inserts and paint everything with a coat of white gesso on both sides.


4. When everything is bone dry sand the edges and any rough spots then use a natural sponge to blend over a neutral palette of media acrylic paints mixing the colours on the project spritzing and blending them together with a babywipe as you go. Dry each layer before adding another. I used burnt umber, titanium white and titan buff.


5. Because I wanted the next layer of watery paint to seep into the recesses and not into the lace I gave the covers a couple of coats of matte medium. When they were dry I dipped and spritzed the washes over them then took some time to add the colours directly into the recesses with a small brush heat drying as I went.


6. Now came the time to add embellishments to the front cover…..


7. …. and to add some collages to each of the pages and some uplifting words.


There are some close ups of the pages today over at Bumblebees and Butterflies if you'd like to see them in more detail.


Keep a look out for other makes with a layered theme this week from my fabulous teamies.

hugs Brenda xxx

Monday, 13 May 2019

Anything Goes Week - Brenda

ANYTHING GOES - we love it when we get a week where we can share anything we like with you and I have chosen this mini album created by Di for one of her Hochanda shows.
This was  one of the samples I made for her.


Process steps. Pages
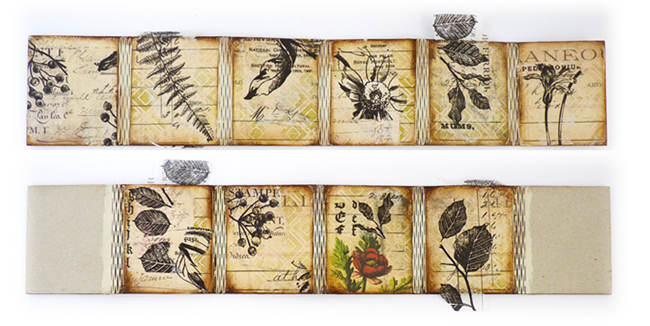
1. Cut panels from patterned paper, ink the edges and adhere to the album.
2. When dry sand back the edges and ink again..


3. Use snippets of Tim Holtz  botanical collage paper with decou-page  mate sealer/glue on each panel,sealing the complete surface of each one
4. Sand off any over hangs.

5. Paint the flowers and leaves with watery media fluid acrylics.
6. Add some die-cut leaves, tiny flowers and words.

7. Repeat the same process steps for the front and back covers.


I used small buttons and thin black elastic to make the closures.


Finished front cover


Finished back cover.

 This is such a cute size 8 x 9.5 cms and feels lovely to hold in the hand and is great as a quote book to give someone.


I hope you like this style journal/album.

Thanks for stopping by.

hugs Brenda xxx


Monday, 3 December 2018

Colour theme week - Brenda

Welcome, it's Brenda here with the start of the December Colour Theme week and what a gorgeous palette it is.


Don't you just love the contrasting shabby tones and those pine cones reflecting the colours?
I decided that to do this justice I needed to focus on some colour mixing and I used one of my charts to record what I did. Of course it's impossible to say how much I used each time but I always add less than I think I need because I can always add more but can't take it away! But I'm pretty pleased with the closeness of the colour shades (from left to right) #s 1, 4 & 5. #2 is represented by cerulean blue and #3 is titan buff.


So here's my finished mini winter sketchbook.


Decorated with sparkly snowflakes on the outside and ......

 
With watercolour pages inside and two magnets to hold the flap closed.


There are some process steps over at Bumblebees nd Butterflies if you'd like to see how it all came together.


Thanks for stopping by and enjoy your week.

hugs Brenda xxx

Sunday, 18 March 2018

Anything Goes Week

Hi Brenda here. For this 'Anything Goes' post I decided to show you one of the mini books I made up for Di to use as a sample at Stitches last month.
This is a tiny but oh so cute book measuring about 6 cms square. It comes in three pieces - a front cover,  a back cover and a spine. I used canvas from a canvas pad cutting one piece to cover all three parts of this book and simply used a mounted vintage photo and number for the front.


White card was stamped with black archival and inked to make the cover inside panels and then black card was used stamped with white gesso to make the pages.


I found a tutorial on YouTube to help me make a hidden hinge on which I adhered my pages. It is explained here. They fitted in really neatly


The book is secured with a piece of elastic. I made a hole in the spine and tied the ends in a knot on the inside to prevent it completely pulling through when I pushed it through the hole. 


It is a very neat closure.


Do tell us if you make up any of these tiny minis, I'm sure you'll love them.

Thanks for stopping by.

hugs Brenda xxx

Monday, 12 February 2018

The new flexi spine mini album

Hi it's Brenda here and with an 'Anything Goes' week I am taking the opportunity of showing you how I decorated one of Di's new mini albums which are being released at Stitches next weekend.
This is a fabulous little mini with a flexible spine that just bends to create the whole album in one.
Take a look at the photos to see what I mean.


 I created a panel for the front cover and used some of the brand new Andy Skinner stamps


I used the slots in the spine to sew my pages in ....

 .... and have dipped a piece of fabric in watery paints to create the tie.


This is a fantastic small mini that just feels so comfortable and cute when holding it in your hands and Di has also made an mdf stand that can be decorated and will hold quite a few of these which will look fabulous on a shelf. I'm sure someone will post one of these on here soon.
Keep a look out for these in the Tando shop, at about 3 1/4 inches square they are going to be fantastic for making little gifts for friends and photo albums for family members and if you want to see how I did my pages then pop over to Bumblebees and Butterflies to see a few more photos.

Have a great week.

hugs Brenda xxx


Tuesday, 25 June 2013

Pretty in Pink Mini Album


Hi Tando fans! Dana here today sharing a mini album for the Pretty in Pink theme this week. I had a lot of fun creating this little scene with a Small Wrought Iron Gate, and heart from the Buttons Grab Bag and a couple of Mini Butterflies.


I added a light coat of paint to the gate and colored the heart and butterflies with Gelatos and watercolor pencils.


Thanks so much for stopping by today!