Tuesday, 1 November 2022

Hex Tower - New Technique - by Kim

 Do you remember the Lighthouse and the Spooky Windmill that I posted a while ago? Well I've been
thinking about the technique, and how to build the hexagon tower more easily. So I've come up with this method. Don't be put off by your first read through - it is easier than it looks.

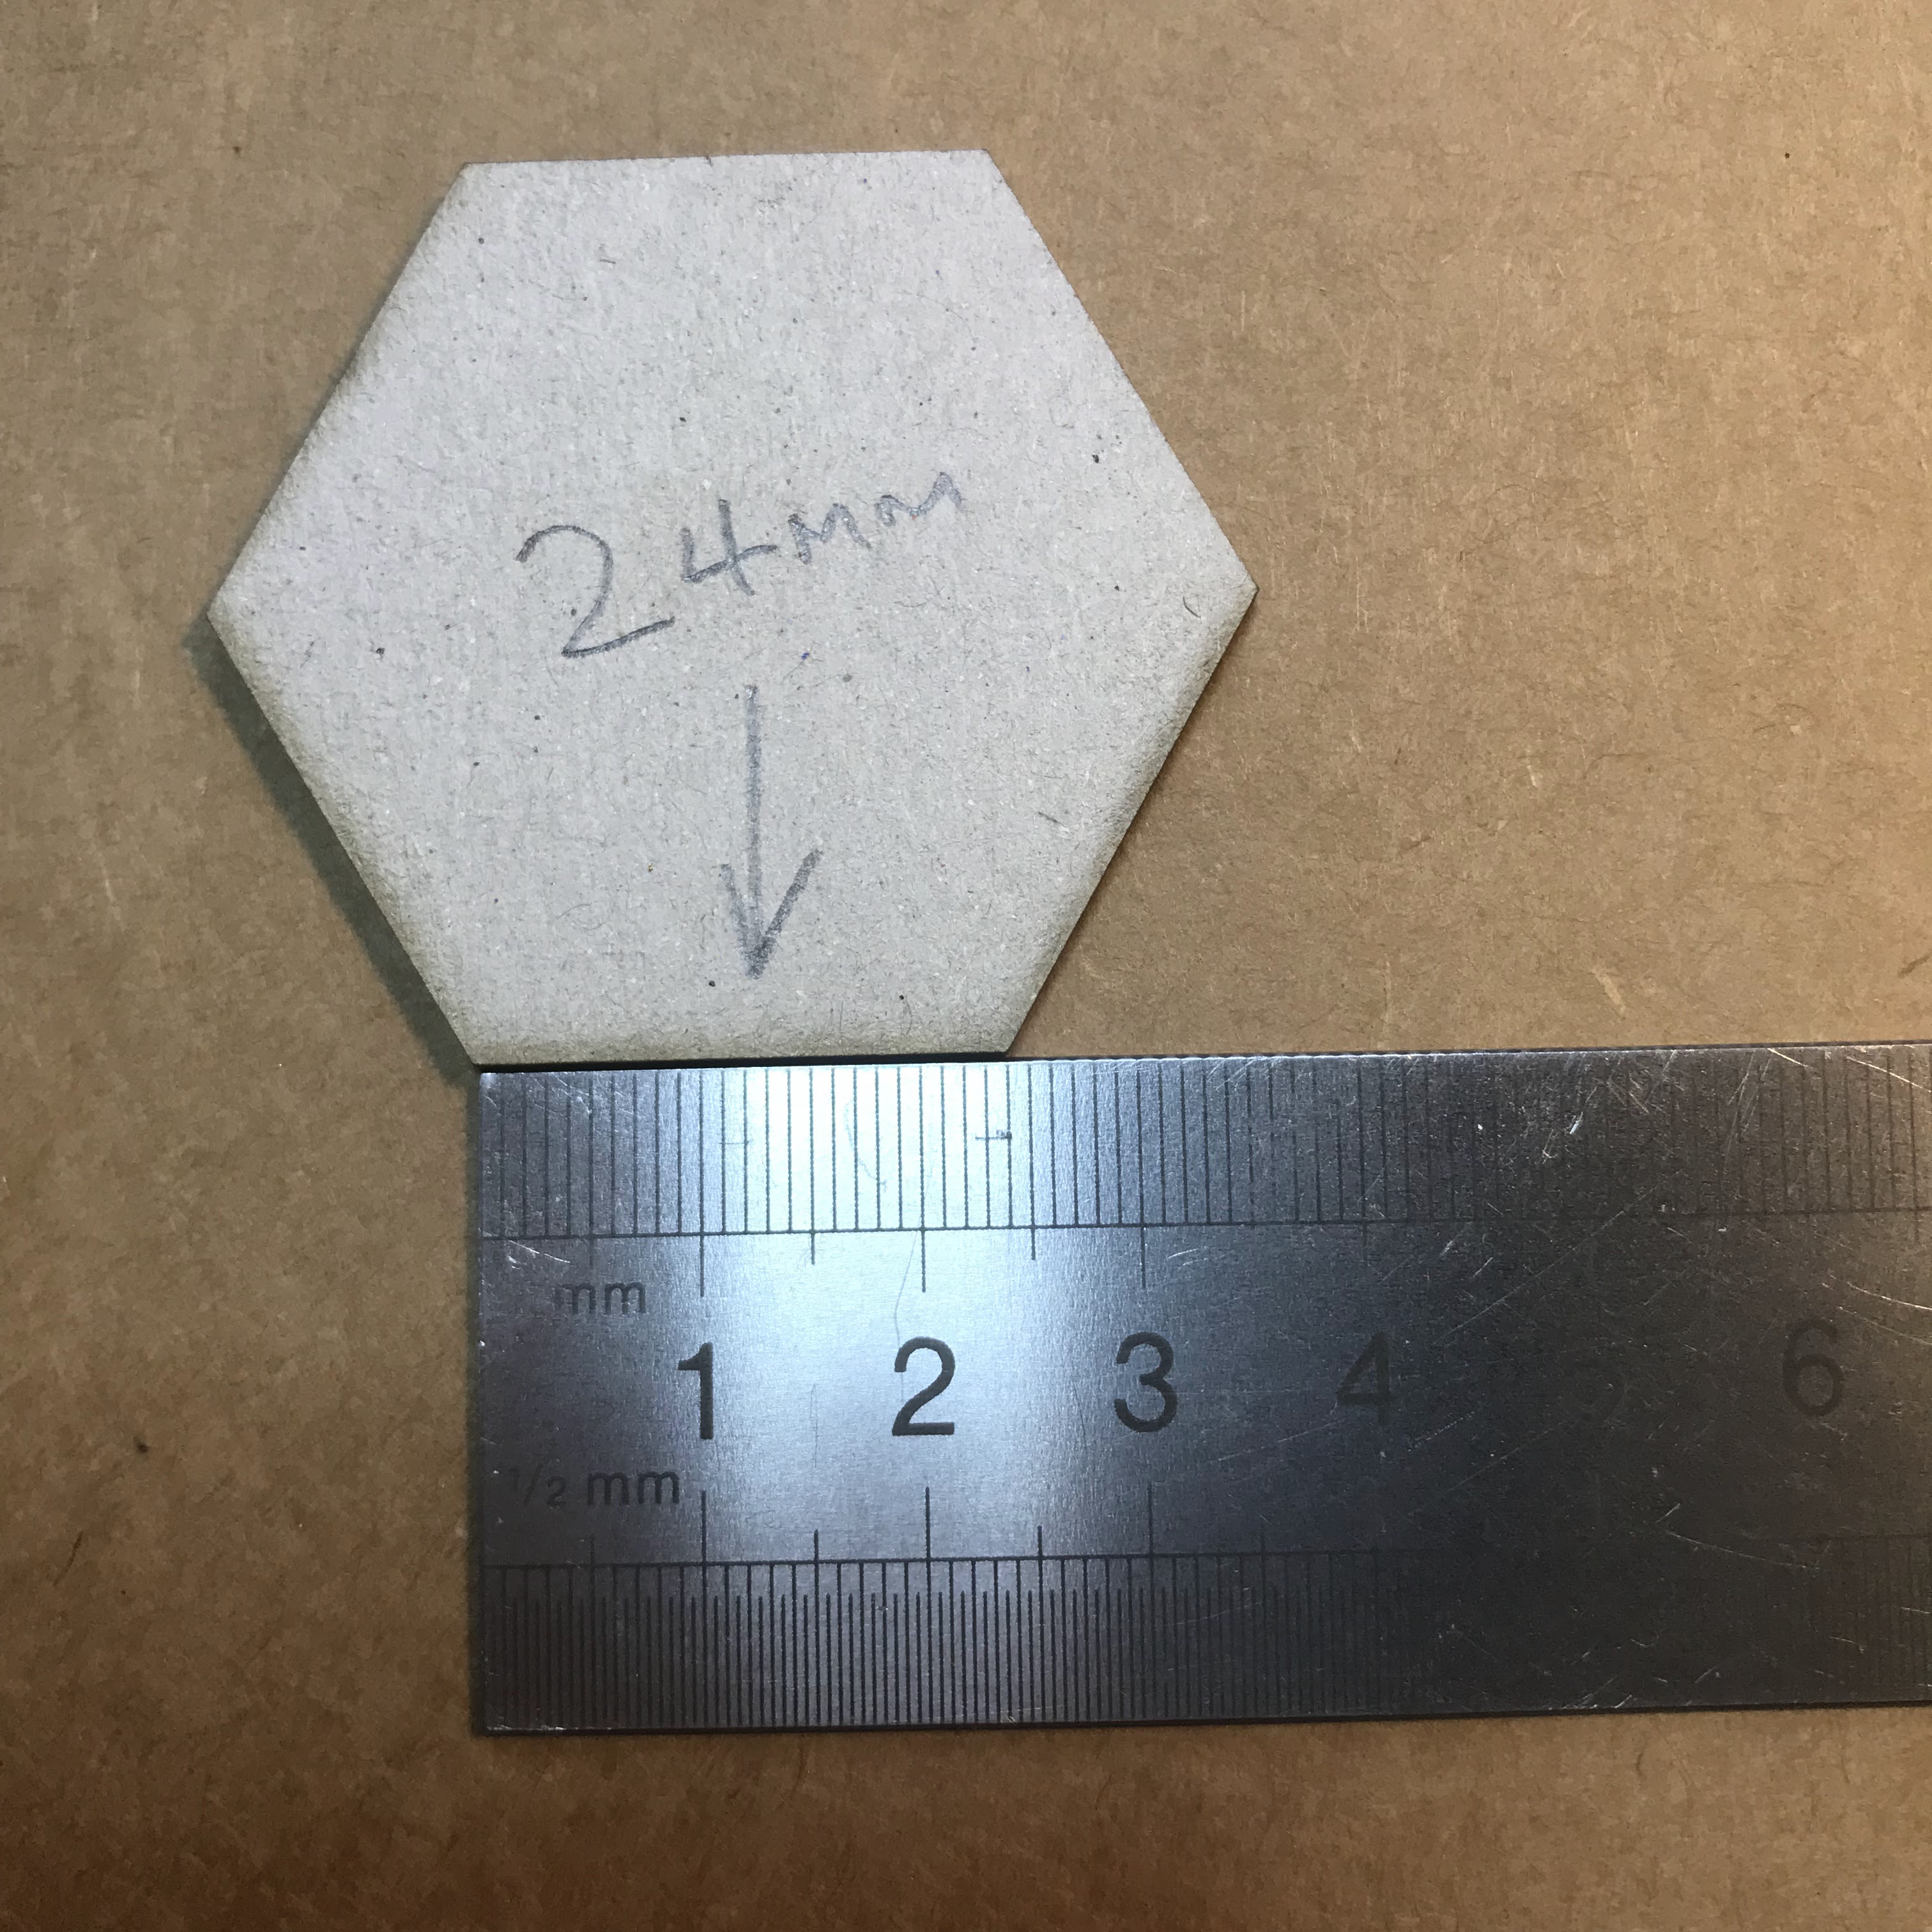
I used the smallest hexagon, 24mm sides, and the largest hexagon, 50mm sides.

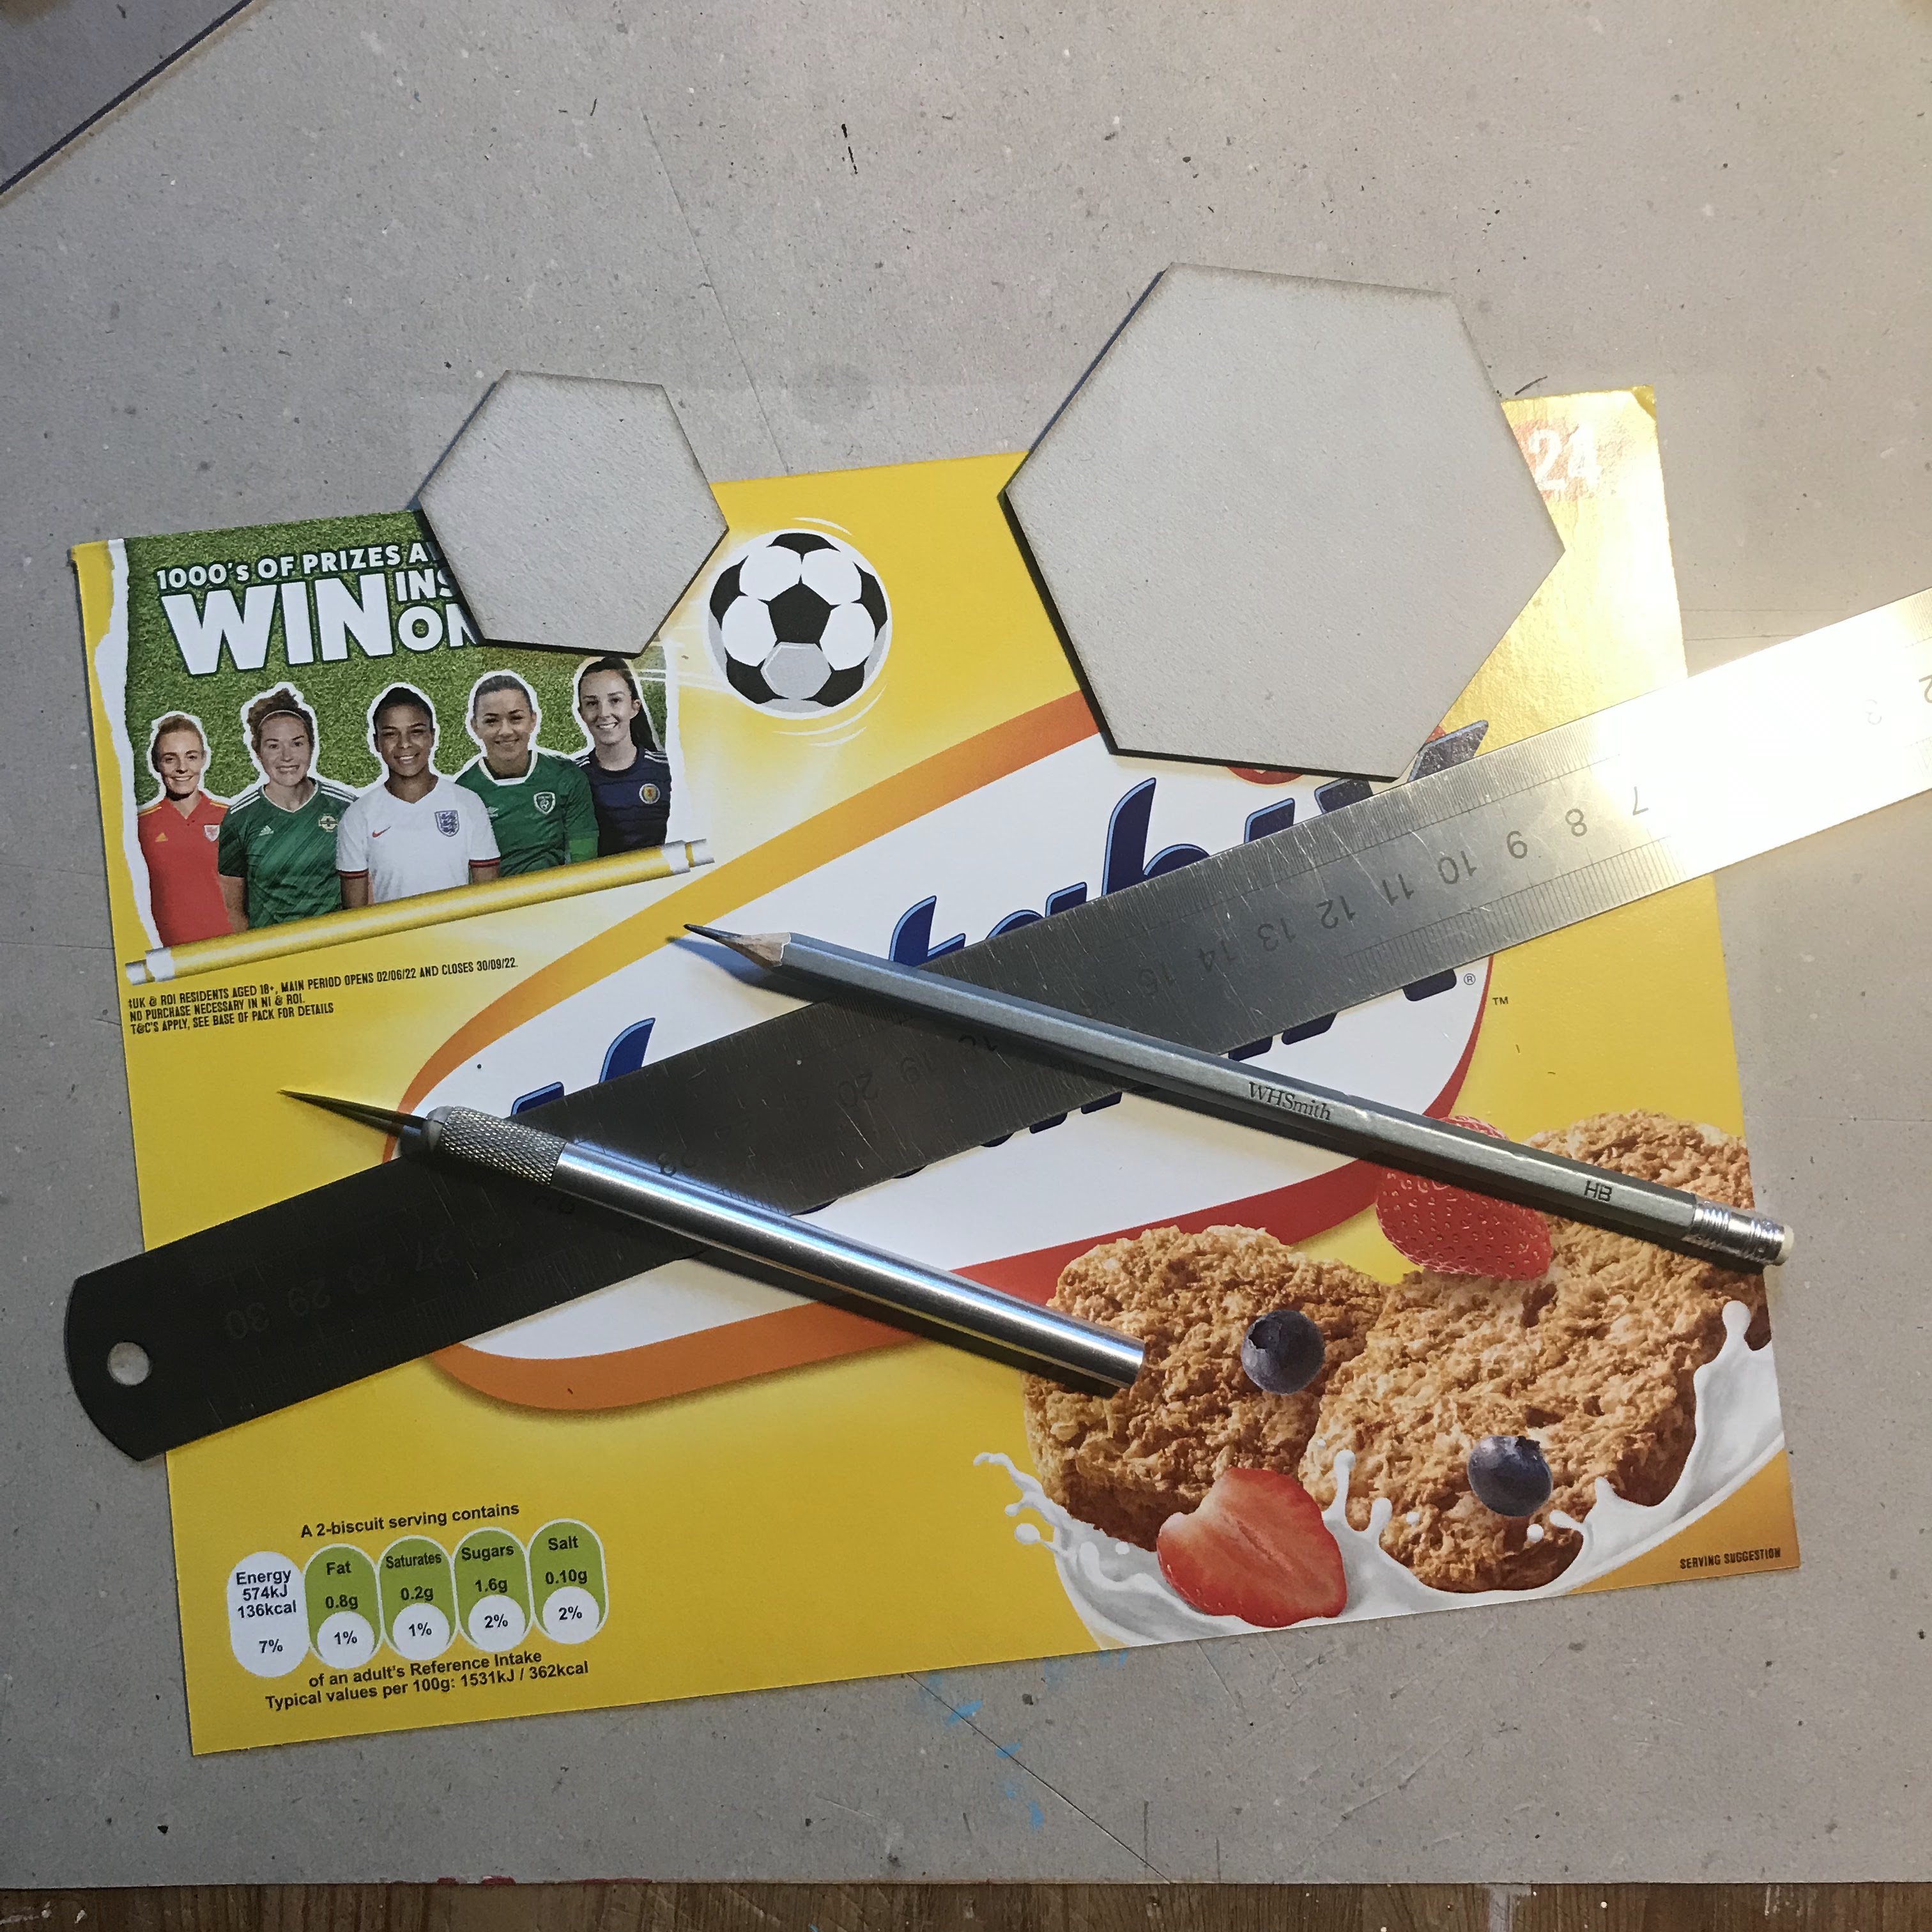
A ruler, sharp craft knife, and fast drying glue (PVA will do, but you may have to wait longer for it to set)


CUTTING

1    From a cereal box cut out the two big sides. Nice straight edges, please!

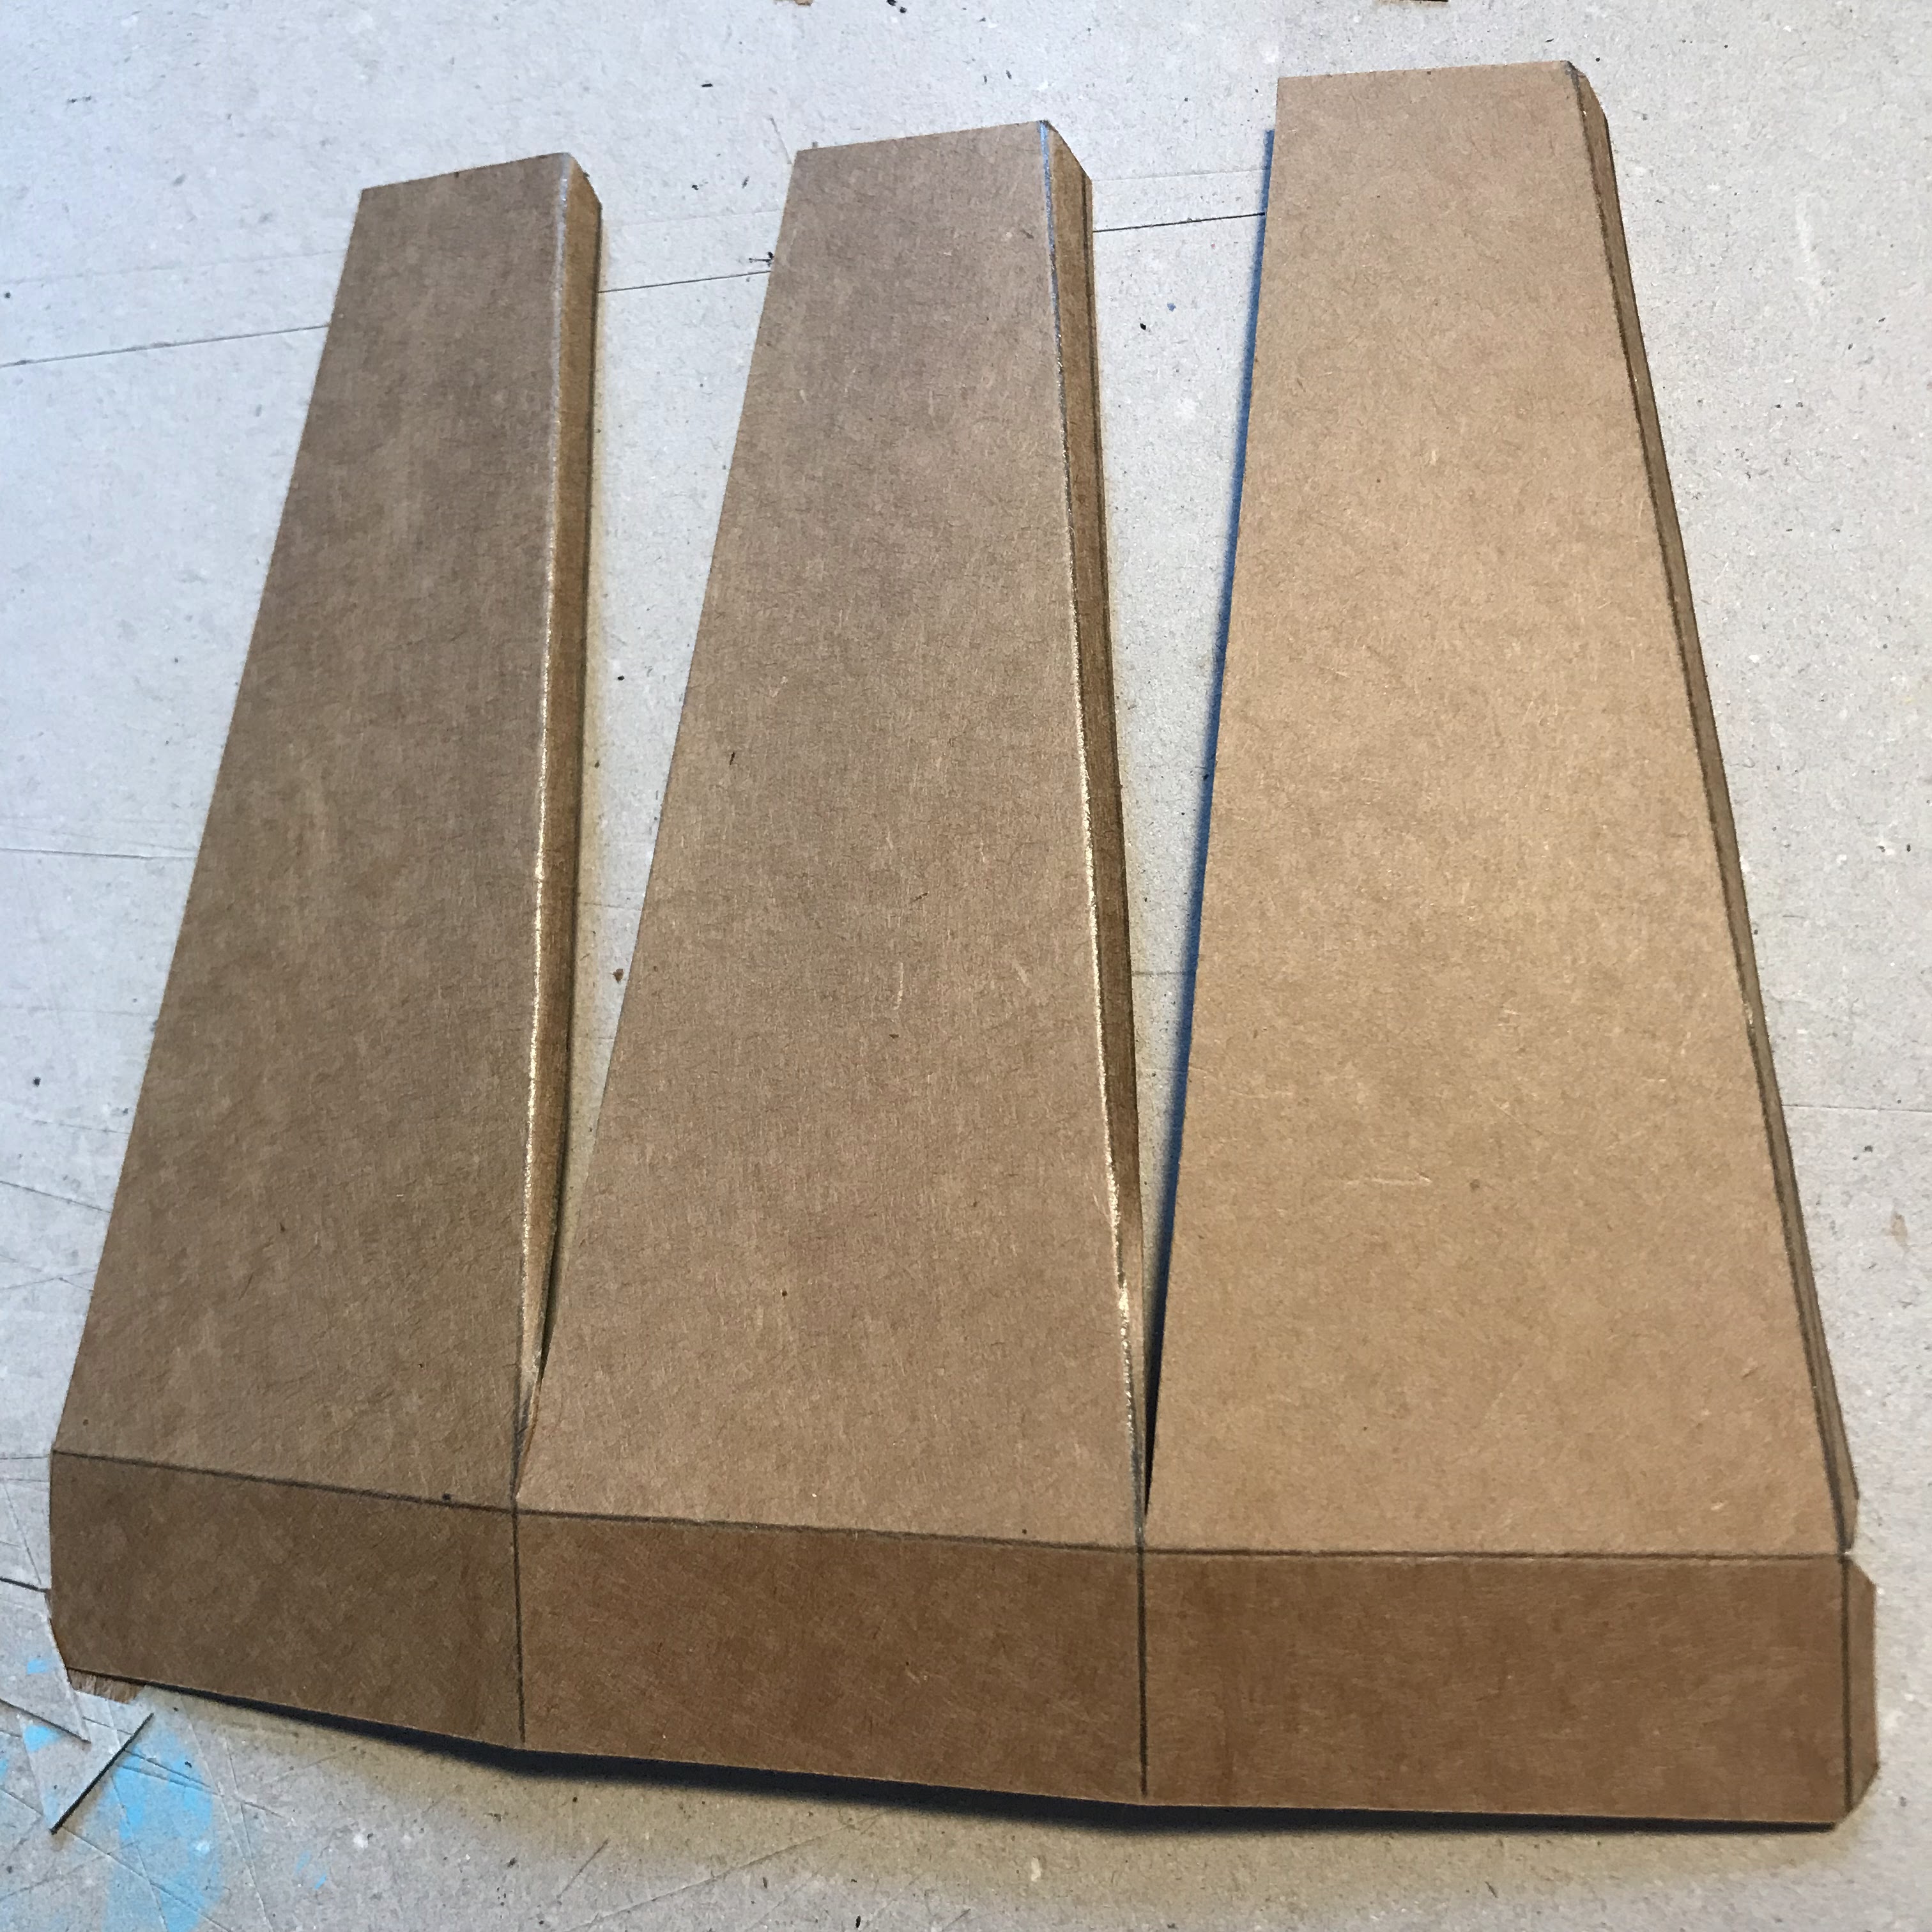
2    From the long edge measure 2cm and 14cm and draw lines across

3    From the left edge draw vertical lines at 5cm, 10cm, and 15cm

4    From the left edge mark the top centre of each of the panels created above - 2.5cm, 7.5cm, 12.5cm

5    Either side of the centre marks, mark 1.2cm. 

6    In each panel draw a line from the end of the 2cm line created at #2 to the corresponding point created at #5. 

7    To the right of each tapered shape draw tabs for glueing - see photo for size and position.

8    Use the craft knife and ruler to cut out the shapes - make sure you include the glue tabs - see photos for required shape.


9    Repeat all the above for a second set of three sides.

10    Use an embossing tool/dotter with a ruler to put creases along the remaining pencil lines to help you fold the pieces into shape.


CONSTRUCTION

Check photos for positions

11    Start with the large hexagon (50mm) and one of the prepared side pieces. Apply glue just below the horizontal crease at the 2cm line, across all three panels. Place the edge of the large hex in centre panel and bring up the sides to match. Let it dry.

12    Apply glue to the tabs on the long sides. You may wish to do one at a time. Bring the tabs inside the adjacent edge and and adjust to make a tidy join. When both are done, let it dry.

13    Take the small hexagon (24mm). Apply glue around the inside of the top of the tower and place the small hex in to fit nicely level with the top of the panels. Let it dry.


14    Take the second side piece, apply glue to the tabs on the two inner long side (one at a time if you prefer) and form the tapered shape. You will not be able to get to these tabs once it is joined to the other half. Let it dry.


15    On your first half, apply glue to two edges of both the small and the large hex, and just along the inside of the long edge without tabs. Place the second 
half in position on top of the first, tucking the tabs inside to make contact with the glue. This is a but fiddly. Hold in place until dry.


16    Apply glue to the remaining edges of the hexs and the last tabs. Put the last panel in place, make any small adjustments before the glue sets. Let it dry.


17    To add strength to the bottom of the tower I used the largest hex ring - same size as the plain hex. I cut a small piece from the ring to allow it to fit and to be adjusted. I found it easier to slide the ring into the space at the bottom of the tower, making sure it fitted snugly, push it in too far, then apply glue around the inner edge and slide the ring out to meet it. Let it dry.


18    Make a brew and sit back and admire your handy work.

Once you have your raw tower it can be decorated however you wish. The Lighthouse was painted with DecoArt acrylics, the Spooky Windmill had Texture Sand and Modelling paste applied. You can cut holes for windows, install battery powered lights for special effects - you are limited only by your imagination. 

I have an idea for another hex project ...

Thank you for reading down this far. I hope you get to make a tower - remember you can adjust the measurements to suit your creation - and send photos so we can see how you get on!

Watch the YouTube video, too!


Friday, 21 October 2022


                          Something Spooky - Halloween Tag by Bernadette


Good Morning Everyone!

I am looking the Halloween making season this year - not something I've been into before but seeing all the makes on social media has got me inspired - spooky!


I decided to make a tag using some of the fab Halloween goodies from Tando.  I'll add links to all the products I used.

I started with a size 10 tag https://www.tando-creative.co.uk/TAGS120X60.html which is my go-to tag size and covered it with some patterned paper


I then painted the coffin black and added some texture paste through a stencil.  Once the texture paste was dry, I sprayed some black soot distress oxide over the top. I painted the skeleton with some off white paint and dry brushed a tiny amount of grey paint over the top, leaving some bits off white https://www.tando-creative.co.uk/SKELPAIR.html


I then cut a piece of white card and did some stencilling with grey and black ink.  I added ink through the stencil and also added some ink directly to the stencil, spritzed it with water and stamped it onto the card.


 I painted the pumpkin orange and added some black ink to the edges.  I painted the spider and bat black and added some silver gilding wax https://www.tando-creative.co.uk/TMMXDHLWN.html  https://www.tando-creative.co.uk/GRBBGSPDERS.html

I then layered everything onto the tag using either foam tape or glue.


This might be my last Halloween make for this year but I might try to sneak another one in before the end of October - watch this space :)

Lots of Love
Bernadette xxx 


Thursday, 6 October 2022


Dorothy Liked Anything Spooky by Bernadette


Good Morning Crafters!  I've been away for too long but I am hoping to be posting much more from now on.  

I'm getting the spooky vibes as we go into October and autumn so I've started with this greyboard tag.


 The first thing I did was to cover the tag (size 10) https://www.tando-creative.co.uk/TAGS120X60.html with some patterned paper.  I then grunged it up a bit with some vintage photo and ground espresso distress ink using an ink blender.


I then used one of the frame pieces from the specimen cards and binder set, https://www.tando-creative.co.uk/fiona-randall-specimen-cards-and-binder.html added some grit paste and  painted it black. I then dry brushed the whole piece with some green paint over the top.  I then attached some patterned paper to the back of the frame.


I used some black distress ink to colour the greyboard extra thins wire https://www.tando-creative.co.uk/XTHNSWIRE.html


I added a paper doll to the frame and glued the greyboard thin wire to the front.


I painted the key black and rubbed some gold wax over the top and added that with the numbers, the sitting paper doll and saying to the front of the tag.


Would be great to see your spooky makes on the Facebook Tando Creative Zone.


Love, Bernadette xxx


Friday, 30 September 2022

Puzzled? - by Kim

 I had plans for Tando's Jigsaw Puzzle kit - I was going to use photographs and ephemera and antiquing techniques ... but it didn't happen as I hoped, so I did this instead.

First, I wanted to have some 3D effects in the jigsaw for added interest. I put the puzzle together then separated it in to four sections of five pieces. I glued the sections to thick cardboard to get varying thicknesses. One had no extra cardboard, the next 1 layer, the next 2 layers, and the last 3 layers.


The backboard would normally frame the puzzle, but I spread the sections out to the corners leaving a space in the middle. I marked this space on the backboard. 

My idea was to be looking through the puzzle to a dark forest scene behind, so I painted the visible area (no point painting the rest) with Lamp Black, Burnt Orange, and White in a scumbled, blended manner. Then I painted on the bare tree branches in Lamp Black, highlighted with Zinc grey where the light catches them.

The puzzle sections are painted to look like falling autumnal leaves. I set out Lamp Black, Burnt Orange, Tangerine, and Primary Yellow on my pallet and used a slip-slop technique to create the effect. I started with the lighter colours near the centre, getting darker towards the corners.

Before I stuck the sections to the backboard I painted the edges black, and accentuated the joins in the puzzle pieces with black, too.

As a super contrast I used a set of Tando's Leaf Branch, Cut Out Leaves. I cut each leaf from the branch with a craft knife (very carefully!). 

I painted the front with Indian Turquoise, and the edges with black. I arranged them on the project and when I was pleased with the layout I stuck them on.


A great autumnal and Halloween picture to get you started on spooky season. I hope you enjoyed the project. Let us know how you get on.

Thanks for dropping by!

Products:

Tando Creative Jigsaw Puzzle Kit

Tando Creative Cut Out Leaves

DecoArt Americana various colours