Monday, 9 April 2018

Texture Paste with Tando

Hi everyone Dee here with my make for texture paste week. I have used a variety of both modelling, crackle paste, Deco Art Ferro paste graphite & Stamperia glass paste ice effect. All my work is about texture and layers and to me texture paste is anything that creates texture from crackle pastes to liquid glass as it all creates a 3d structure to which we as 'artists' turn and manipulate into our art.
I started with cutting card into random square/rectangle pieces and sticking them onto a tag, I followed this with a layer of gesso. When it had dried I then applied both modelling paste and crackle paste with my palette knife. I allowed this to dry naturally.
I used very watery , washes of quinacridone gold, Prussian blue hue, Phthalo Blue, transparent yellow oxide, Dioxide purple. I applied the Stamperia glass paste through a Tando small flourish stencil and allowed to dry. Once dry I swiped it with pewter treasure gold.
I used a pallet knife to apply the graphite ferro to the circles substrate so that it would be at varying levels of thickness when dry so giving an uneven texture to the circles. I highlighted this with Treasure Gold as the Dragonfly from #France Papillon's Creepers and Crawlers plate was going to rest on top of it. I triple embossed Frances Dragonfly with # Stampendous embossing powders & coloured some frayed ribbon I layered it all up underneath the Dragonfly.
I hope you all enjoyed my post today thank you for taking the time to pop by.
Please let me know any questions you might have.
Cheers Dee X

 PRODUCTS USED


Saturday, 7 April 2018

Colour week

Hello, Carol with you today sharing with you my mixed media colour board 4/12.

As you've seen the colour palette for this week was lovely muted pinks/oranges - strange how we all see things differently isn't it even with the same colours…anyway, here is my offering:-


Tando products used:-
Sequin waste stencil (now thats a surprise for me lol)

TFL xx

Wednesday, 4 April 2018

Colour theme - April

Hi, it's Karen here with number 4 of 12 of the *twinchies* that I am decorating for this colour theme year.


I painted then stamped the background with a map stamp.  The *arrows* (which come in a mixed bag of 24) have just been painted and glazed.  The colour theme...


Thank you for taking a look, hugs, Karen xxx


Monday, 2 April 2018

Spring like Colour theme this week

Hi it's Brenda back with you today. You know when I started this project there was still snow on the ground so when I went back to look at the colours to use I thought how warming they were and very Springlike too. What do you think?


Here is my colour palette for this project.


Seal a size 9 tag with gesso and take a stencil and apply white crackle paste through it and leave to dry.


Mix a deep burgundy colour, made a watery wash and dip, spritz and dab before heat drying.


Then mix the rose pink colour and use a natural sponge to daub on some colour.


Added white to the rose to make the lighter pink and dribble, spritze and daub to get most of the tag coloured up.


Here I took my cue from the photo and having mixed the yellow I wanted I used my finger to apply it randomly around the edges not pressing too hard but rubbing my finger over the textures that were forming.


I finally got to make the orange and again looking at the raindrops I made a watery wash and splattered it over - another messy stage and not a good looking finish either but hold on (sorry I forgot to take a photo of that step) .......... 


I cleaned up the mess on my craft mat and foil palettes ....
.... mixed some watery white and just kept dipping, drying, dipping, spritzing etc until I was happier with the background again.


Now to grunge it up a bit, I mixed the dark burgundy which actually came out more as a reddy brown and dripped watery washes through the stenciled image and dried it again. I also rubbed a small amount around the edges to start to frame the tag. This helps bring the eye into the centre of the piece again.


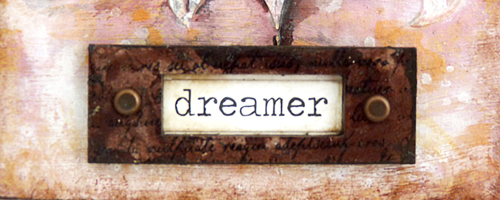
At this point I remembered I was going to include some stamping but thought this might make it too busy so I grabbed a word label and painted it and found some glass cabochons (taking my cue from the water on the petal in the flower again) and glued them to some text paper .....


.... and when dry painted the backs with yellow to bring some colour to them then added them to the background.


The label I stamped and gave a coat of satin varnish and added a couple of brads to finish it off.


At the end I had great issues with the contrasts and shadowing of the stencilled shape and I'm still not totally happy with it but at the moment it's as good as it gets. It's been repainted a couple of times and I think I'm happier with it in real life, more than the photos so please bare with it. At least the colours still have a bit of a resemblance with the original colour palette lol.


Thanks for stopping by.

hugs Brenda xxx

Supplies


Friday, 30 March 2018

Steam Punk and Flowers by Dee


 Hi everyone Dee here with my piece for this weeks challenge Steam Punk & Flowers. For my piece I used a sheet of grey board that I cut to size so that I had a long panel. I painted it with Lace chalky finish paint. I stamped Andy Skinners Tech Trauma with versa fine and clear embossed it.
 Next I took Neil Walkers Tando creative mask Tangled yarn to which I scraped modelling paste and crackle paste to the top and down the left hand side at the bottom I used Ferro paste. I sprinkled a bit of chunky gold embossing powders which were heat set.
To colour I used bister in natural, & black and I used some paper artsy infusions. I used one colour at a time and dried it off between colours lots of water was used. I took a baby wipe and knocked it back
in the centre of the stamped image.
  The flowers were die cuts and were coloured by distress inks, as was the butterfly little gems were attached to bling them all up. I coloured weave with distress ink. Next I dabbed black modelling paste onto different sized Tando cogs and added a couple of silver die cut ones with little gems as well.
I hope you have al enjoyed my post and Thank you for popping by.
Cheers Dee x

 PRODUCTS USED


Wednesday, 28 March 2018

Floral Steampunk Frame

Hello!

I am really excited to be showing you a project this week on the Tando Creative blog as I love floral and also steampunk so am really pleased that this week the theme is both!


I immediately think of cogs when steampunk is mentioned so I decided to continue with a round theme by using the circular shadow frame layering up the MDF and grey board circles.  Once they had been stuck together I applied Decoart white gesso then crackle paste to the whole frame.  When it had dried and the crackles had appeared I added the other grey board elements then used spray inks to build layers of colour using browns and a touch of teal...


To add extra tones to the pieces I used gilding wax and also did some dry brushing with a darker acrylic paint across the whole frame.  Finally I chose some paper flowers in similar colours, micro beads and metal embellishments to add to the frame...


To create this project here is what I used:

* Shadow Frame
* Mini Cogs
* Industrial Elements
* White Gesso
* Crackle Paste

Thank you for reading and happy crafting!

Jane xx

Monday, 26 March 2018

Steampunk and flowers

Good Morning, Carol here welcoming you to a new week here on the Tando Creative blog, and its my privilege to announce this weeks theme which is:-  Steampunk and flowers.

Here is my steampunk and flowers piece:-


I added crackle glaze to the cog, which came from the Andy Skinner industrials set, but, for some reason its gone all blobby, perhaps its gone off? flowers from the mini pack were painted and doodled and added along with some prima blooms.

Do pop back during the week for some more steampunk and flower projects.

TFL xx