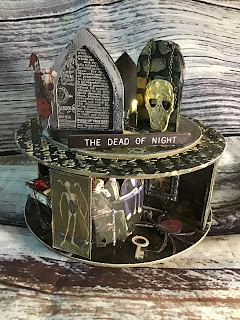
This morning i have another Tando Twirly Whirly Art Stand for you all to enjoy!
Again this one has a gothic theme but you can make yours whatever you want, the only limit is your imagination
The Twirly Whirly Art Stand is very easy to put together, it is also adaptable to accommodate lights. My last stand had lights in the bottom, this one is going to gave lights in the top
First, use a good PVA glue to stick all three rings together, and glue to base, oleave to dry and clamp if necessary or leave to dry under a heavy book
Of the two circle pieces with a hole in the centre, select the one with the largest hole and insert the bolt through the centre
Then glue that circle to the top of the rings leaving the bolt in situ
Di has done a very easy to follow video of the Twirly Whirly construction which you can view on the Tando Creative YouTube channel, my version differs slightly in that the spacers that go on top, i have used next, they need to be added and cant be left out, to get the correct tension, but i wanted a larger surface area to decorate in top, use first the smaller disc…
Then the larger
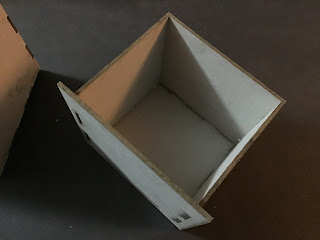
Construct your H pieces paying particular attention to the tabs and notches, the notches always face the top outside edge, whilst the tabs slot into the base. Glue securely to the large base circle ensuring all tabs are seated in the slots
This then slides over the central bolt and once located add the top cross piece making sure the tabs are securely located in the outer notches on those H pieces
I covered the floor if my stand in decorative paper, it’s a good tip to draw around the large circular base piece before construction, cut out then cut into quarters, remove roughly a centimetre square from the centre to allow to the central panel. Adhere with matte medium, sand edges when dry
I highly recommend decorating in this fashion rather than trying to cover the whole base with one piece as you do not want to obstruct the slots the H pieces sit in
Run 3mm red Liner tape along all outer edges of cross piece. I wanted lights on top of my stand too but didn't want the wires to run over the outer side edge so I worked out, using a string of twenty lights would give me two bulbs for each inside wall, totalling 16 lights with four left over for the top
I needed to have the battery pack on top too so that it was accessible for switching in and off, so with the battery pack on top i thread the other end of the lights through the hole in the middle of the top circle and gently pulled 16 bulbs through
Remove tape backing and attach lights making sure that the bulbs just hang off the edge so that your top circle can still sit flush.
Turn your paper covered circle over and glue to cross piece, avoiding the centre square that houses the bolt as we don't was glue to stop it spinning
The top circle had been decorated in the same was as the floor, drawer round your circle into the reverse side of your backing paper, cut out, adhere with matte medium, leave to dry before sanding
I decorated the smaller disc too using paper from the same collection
I used sand texture past around the edge of the base so that it looked more finished and coordinated and used the same sand texture past through a stencil on top
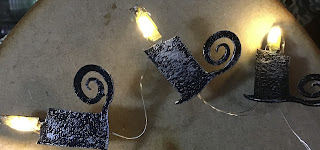
I painted the bases of four candles with black gesso and dry brushed over with titanium white acrylic to give a wrought iron elect and painted the flame yellow
I then ran red liner tape up over the front of the flame and down the full back of the candle, repeat the process for all four candles
I attached the remaining four lights, one to each candle securing the wire down the back
I then was able to decorate each cubby with ephemera, die cuts, trinkets and resin pieces
I used texture paste and paint to create a stone effect on tombstone and added these to the top
I used Stamperia Alchemy papers and Tim holtz Halloween Quotes for additional decoration
I securely the battery pack discreetly behind on of the tombstones
Hope you like the finished effect
Have fun having a go at creating your own
I have used
Sandpaper
Redliner tape 3mm
Magik Graphics Dark Arts papers
Magik Graphics Alchemist Memoirs stencil
Stamperia Alchemy papers
Tim Holtz Halloween Emphemera