Wednesday, 2 February 2022

February Kit: Craft Twirly Whirly By Sarah


Craft Organiser


Materials

February Substrate kit by Tando

DecoArt paint in blues and greens

Tando Grids: Moroccan

TandoMoroccan grid/Stencil

Distress Glaze

Black ink pad

Distress Oxide in Speckled Egg and Frayed Burlap

Washi Tape

3 assorted sized containers or tins

Foam Pads


Instructions

I began by assembling the twirly kit, there is a cracking video made by Di for assembly on the Tando You Tube channel. Once it was dry, I gave it a coat of gesso and when that was dry, I gave it a coat of green paint.


I didn’t like the brush stroke look so I took a sponge and dabbed it all over.


I painted the circle pieces for the top in a different colour and set aside for later


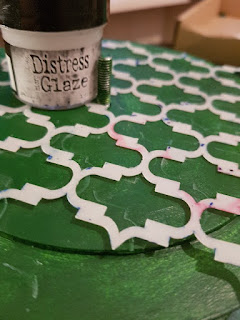
Next I took my Moroccan stencel and layed it on top of the swirly. I took some distress glaze and carefully with a sponge rubbed it over the stencil. The glaze acts as a resist for anything going on top.


Next I sprayed on distress Oxide in frayed burlap. Once dry I spritzed on some speckled egg. I then spritzed on some water. I haven't used the Distress glaze before but I was quite pleased with the BOHO Moroccan effect I achieved. Where there was bare patches, I dabbed on more paints in the blues and greens.


I also repeated the process on the circles for the top


And inside the cubby holes. I also sprayed in some Distress oxide for a painty drippy effect.


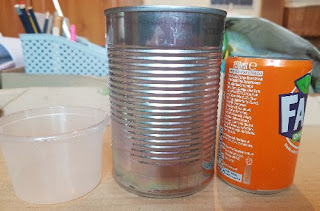
Next, I took 3 containers. I used tin cans and packaging from my recycle box. I painted them white with gesso and taped off the sharp edges with washi tape. I then covered them with Gelli Plate printed papers in similar colours to my selected paints.


I took a Tando Grid and painted it in all the different coloured paints. I also painted the inner parts too


Once dry, I cut down some of the grid and glued it too all the side panels, I then used foam pads to add the inner bits on so they where sticking out proud.


I didn’t use all the circle pieces on top of the twirly as I didn’t want to cover the decoration. So I used the smallest circle piece underneath one of my storage containers. I used a hot glue gun to glue all the containers on ready for all my painty bits


Some more pics from all angles


I hope you like my practical use of this months substrate kit. And keep a look out on the blog as there are lots more Twirly Whirlys coming up from the rest of the team. 


Sarah


Tuesday, 1 February 2022

It's nice to BEE nice Hexagon canvas by Nicky Rousou

 It's nice to BEE nice Hexagon Canvas By Nicky Roussou

So where to begin. I received a packet of Hexagon Grey boards from Tando-Creative and knew instantly what I was doing to do, which isn't usually me...I often sit for hours procrastinating and getting very little done but this just inspired me!

I started with a white 30cm canvas which I painted with Black Gesso and then added some PaperArtsy crackle glaze. I like this brand as you can heat dry it too. 

I then painted all the Hexagon Grey Boards with a range of different mediums. I wanted the texture of each Hexagon to look at little different.

These included : 

These I have had in my stash for years and last forever. 


Once the Crackle was dry, I used some Yellow and Brown acrylic paints to go over the canvas and grey boards to start to building some colour, depth and texture.  The crackle came out fantastic and I'm really happy with it. 
It was over layered with a light layer of Brown Oil paint with white spirit ( my fav!) which just brings out that beautiful rustic tone I adore so much. 

I also used a die to cute some small paper Hexagons to go in the top corner to add a little detail


For the frames I used some vintage photo distress inks on them and then embossed them with the Cosmic Shimmer Tropic Yellow powder. I them placed them sporadically around the canvas to fit the Hexagons. 


Once all my bits were painted and embossed, I began playing about with the layout.
I had these cute little sunflowers from my stash which I have been desperate to use for ages and they work perfect!

To jazz up the flowers and add my rustic touch, I added some cosmic shimmer glass fragments in Brown to the centre of the flower which looked fab!


Once I got my layout sorted, I die cut some Tim Holtz butterflies. I gave then a coat of distress ink and used the yellow pain to the body and over laid again with the Tropic Yellow embossing powder 


I then added some Tim Holtz wordage to bring the canvas to life and a Crown from my stash for the Queen Bee!

I added a few more gold Fragments hear and there and finished with another coat of the watered down all pain to get into corners and give shading and tone. 

And there we go....Its nice to BEE nice Hexagon Themed Canvas.


TANDO-CREATIVE HEGAGON GREY BOARDS

BLACK GESSO

DECOART CRACKLE GLAZE

TIM HOLTZ BEE DIE

TIM HOLTZ DISTRESS IN, VINTAGE PHOTO, 

FLOWERS FROM MY STASH

COSMIC SHIMMER STRATA PATES

COSMIS SHIMMER TROPIC  YELLOW EMBOSSING POWDER

COSMIC SHIMMER GLASS FRAGMENTS IN GOLD

GALERIA : Small Grain Medium Gel, Large grain Medium Gel. Modelling Paste and a small glass pebble medium. 

Bend it like ... technique by Kim


 Have you ever needed a bit of a curve on your greyboard? It's pretty stiff and won't normally bend.

When putting together the new roundabout, spinney, roundy-round thingy, released by Tando Creative in February (2022), I really needed to have curved panels. So this is how I did it.

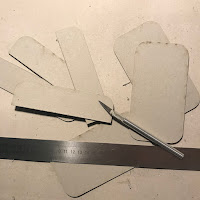
  • I had a set of Tando Creative Mixed Media Boards, which when cut in half lengthways, were just the right size and shape

  • Mixed Media Boards
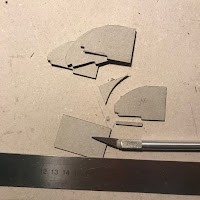
    Extra bracing struts


  • To get the right size bend I measured the diameter of the circle I needed the panel for, the searched my home for something of the same diameter to use as a 'former'. One of my saucepans was just right! (Actually I made the diameter slightly smaller than needed as the board will tend to ease open a bit when released)
  • With a damp (not wet) sponge I wiped both sides of the board and let it absorb the moisture. Add it a little at a time so as not to make the board soggy.

  •  


  • When you can feel the board is able to flex, gradually form the bend with your fingers.
  • When you have a bend started all the way along the piece, lash it to your former. I used a piece of a tie-back, but ribbon, string (be careful not to dent the board), elastic bands, may work for you depending on the size.


  • Once it is secure leave it to dry. I found two hours at room temperature was OK, longer would be better, but I am impatient!
Once dry glue it in position as you would with other greyboard pieces. Because there was little support I had to add some bracing struts.


For information, this curve was around a 160mm saucepan, slightly tighter than needed by it allowed for the board to 'spring' when released. The tightest curve I have done is around an 85mm milk bottle. It may be worth practicing with a piece of waste board.

(To work out the distance round (circumference - C ) the Thingy, I used my school-boy maths, C=2 π r.
Which is 2 x 3.142 x 90mm (radius, half the diameter) = 565.5mm or slightly over 22 inches. 

The mixed media boards are 138mm (5.4 inches) long, so two boards cut in half lengthways, giving four lengths is just short of 22 inches)

Items used:

Monday, 31 January 2022

A Magic Roundabout - February Kit by Kim


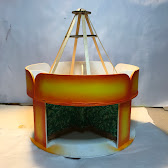
 Fondly known to the design team as the spinny, roundy-round thing, I present my version of Tando Creative's Twirly Whirly Art Stand ...


Please note the curved round boards and circus top are not included in the kit - they are constructed from off-cuts and spare parts. See 'Bend it like ...' on tomorrow's blog for details of forming the curved surfaces.

Assembly of the greyboard kit is straightforward but note there are two large discs - one has a larger hole than the other - the larger holed one is the bottom, the smaller hole is atop the X section. 


Also note the upright end pieces that slot into the large X have their tabs downwards and slot to the top (see picture).

My first job was to base coat the whole thing in white, to make sure the colours are bright and vibrant.


Next I painted a 'leafy glade' scene as a background. I used three greens, first a mid-green dabbed on all 

over but leaving gaps. Next a darker green dabbed on but mainly in the lower half, finally a lighter green, mainly to the upper half. There is no skill needed for this, it is just dabs of colour to give the impression of leaves. I added some brown lines to suggest branches, and brown 'ground' for it to stand on.

Next I worked on the round boards and side panels. I started with a base coat of Primary Yellow, then using a dry brush technique added a boarder of Tangerine, and a slightly narrower boarder of Calico Red. This gave me the basic fairground look I needed.


Using Primary Blue, Festive Green, and Calico Red I added the brush stroke design to the round boards and side panels. I added dotty scrolls in Venetian Gold to complete the design. To make sure the scrolls were all the same I sketched out a suitable size and shape on stiff card, and using a pokey tool pierced the design. I used this as a reversible template to mark the shape in pencil.

Last I added the large white dots - reminiscent of the bright lights found on fairground rides.

To make the circus top I used a cog wheel left over from Tando's Industrial Elements kit and six wooden coffee stirrers. I glued these with all purpose glue as in the picture to make a cone shape. I glued a large washer, also from the Industrial Elements kit, inside the cone for strength. I left this overnight to make sure it was dry.

I measured the height, to get the size for the circle needed for the 'canvas' cover. It just fitted an A3 sheet of paper. I estimated how much of the circle I would need and painted on the red and yellow stripes. I wrapped the paper carefully around the legs of the cone, using PVA to glue it to each one as I went round.

Rather than horses, I thought butterflies would be more magical, so I used a set of Tando Butterfly Minis.


While they were still in their original frame I base coated them in white, and then with Primary Yellow, Calico Red, Primary Blue, and Festive Green I dry brushed random areas over the board, ensuring each butterfly had some of each colour. A little gold edging to finish them before gluing them on poles made with jewellery wire to hang in the carousel.

A Magic Roundabout

I added flags on cocktail sticks, just for fun.

See the carousel in action on my Instagram page

Products:

Tando Creative Twirly Whirly Art Stand Kit

Tando Creative Mixed Media boards (for the round boards, see tomorrow's post)

Tando Minis - Butterflies

DecoArt Americana Colours - White, Primary Blue, Primary Yellow, Calico Red, Festive Green, Burnt Umber, Leaf Green, Foliage Green, Forest Green, Yellow Ochre

Spare parts from Offcuts and Industrial Elements

Coffee stirrers