Showing posts with label fair ground. Show all posts

Saturday, 12 March 2022

Punch & Judy photo box - by Kim


 More blank boxes. This was originally going to be one box as a photo frame/box fitting for a Victorian family photograph - but it 'just growed'.

I used both the large shallow box and the large deep box. Let's start with the deep box.

I wanted a theatrical stage as my setting, so I marked out pelmet, curtains, tie-backs and stage. Using a very sharp craft knife I carefully cut out my shape. To add a little 3D effect I carved some additional texture into the edges of the drapery. I painted black all the surfaces that would end up inside the box, then glued the box together with PVA.

I painted the outside of the 'theatre' with a medium brown, then used Paynes Grey Fluid acrylic to add some shadows to the drapes. I also darkened the outline - like a vignette - with Paynes Grey so the detail would gradually fade away.

Once happy with the shading I outlined the drapes with Venetian Gold, to look more theatre like.


It was at this point, when looking for an appropriate photo, that the Punch & Judy idea struck.

So, back to my stash of leftovers. For the header board I used a piece of art board, the two wings (and other bits and pieces) are made from Tando Offcuts.

I base coated the header and wings with Primary Yellow, then dry brushed Scarlet, then Calico Red around the edges. I planned out the decoration very lightly in pencil - making sure the letters looked central.


I used Forest Green for the letters, with Venetian Gold embellishment to the 'thick' strokes. Then I added the brush stroke design in Calico Red, Titanium White, and Primary Blue. On the large strokes on the header I added gold. When painting the design on the wings I kept them side by side to make sure they matched. 

Next I added the gold coach line around the edge using a liner brush. I highlighted the line with a ruled line in black fine marker pen.


The drapes under the stage were cut from grey board, base coated in medium blue, Primary blue shadows and Blue Harbor highlights. A little gold for the tie-ups.

I glued the parts together with solvent based glue for a quick 'grab'. I made a couple of supports for the header board for extra support.

The second box is the shallow box. No cutting this time, just glue it together. Base coat with Titanium White (two coats). Then on one large side and two long edges I marked out the stripes for the canvas.

My stripes are 1cm, but to get them in the centre I started with a 0.5cm white stripe at the edge, this meant I finished the other edge with a white stripe, too. I painted the sides of the 'theatre' box to match the base.

The Calico Red stripes needed two coats. I used a No 4 liner brush to outline the sides of the stripes, then filled in with a small flat brush. To help the liner flow you can use a little 'extender' or 'flow medium' with the paint.

The base can be glued to the top if you like. Make sure it is centrally placed to look neat. To make the whole thing more stable I glued a spare mixed media board to the bottom, added a layer of DecoArt Texture Sand and some Mini Art Stones. When dry I used Burnt Orange and Moon Yellow stippled on to colour 'the beach'.

Select a suitable picture and place it in the 'theatre'. I found a picture of Punch & Judy, fussy cut round the edge, removed the faces and replaced them with my wife's and my faces, just for fun.

Products:

Tando Creative Blank boxes large deep and shallow

Tando Creative Offcuts

DecoArt Americana Colours, various

DecoArt Texture Sand

Monday, 31 January 2022

A Magic Roundabout - February Kit by Kim


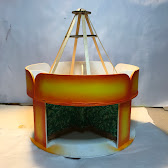
 Fondly known to the design team as the spinny, roundy-round thing, I present my version of Tando Creative's Twirly Whirly Art Stand ...


Please note the curved round boards and circus top are not included in the kit - they are constructed from off-cuts and spare parts. See 'Bend it like ...' on tomorrow's blog for details of forming the curved surfaces.

Assembly of the greyboard kit is straightforward but note there are two large discs - one has a larger hole than the other - the larger holed one is the bottom, the smaller hole is atop the X section. 


Also note the upright end pieces that slot into the large X have their tabs downwards and slot to the top (see picture).

My first job was to base coat the whole thing in white, to make sure the colours are bright and vibrant.


Next I painted a 'leafy glade' scene as a background. I used three greens, first a mid-green dabbed on all 

over but leaving gaps. Next a darker green dabbed on but mainly in the lower half, finally a lighter green, mainly to the upper half. There is no skill needed for this, it is just dabs of colour to give the impression of leaves. I added some brown lines to suggest branches, and brown 'ground' for it to stand on.

Next I worked on the round boards and side panels. I started with a base coat of Primary Yellow, then using a dry brush technique added a boarder of Tangerine, and a slightly narrower boarder of Calico Red. This gave me the basic fairground look I needed.


Using Primary Blue, Festive Green, and Calico Red I added the brush stroke design to the round boards and side panels. I added dotty scrolls in Venetian Gold to complete the design. To make sure the scrolls were all the same I sketched out a suitable size and shape on stiff card, and using a pokey tool pierced the design. I used this as a reversible template to mark the shape in pencil.

Last I added the large white dots - reminiscent of the bright lights found on fairground rides.

To make the circus top I used a cog wheel left over from Tando's Industrial Elements kit and six wooden coffee stirrers. I glued these with all purpose glue as in the picture to make a cone shape. I glued a large washer, also from the Industrial Elements kit, inside the cone for strength. I left this overnight to make sure it was dry.

I measured the height, to get the size for the circle needed for the 'canvas' cover. It just fitted an A3 sheet of paper. I estimated how much of the circle I would need and painted on the red and yellow stripes. I wrapped the paper carefully around the legs of the cone, using PVA to glue it to each one as I went round.

Rather than horses, I thought butterflies would be more magical, so I used a set of Tando Butterfly Minis.


While they were still in their original frame I base coated them in white, and then with Primary Yellow, Calico Red, Primary Blue, and Festive Green I dry brushed random areas over the board, ensuring each butterfly had some of each colour. A little gold edging to finish them before gluing them on poles made with jewellery wire to hang in the carousel.

A Magic Roundabout

I added flags on cocktail sticks, just for fun.

See the carousel in action on my Instagram page

Products:

Tando Creative Twirly Whirly Art Stand Kit

Tando Creative Mixed Media boards (for the round boards, see tomorrow's post)

Tando Minis - Butterflies

DecoArt Americana Colours - White, Primary Blue, Primary Yellow, Calico Red, Festive Green, Burnt Umber, Leaf Green, Foliage Green, Forest Green, Yellow Ochre

Spare parts from Offcuts and Industrial Elements

Coffee stirrers