Saturday, 23 October 2021

Product Focus By Nicky Roussou

 Welcome to my blog for Tando-Creative

This week is 
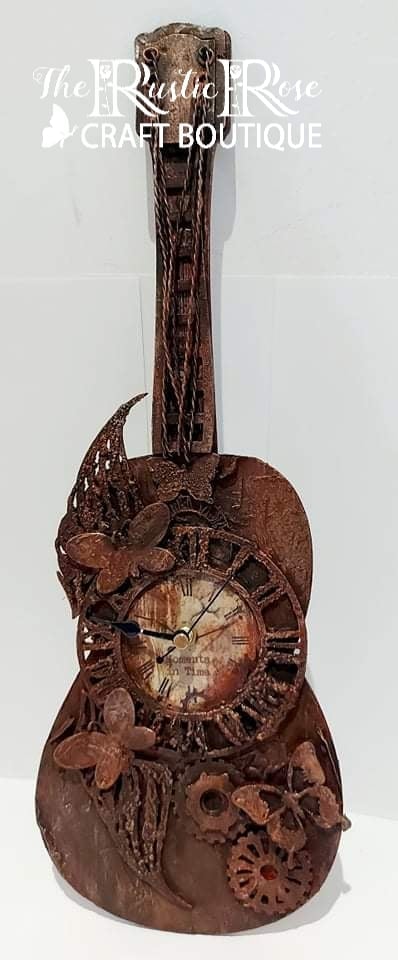
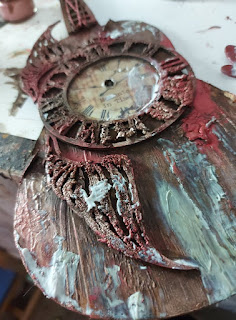
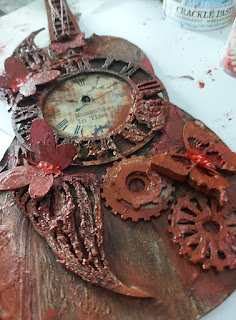
product focus and I have been wanting to make a Guitar Clock for ages but have never got around to it so this was great fun!


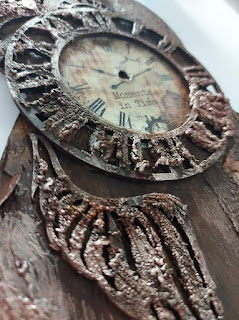
This photo catches the colour better. 


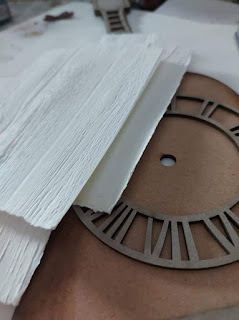
I started out by laying out the Guitar and clock.


I cut sheets of card stock and ran them through my big shot in a Tim Holtz 3D wood embossing folder ( one of my favourites ever!)


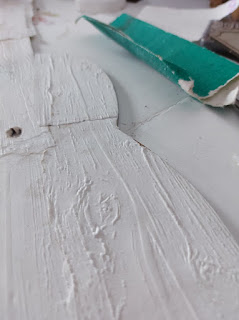
 I then stuck the paper over the entire Guitar, leaving the edges really rough so I could peel them up.


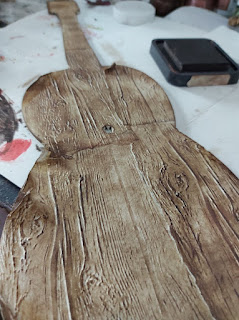
Then covered with distress ink.


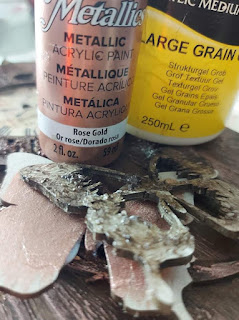
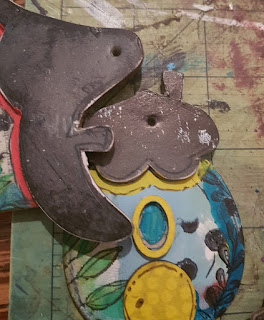
For the Layered Butterflies I painted them with a beautiful rose gold paint and some large grain medium.


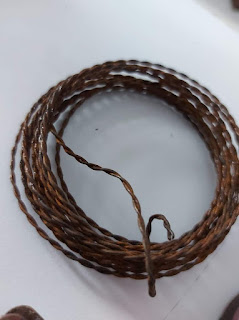
For the Guitar strings I used this rusty wire I've had in my stash for a while which I've dying to use and was perfect for this project. 


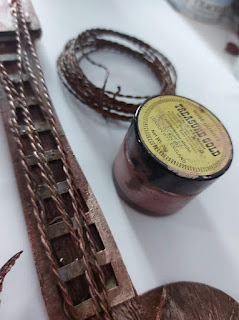
Doesn't this look great with a bit of gilding wax to bring out and highlight the string.


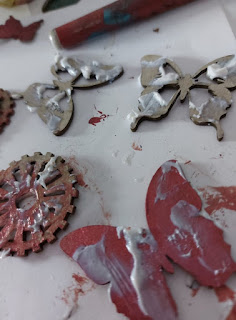
I repeated the same process for the other Butterflies and the cogs and I added Angel Wings too.


The clock and wings were coated with Lava Paste and heated and painted over.


I added some crackle pates over the Guitar randomly and gave it a coat of Decoart Quin Gold


Finally a coat of watered down brown oil paint.


and some gilding wax to finish off.


PRODUCTS USED


Friday, 22 October 2021

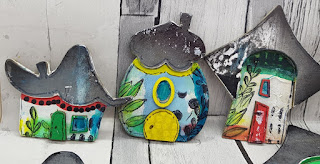
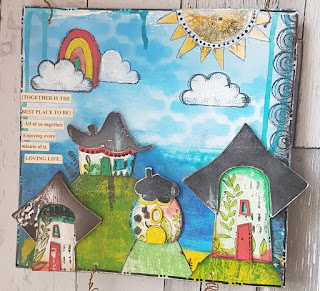
Whimsical Houses Wall hanging


Whimsical houses Wall hanging


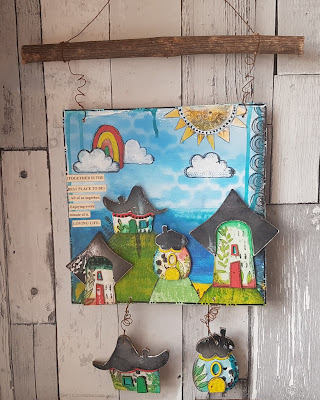
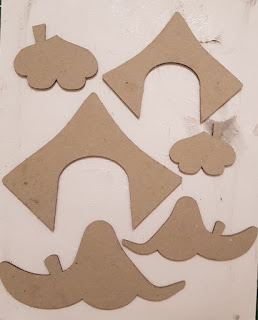
As you will probably see in the future, I am a very big fan of wee houses. I have them all over my house, every room, all decorated with various themes and techniques. I have also joined in Tando’s 12 houses of Christmas, a year long project. You can find these on the Tando FB page and You tubeSo when i saw the whimsical house kit i knew it was perfect for my product focus project this week.

Materials

Tando whimsical houses

Tando Stencil:Grid Moroccan

Grey board sheet cut to 8” x 8”

Decoart Paints

Journal pens

Posca Pens

Woodware whimsical stamps with clouds and rainbows

Rubber dance floral stamps

Strong glue

Rusty vintage wire

Thin wooden stick/branch

Patterned paper or Gel print papers


Instructions

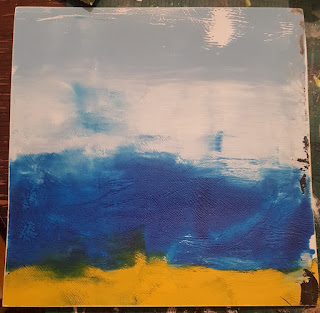
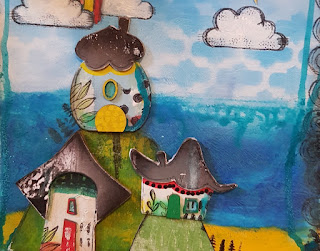
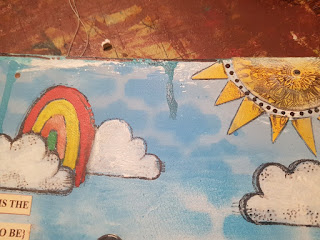
First I cut a piece of greyboard to measure 8” x 8”. I then took a mix of patterned paper and gelli printed paper and created a “scene” of sky and land with rolling hills etc. I took the Tando Moroccan stencil and painted over the top blue bit to make “clouds”. I also added some actual clouds and rainbows using stamps and hand painted the colours in. I cut out a sun from scrap yellow paper and added that the background. I added some stamping and doodling around the sun. To finish I added runny paint drips, doodling and some boarder stamps.


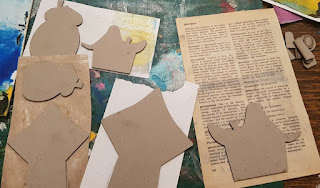
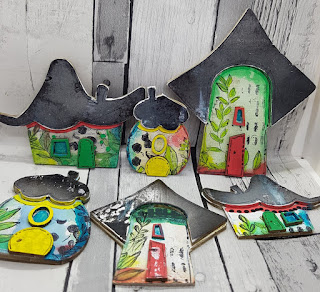
Next, I started on the wee houses. I glued the main body of the houses onto some book pages I painted white and the roofs onto some black paper. Once dry, I sanded down all the edges and distressed them.


I coloured the doors and windows in red, yellow and green. I then took some floral stamps and added them to the main body of the houses and coloured them in with the 3 same colours. I added little splashes of these colours to all the houses so they all matched.


Once all the houses where dry I began adding them to the background canvas.


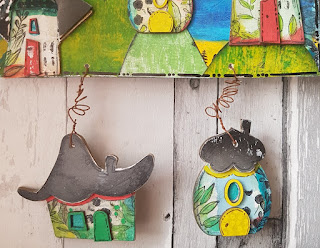
I could only fit on four of the houses, so I punched holes in them, added some rusty wire and hung them from the bottom of the canvas. 


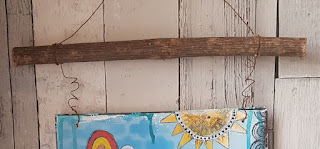
At the same time, I punched holes in the top and made a hanger from a piece of stick and more rusty wire.


I hope I have inspired you to have a go at your own whimsical houses.

Thanks for looking


Sarah xx


Wednesday, 20 October 2021

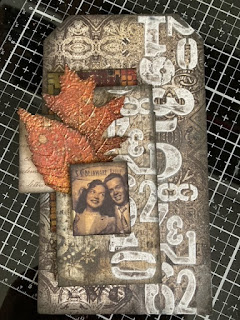
Product Focus - Greyboard Tags by Bernadette


Good Morning Friends!

Today I am posting a tag I've created as my product focus.  I love working with tags because I do like to be able to start and finish a project in one session if possible, and I find tags are a perfect way of doing this.  They can be small enough to complete in one evening and there isn't a large, intimidating space to cover.

Tando tags are perfect for me because of the different sizes available.  I find that they can withstand a fair bit of paint and ink too, especially if you are like me and change your mind about what you want to do with it part way through.  They are also a perfect way to use left over bits and pieces that you can't bear to throw away but don't really know what to do with them. 

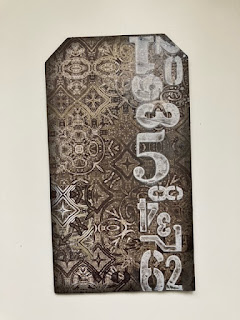
For this project, I decided to use a size 10 tag https://www.tando-creative.co.uk/TAGS120X60.html I first covered the tag with some patterned paper left over from something else I had made.  The paper was a bit of an odd shape and didn't actually cover the whole tag because of the way I had previously cut it. I had to do a bit of patching up, but because it is such a busy design you can't really see it, unless you look really carefully ;)  

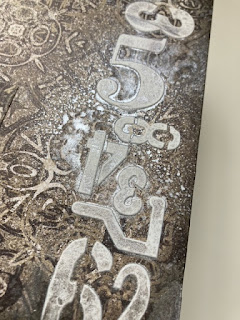
I then took the Tando NUMBERS long stencil https://www.tando-creative.co.uk/STNCNUMBERS.html and stencilled using some modelling paste. Once the modelling paste had dried, I did a bit of random spritzing over the numbers with a silvery coloured mica spray and blended some black ink around the edges.


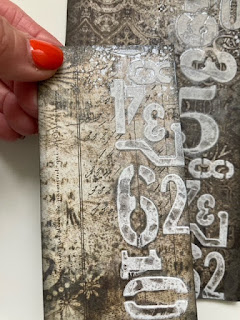
I then covered a smaller rectangle of card (it was actually a thick tag from a jumper I had bought) with a similar patterned paper and used the same process to add the numbers


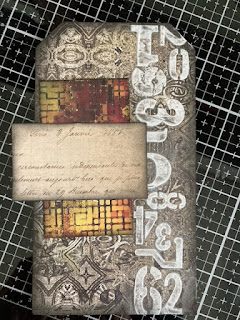
From my scrap box I chose a couple of bits of paper I thought looked good with what I had already done. I added some black ink around the edges and and glued them to the tag.


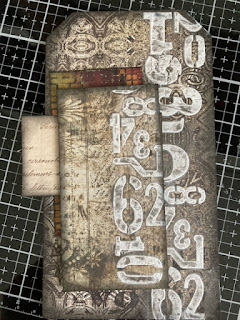
I decided to put the rectangle with the numbers close to the numbers on the tag because I liked the layered look of them together and the offset repetition of the numbers.


I added a couple of diecut leaves and small photo which I had edged with black ink.  I had put the leaves through my diecutting machine in a foilage design embossing folder to add some texture.


Lastly, I took one of the hearts from the Tando hearts grab bag https://www.tando-creative.co.uk/grab-bags.html  I painted this with a dark red paint and added some black ink around the edge to make it pop from the main design.  I didn't want to add weight with a metal key, but I wanted the key to have a metallic look so I used the smallest of the keys from the Tando set of 5 keys https://www.tando-creative.co.uk/KEYSSET5.html  I painted the key black with some gesso then added a little bit of silver paint just using my finger to tap it on rather than cover the whole thing.


I hope you have enjoyed reading how I made this tag and give it a try if, like me, you want to complete a project in one crafting session.  

Take Care,

Bernadette

xxx


Monday, 18 October 2021

Product Focus - Steampunk Clock and Hands - by Zoë Sanderson

 Hi, just a quick visit from me today sharing this Steampunk Clock and Hands for Halloween.


For this project I simply applied layers of paint.  Base coat Black Gesso to all the Tando Chipboard part.  Then the main Cog Cloak face over dry brushed with purple, dry brushed because it gives a rougher patchy finish with lots of the black still visible.   Over the now dry painted surface DecoArt Crackle glaze was applied, once again this was in patches not even overall coverage.

The hands had also been painted black as had the little cog to go on top.  The hands were each given just one brush stroke of a silvery paint, the last of the paint on the brush has been discharged onto the base cog. while the top of the cog treated in much the same way with a brassy colour.   These parts were then layered and glued to the together on top of the base cog.

The Halloween Candle is a Chocolate Baroque stamp which has been coloured with Chameleon pens then fussy cut.

Products used

Steampunk Clock and Hands

Tando Steampunk Clock and Hands

DecoArt Media Black Gesso

DecoArt Media Purple Acrylic Paint

DecoArt Media Clear Crackle Glaze

Imagination Crafts Starlights paint

Chocolate Baroques Rubber Stamp

Chameleon Pens


Happy Halloween

Sunday, 17 October 2021

Tando Straight edged arch bound in a book by Art Angel

 Todays project is a little bit different. I have in my stash a set of the wonderful Tando Straight Edge Arch substrates and thought they would make a lovely set of book covers….. not how they are usually used maybe  but thats what i love about the versatility of greyboard!

This project is perfect for using up all the left over scraps of rice papers that otherwise would head for the bin. I have used Stamperia scraps left over from a Christmas project, but this book does not shout Christmas at all.

I randomly base coated my back board, arch and smaller arch insert, and an additional mdf heart with decortart oatmeal and raw umber and adhered my rice paper scraps to all four pieces. When dry i used heavy gel medium through Andy Skinners distressed digits stencil on three areas of each element and left to dry.


Whilst waiting for the pieces to dry, i carefully used the largest solid arch as a template to draw round by placing one flat side edge along the creased edge of some folded cotton rag paper sheets and cut just within the line drawn to create my pages, paying particular attention to not cut too far down the folded crease. You can make as many or as few pages as you wish.


When my boards were dry i used a punch to evenly pierce five holes along the lower half of one straight edge. Laid this on top of the open arch and poked through holes made with a pokey tool, to mark the positioning required for that piece and then made holes in the relevant places.


I added some texture paste coloured with a bit of turquoise acrylic and inked my edges with archival ink on a blending tool, when all edges were done i lightly blended over the set gel medium and dry brushed with interference gold to bring out more texture. I finally added small elements of red to bringing out tiny red elements in the rice papers


I used a coptic stitch to bind the pages into the two covers and adhered the back page to the open arch so that i had a backed recess to mount my mdf heart.


I used one final piece of creased cotton rag to create a smaller one page signature to go under my front arch insert as i wanted this as a feature on my front cover. I used the punch to create three binding holes and coptic stitched the single page to the small arch. 


I adhered the back side of this page to the front book cover, pierced another hole opposite the middle binding holefor my closure and a final hole in the main cover so that i can thread waxed string through. This is the most simple closure ever,  waxed thread through the hole , tape the end in place with red liner tape so it has a strong hold, glue all around edges and centre of greyboard and adhere to first page, do the same on both front covers, this way you conceal your workings and are left with two dangling strands that you can now tie in a bow.


Ive added one bead at the spine, will add coordinating beads on the ends of closure strands when i find some the right colour and a key painted turquoise and red, i may add most embellishment to the front but don’t want it too bulky as the point of a coptic stitched book is that it will lay very flat when open for working in 

I’d love to see yours if you make one x 

Products used


https://www.tando-creative.co.uk/ARCHSELRG.html


https://www.tando-creative.co.uk/CLDADMFA37-1.html


https://www.tando-creative.co.uk/CLDADMFA09-1.html


https://www.tando-creative.co.uk/CLDADMM33-4O.html


https://www.tando-creative.co.uk/ANDY11-K.html


https://www.tando-creative.co.uk/CLDADMM23.html


https://www.tando-creative.co.uk/ARCHBLKSM.html


https://www.tando-creative.co.uk/CLDADMFA100.html


https://www.tando-creative.co.uk/CLDADMFA18-1.html


Rice paper scraps

Waxed thread

Bookbinding needle

Cotton rag paper

Scissors

Pencil

Hole punch 

Pokey tool