Showing posts with label faux wood. Show all posts

Wednesday, 20 July 2022

Book binder cover A6 - 451F by Kim

Book paper ignites at 451 degrees Fahrenheit - apparently. 

This A6 was designed as a cover for a purchased notebook.

I reached for my ultra sharp X-acto craft knife - I was going to do some serious damage this time! 

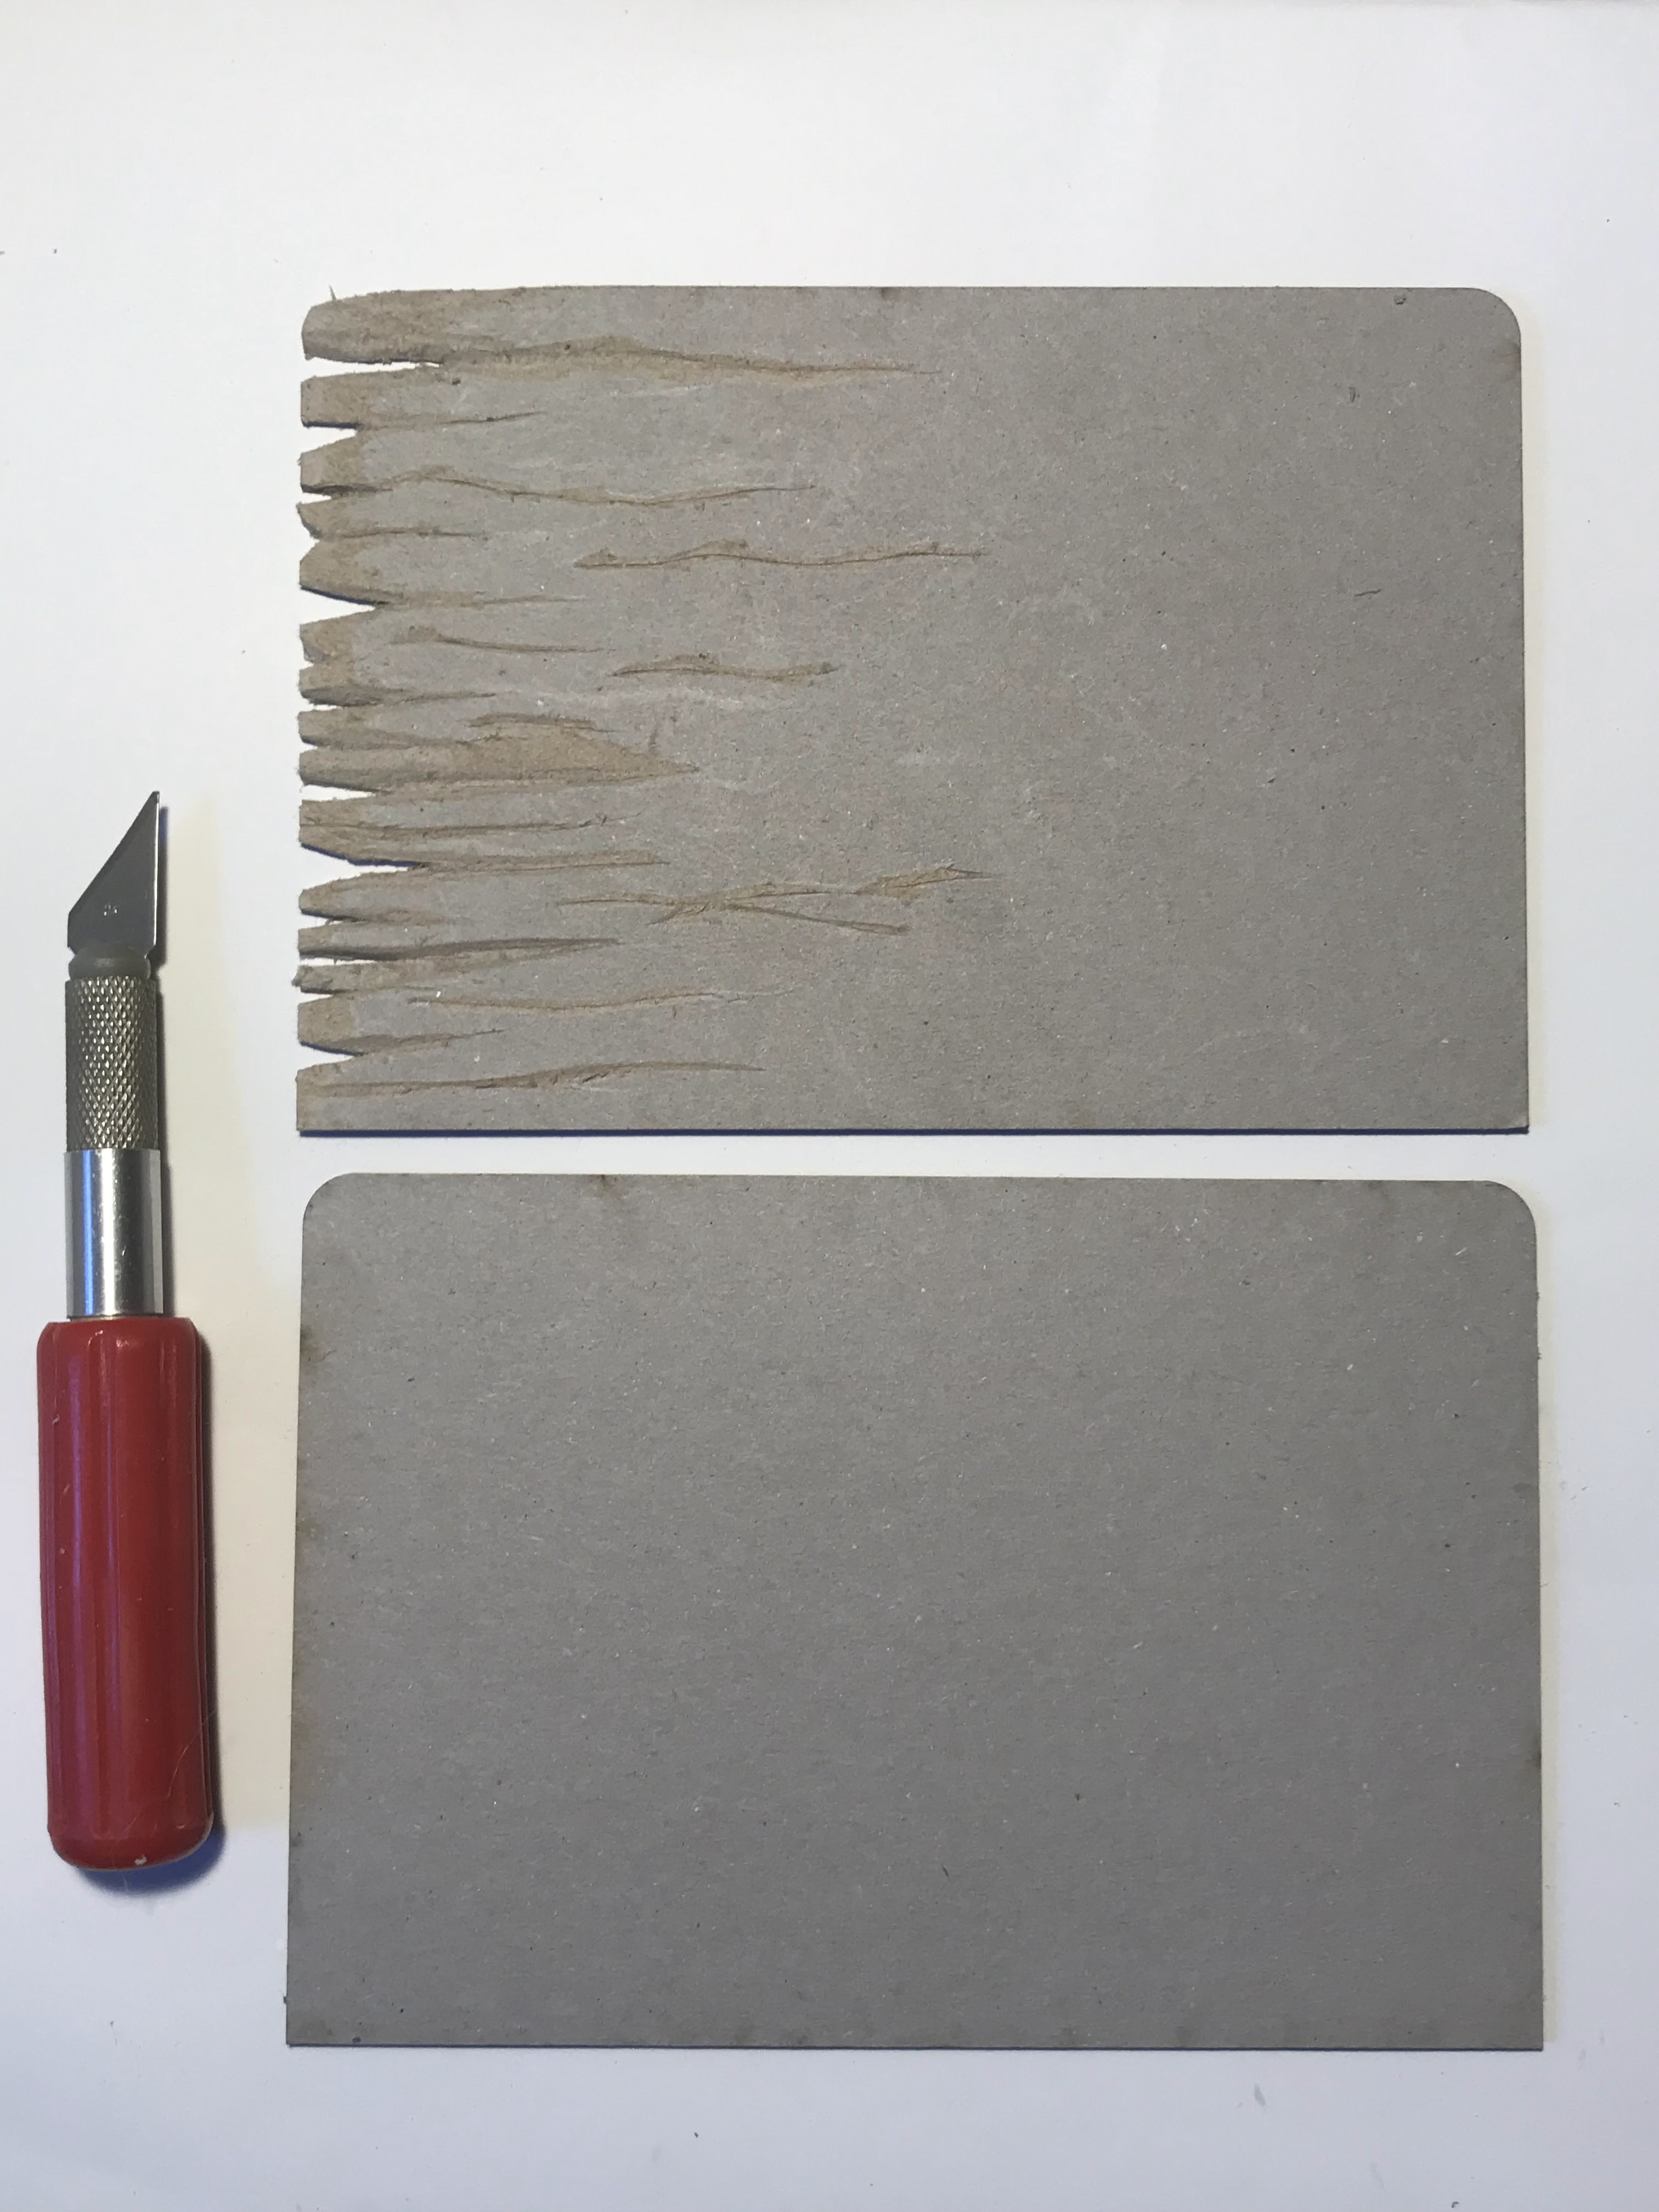
I took the A6 front cover, and with the craft knife cut grooves and notches in the surface and top edge. These were the bits that will end up as charred wood. Make sure the design is random and varied - no two pieces should be the same. Once I was happy with the shapes I base coated the front and back covers with DecoArt Lamp Black, inside and out.

To get the wood effect I first dry brushed Burnt Umber, halfway up the front, and all over the back - don't divide into planks yet, cover the whole area.

On top of that I dry brushed Burnt Orange to add texture and vary the surface, with a light dust of Oyster Beige in places, and to highlight the 'charred' bit at the top. I dry brushed some Lamp Black from the top to make sure it was really dark.

To add the 'planks' I painted in the detail with DecoArt Media Paynes Grey, adding splits, nail holes, and the gaps.


I wanted the spine to look like an old leather-bound book, so I found one (we have all sorts of stuff in our house!) and scanned the spine. I measured the binding spine in the kit and reduced the scanned image to fit, then printed it, and stuck it on.


The back, front, and spine were joined together with a hessian strip. When finished the cover fits perfectly an A6 notebook, which is how this one will be used.

As a nod to the book that influenced me, Ray Bradbury's 1953 novel, Fahrenheit 451, I added a wooden plaque to the front cover.

Thanks for visiting - where do you find your inspiration?

(Take extra care when using sharp craft knives)

Products:

Tando Creative Book Binding Cover (A6)

DecoArt Americana Colour

DecoArt Media Colour


Tuesday, 2 November 2021

Deep Book in a Box - by Kim

The Book of Shadows


This is an interesting shape, and I instantly imagined it as a wooden box, wrapped in antique leather to look like a mysterious old book.


First, assemble and glue the box ensuring a good fit with the pieces. Allow to dry thoroughly.

The curly trim is small butterflies cut in half lengthways and glued. Any decorative trim will do. The title rectangles on the book spine are Tando off cuts.


Faux Leather outside

I only added ‘leather’ to the flaps and spines and avoided the expanded hinges. You will need thin tissue paper, I used the sort that is used for wrapping, and ordinary PVA.

Cut a piece of tissue slightly bigger that the panel you are covering. Use a brush to spread a good coat of PVA over the panel - avoiding the hinge. 

While the PVA is wet lay on the tissue - make sure it is wrinkled by moving it slightly with your fingers before the glue dries. With the glue brush make sure it is stuck down all round the edges, and tucked up to the curly trim.

Repeat for each panel. Don’t worry if you make little tears in the tissue, they won’t show when it is finished.

Let it dry - overnight is good.

Trim the excess tissue with a sharp knife and tidy the edges.


Base coat the entire outside with Lamp Black. Let dry.

Mix True Red with a little Lamp Black to get a dark maroony-red. Start with 5:1 and adjust to taste. The black is stronger so add the black to the red little by little. With the mix, using a fairly dry brush, paint over the black but leave random spaces so that you get a textured/weathered look. Let dry.


To bring out the texture I used Duncan Iced Espresso and Champagne Ice Metallic Lustres. The lustre is on the trim, too.


Base coat the inside of the cover with black.


Faux Wood box

I tried to match my ‘planks’ with a pine table at home. Start with a yellowish-beige base. I mixed Yellow Ochre with some Burnt Umber. It doesn’t matter if it goes on a bit patchy because natural wood isn’t perfect.

When you are happy with the base coat - and it is dry - use Burnt Umber to paint on the wood grain. Add some small black marks to the grain for added realism.

Copy what you see on a piece of wood you have - a table, worktop, or chair. Practice on a spare surface to get the look you want. If you don’t like what you see, paint over it and start again.


Book covers

I found some super hand made Gelli plate printed background papers, by Julie. I cut them larger than the size needed and glued them on with PVA. When dry I used a flexible sanding block to remove the excess - by sanding the edge to give a ‘blended’ feel. I finished the edges with Metallic Lustres. The expanded hinges were not covered, but I did wipe on some lustre. On the spines of the small covers I painted black, and when dry used gold ink and a dip pen to write the titles. I did the same on offcuts glued to the larger covers. Inside the book covers are painted black.


I opened only two of the holes on the outer flap after covering with tissue, and use a length of gold leather decorative thonging to hold it closed.


Items Used:

Tando offcuts

Two small butterflies or similar for trim

Tissue paper

Background papers of your choice

DecoArt Metalic Lustre - Iced Espresso/ Champagne Ice

DecoArt acrylic colours as described 

Monday, 5 March 2018

Faux Wood

Hi it's Brenda here with a project for faux wood week. I have created a faux weathered floorboards effect on card and then added it and some embellishments to one of my large media boards cut by Di.


Floorboards
Paint the card with the base colour of your choice. I mixed some cadmium red hue, sap green and paynes grey to create this rich burgundy colour.
Rub some candle wax in the direction of the boards you will finish with ie for me that's longways. 


Then paint over with titanium white, keep gently swiping the brush in the same direction and slowly some of the paint will be rubbed away by the brush and you can see where you laid down the heavy rubs of wax.


Gently heat and wipe with a dry paper towel (again in the same direction) to remove a little more of the paint.


Repeat the previous two steps using titan buff.


Mix a very small amount of your burgundy or chosen colour again and add some titanium white and a small spritz of water to create a pastel colour. Rub with the candle again and paint your mixed colour over it. You will start to see small patches showing through where the water and candle wax don't mix.

Repeat the drying process. You can see how you are building up the worn and weathered layers of paint. Each new layer exposes some of the individual layers underneath.


To make this look like shabby floorboards I dipped the card first in titanium white and dried it and then in some raw umber to give the top coat that grungy look.


To finish the effect, score lines to create the ‘boards’, distress the lines with a sanding block and rub in a brown distress ink. Adhere to the backing board and distress and ink the edges.


I have painted and altered each one of the embellishments using more of the DecoArt media fluid acrylics. The clock had a layer of dark paint, a layer of weathered wood crackle medium and then I finger painted some white crackle paste that has given me another weathered look.
The heart was painted, covered with clear crackle glaze with titan buff rubbed in when dry and the clock hand was painted with a mix of cadmium red and silver then rubbed in paynes grey and then had ground espresso distress ink blended over the whole piece,


The word label was a left over piece from a workshop. painted, distressed, a word added and sealed with decoupage.


Thanks for popping by to see my faux wooden floorboards.


hugs Brenda xxx

Supplies
This size isn't on the website yet but ask Di if you would like some this size.