Friday, 29 July 2022

One Stencil, Many projects


Today i want to show you how i made a collection of cards and tags using just one ornate flourish stencil from the Tando Creative set of 4 stencils.

Materials

Set of 4 background and flourish stencils by Tando Creative

Tando Tags

Distress Oxide sprays or Inks

Modelling Paste

Flowers

Ribbon

Tando Mini's- Butterflies

Tando Mini's- Hearts

Polymer frames

Resin or air dry clay

Journaling cards and text

Wow Embossing pad and Wow embossing foils

Bakers twine


Before i started the projects i made a selection of embellishments with white resin and grey air dry clay and sprayed a selection of plain flowers to match my projects.


Instructions for project 1


I began by spraying my tag in different blue distress oxide sprays and water sprays to give that mottled distressed look. i dried it with a heat gun. i went over the top with a green colour and water, building up the layers. When it was dry i dry brushed on some yellow distress ink in the area i wanted the stencil to sit, sort of around the left but off the tag a bit. I added drips of green distress ink back over the yellow and dried it all with the heat gun again. 

Next i took the stencil and modelling paste and carefully stencilled over the tag. Once dry, i placed the stencil back over the paste and sprayed over the top with pink distress ink spray


I then began to layer up a selection of embellishments, journaling cards, frames and flowers. 


To finish i mounted the tag on a tall card blank covered in coordinating scrapbook paper. 

Instructions for project 2


I began by inking my tag in blue distress inks this time with a hint of pinks and greens dabbed around the outside edges. Next i took a Wow embossing pad and embossed thru the stencil onto the tag. I then used WOW bonding powder and a heat tool on the tag before applying a gorgeous WOW foil in greens and gold's direct to the bonding powder. I love the shabby chic effect i achieved. 


Next i began to decorate the tag. I added a journaling sentiment, some bakers twine and lots of flowers.


I trimmed of the tag to make it square as it was too tall for my 6" x 6" square card. I added some coordinating scrapbook paper to the card before mounting my tag direct to finish. 


Instructions for project 3


I began by colouring my tag blue. I then placed my stencil in the centre of the tag and applied modelling paste through the stencil again. Once dry i placed the stencil back over the paste and sprayed green and pink distress ink sprays 


At the same time i also sprayed a selection of Tando mini hearts to use later


Next i took some scrapbooking embellishments and sentiments and began adding them to the tag. i added them with foam pads to build up the layers. i added the Tando hearts, flowers and Bakers twine to finish. I left this ass a tag but again it could easily go onto another card blank.


Instructions for project 4


This tag back ground actually started life as a piece of Amazon kraft packaging paper that i used in my box for all the oxide spraying i was doing for these projects. I just loved the mix of kraft and the pinky/blues so i dried it and stuck it to a Tando tag. 

I then stencilled through with white modelling paste again. I wanted the stark white to stand out but there was so much pink ink soaked onto the Kraft paper that in began to leech into the white modelling paste. But hey it was a happy accident as i rather liked it. I had two stencils patterns side by side on the tag so decided to spray one again to make it slightly darker that the other.

Next i added a resin trim, some bakers twine, and sentiments to the tag


I sprayed some Tando Mini Butterflies and added them to tag and sprayed some more flowers and added them to the resin trim to finish.


Instructions for project 5


Again this tag background started life as kraft paper from my spray box. I just loved the teal blue and pink combination of splatter mess so stuck it to a Tando tag. Once dry i used the Wow embossing products and a lovely raspberry pink/purple embossing foil with the Tando stencil to create this stunning effect.


I trimmed the tag square as i was a bit stumped as to what to actually make with it in the end. I matted it on some plain pink cardstock and some teal scrapbook paper.


I matted the tag off cuts onto my clay and resin frames and embellishments and set aside for later. I also gathered some more coordinating scrapbook paper too which i added to my 6" x 6" card blank.


I added the "tag" matt to the scrapbook paper matts. I added some bakers twine around the bottom and some sentiments. I added the resin and clay frames up the right hand side of the card before adding a bundle and dyed flowers and Tando butterflies to finish.

And there you go, 5 different projects using the same stencil. I hope you have enjoyed seeing the very different things you can make with just one main product

Thanks 

Sarah


Wednesday, 27 July 2022

Book binder cover A6 - Steampunk by Kim

 When you have a book full of secret stuff, it needs to be secure!

This steampunk style cover is tough enough to keep prying eyes off your personal pages. It has lots of heavy iron work - and a time lock!

I collected the required parts, left over from another Tando Creative set, Industrial Elements - 1 large cog, 3 small cogs, door plate with keyhole (trim the round top off), 6 small hexagon bolt heads, 4 rivets, 2 empty frames from waste greyboard, and 2 large hexagon nuts and washers for the back cover.

I arranged the pieces on the cover, and when I was happy I cut the large cog to fit to the edge. I cut a small cog so that it looks like there are two appearing from the locking mechanism.

I searched through my collection of old watch parts (like everyone has in a kitchen drawer!) and found one just the right size.

First, I glued the rivets in the corner of the front cover. Next I stacked the two empty frames and the door plate, and glued them together, adding the six small hexagon bolt heads.


I used strong solvent glue to attached the watch works to a piece of waste greyboard - but didn't glue it to the door plate yet.

Next everything, including the cogs gets a coat of DecoArt Americana Zinc (grey). Once dry all the outward facing surfaces get a wash of DecoArt Media Paynes Grey - keep the brush strokes in a vertical, up and down, direction to help with the weathered illusion. Then we reach for DecoArt Media Quinacridone Gold and add washy patches, some thicker than others. Last, I added DecoArt Media Green Gold to add streaky stains from strategic places - like the bolts, and maybe where edges might have been damaged.

When I was happy with the painted look I glued the watch works to the inside of the door plate, with the works exposed.


Once all was dry I glued everything together as previously arranged.

The back cover had two large bolts holding the hinges in place, these have the same paint treatment as the front. Two hinge plates (more greyboard offcuts) are glued on the outside of the hessian strip to complete the set. The bookbinding spine is glued inside.

I used a little DecoArt Metallic Lustre, Champagne Ice, to highlight the cogs and bolt heads.

Steampunk never goes out of fashion! Thanks for visiting.

Products:

Tando Creative Bookbinding covers (This one is A6)

Leftovers from Tando Creative Industrial Elements

DecoArt Colours; Americana, Media, Metallic Lustre

Hessian strip.

Wednesday, 20 July 2022

Book binder cover A6 - 451F by Kim

Book paper ignites at 451 degrees Fahrenheit - apparently. 

This A6 was designed as a cover for a purchased notebook.

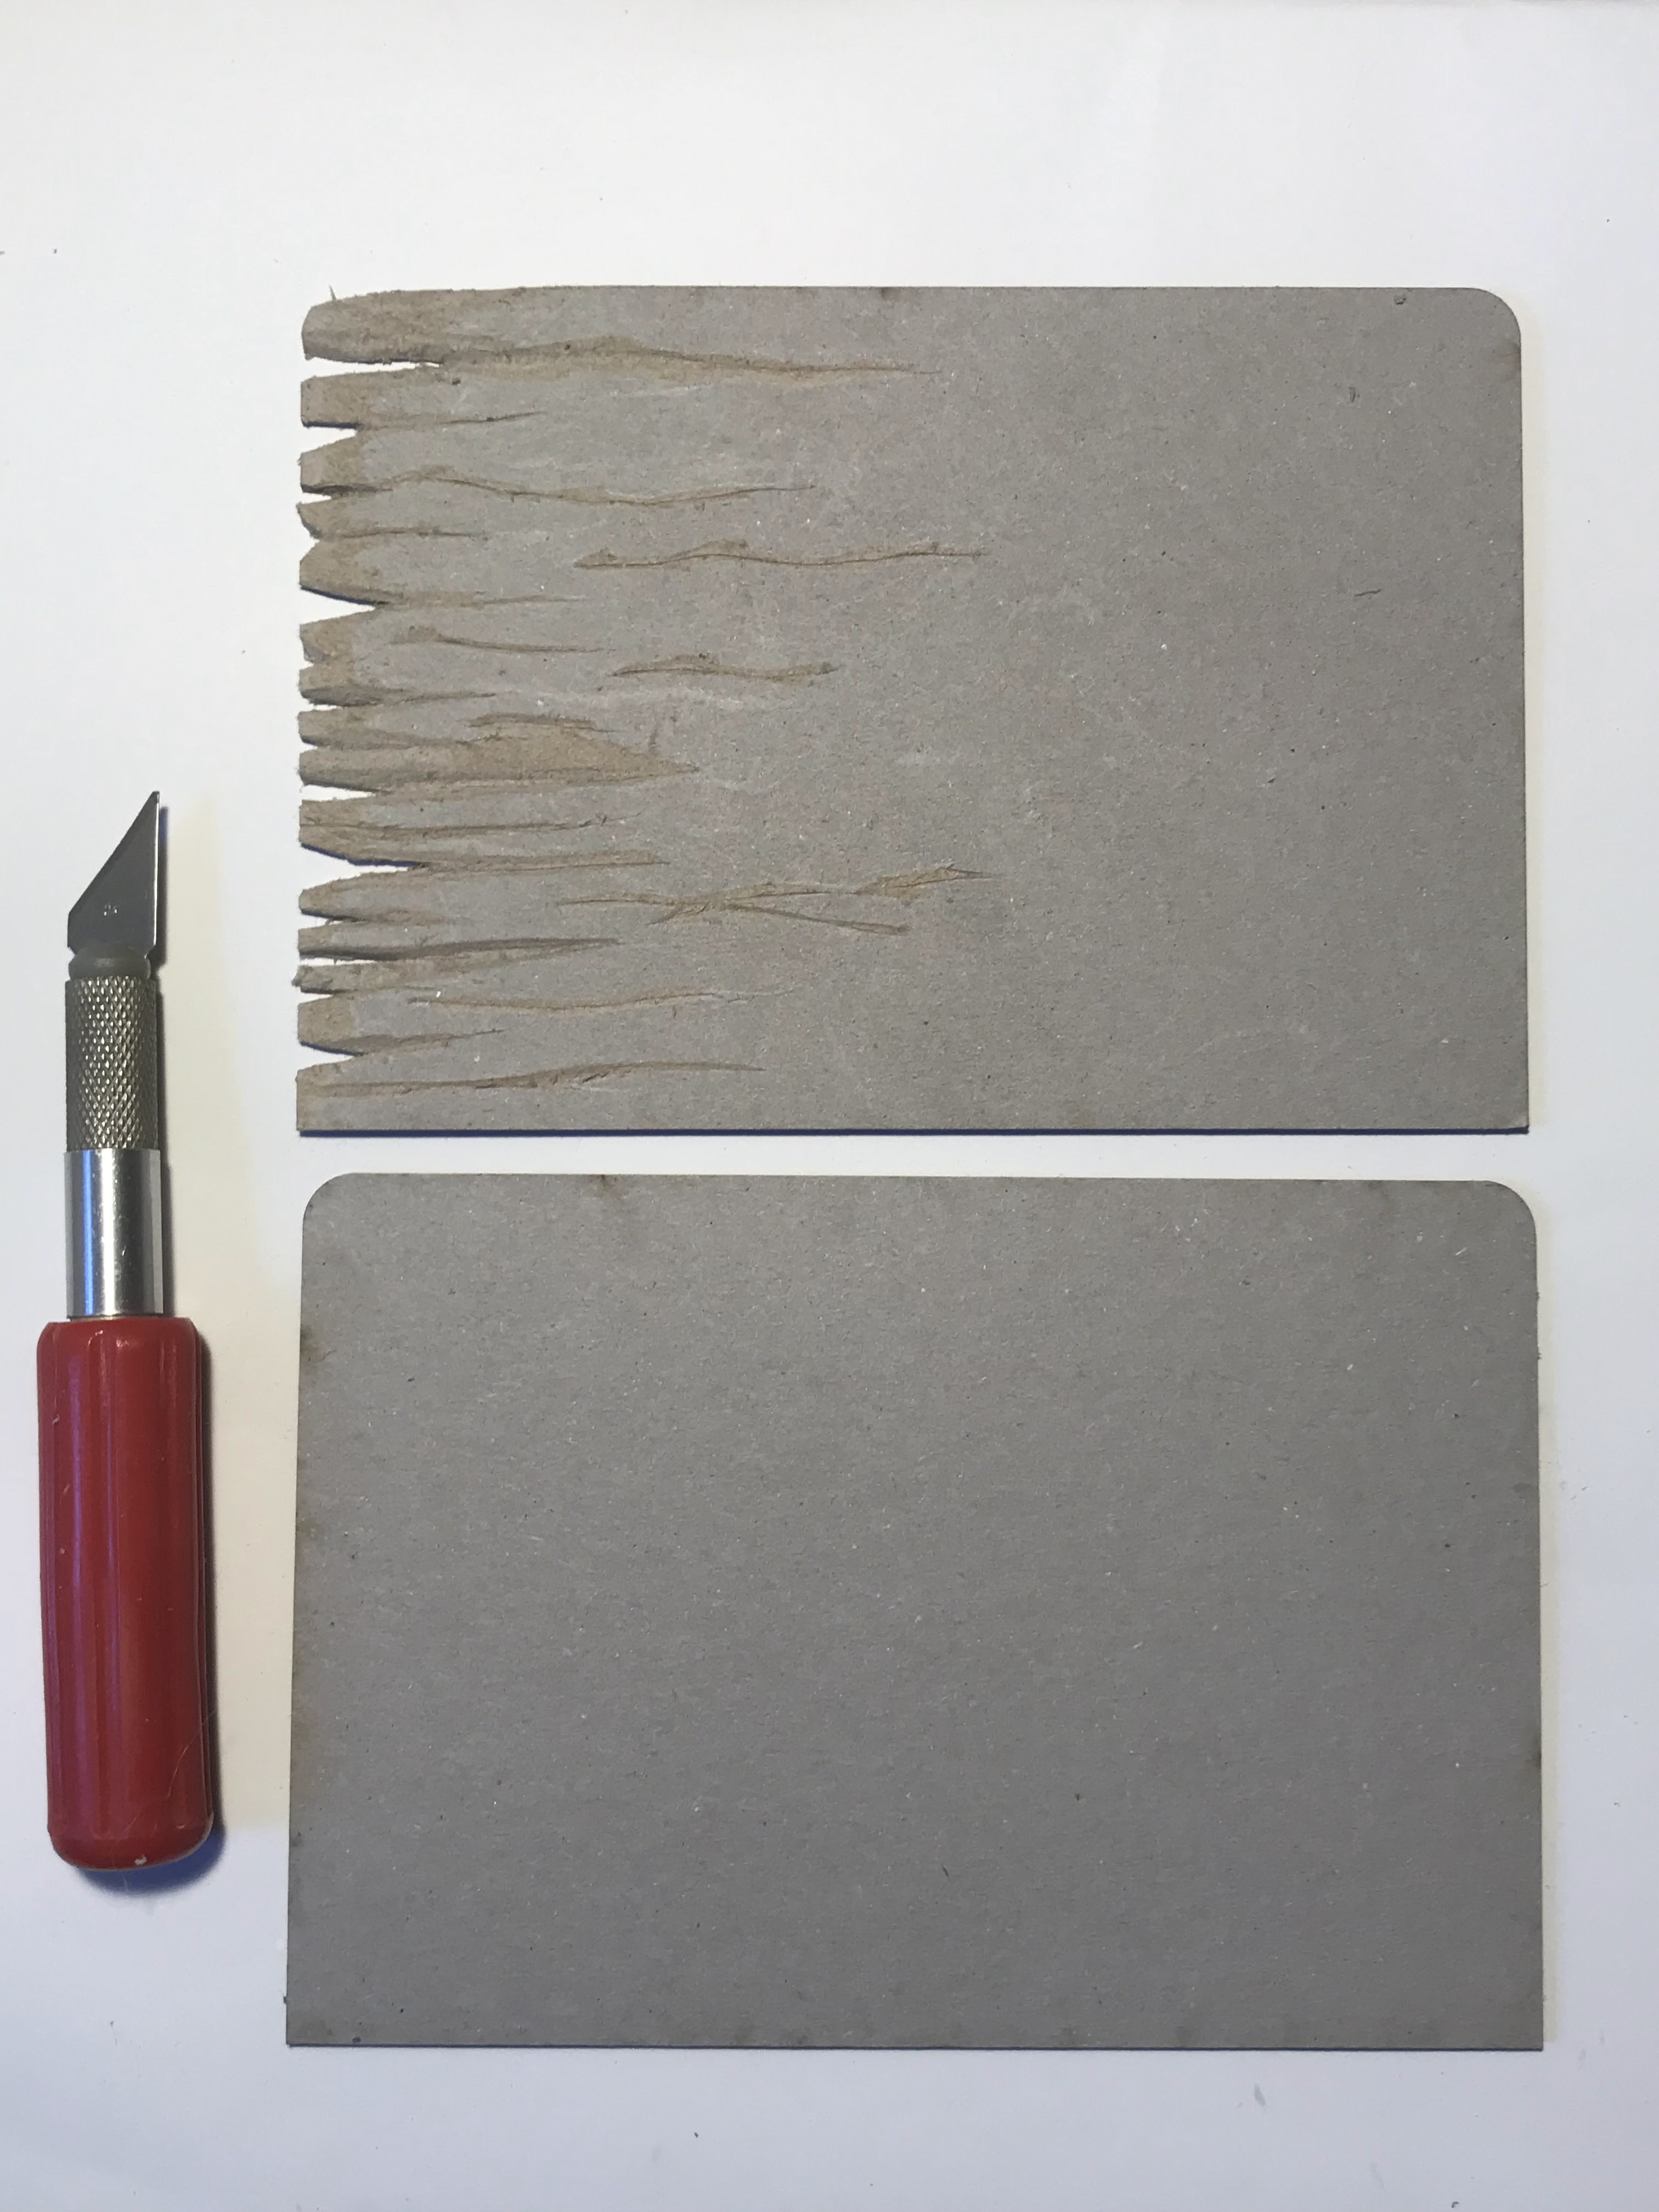
I reached for my ultra sharp X-acto craft knife - I was going to do some serious damage this time! 

I took the A6 front cover, and with the craft knife cut grooves and notches in the surface and top edge. These were the bits that will end up as charred wood. Make sure the design is random and varied - no two pieces should be the same. Once I was happy with the shapes I base coated the front and back covers with DecoArt Lamp Black, inside and out.

To get the wood effect I first dry brushed Burnt Umber, halfway up the front, and all over the back - don't divide into planks yet, cover the whole area.

On top of that I dry brushed Burnt Orange to add texture and vary the surface, with a light dust of Oyster Beige in places, and to highlight the 'charred' bit at the top. I dry brushed some Lamp Black from the top to make sure it was really dark.

To add the 'planks' I painted in the detail with DecoArt Media Paynes Grey, adding splits, nail holes, and the gaps.


I wanted the spine to look like an old leather-bound book, so I found one (we have all sorts of stuff in our house!) and scanned the spine. I measured the binding spine in the kit and reduced the scanned image to fit, then printed it, and stuck it on.


The back, front, and spine were joined together with a hessian strip. When finished the cover fits perfectly an A6 notebook, which is how this one will be used.

As a nod to the book that influenced me, Ray Bradbury's 1953 novel, Fahrenheit 451, I added a wooden plaque to the front cover.

Thanks for visiting - where do you find your inspiration?

(Take extra care when using sharp craft knives)

Products:

Tando Creative Book Binding Cover (A6)

DecoArt Americana Colour

DecoArt Media Colour


Friday, 8 July 2022

Christmas in July Advent box by Sarah


I know its way too early to mention the C word but i wanted to get a head start on making myself my very own advent calendar. this year, one that i can fill with goodies like Miniature Gin and fancy treats, 

Materials


Paint in red blue, black and gold
Script stamp
Blank ink pad
Bakers twine
Small brass draw knob
Selection of Christmas scrapbook paper
Black A4 cardstock
Star shaped buttons
Gold Glitter
Beads

Instructions

I began by building my boxes. I love the PVA glue that Tando sells as its very fast drying. Once the boxes were dried, i gave them a couple of coats of red paint and laft them to dry over night. 


Next i cut some black cardstock to the size of each panel. i distress the edges of each piece and ran some gold paint along each edge.

I then took a selection of christmas papers and coordinated palin papers. I trimmed them slightly smaller than the black pieces. i again distressed the edges and added gold. I glued them to the boxes.


Next i took some Tando stars. I painted some in red, and black, I also covered some in blue paper. Once dry, i sanded them down to give them a shabby look. I also stamped them with a text stamp. 


I then took some advent numbers and covered them in fine gold glitter and added them to the front of the boxes. T then added small draw knobs then randomly glued stars all around the boxes. I tied star buttons and small Tando stars to the draw knobs with bakers twin to finish. I added large beads as feet to soom of my boxes too but i havent decided on my end configuration yet some they may be removed in time


I hope i have inspired you to make a start on your advent project. 

Sarah


Tuesday, 5 July 2022

Hexi Tuesday - Hexi-Tag by Bernadette


Good Evening Everyone,

I've had quite a bit going on at home, work then holidays over the past couple of months and haven't been able to make as much with Tando products as I would like.  So when I decided to settle down and make this tag, I thoroughly enjoyed it.  I had bought some Andy Skinner rice papers and knew they would be a perfect match with a Tando grey board tag (I used a size 10 tag, my favourite size, for this project) and some hexis from the bag of solids and frames 

https://www.tando-creative.co.uk/HXGNS2022.html

https://www.tando-creative.co.uk/TAGS180X100.html


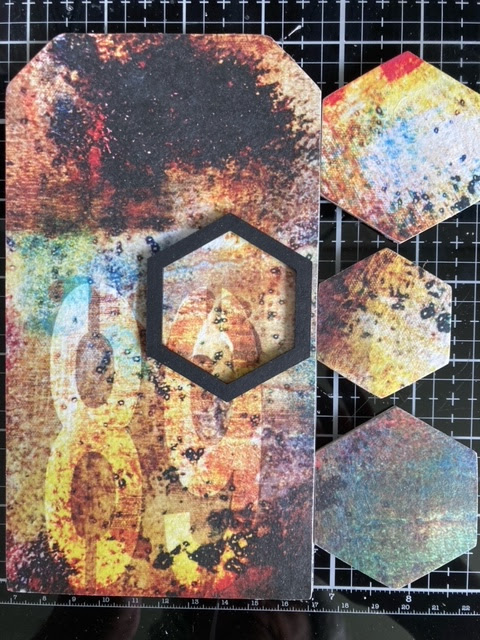
I started by choosing the hexis I thought were the right size for my tag. I chose 2 solids the same size then a smaller one with a frame (not sure you can see very well in this picture, but the smaller one with the frame is the one in the middle)


Then came the boring bit, painting everything with gesso.  It's a good thing it dries so fast, I'm really impatient and bad at letting things dry properly but I wanted to make sure the colours on the rice paper stayed vibrant and I find that using gesso underneath rice paper is the best way to go.


I then painted the little hexi frame with black paint and added the rice paper to the tag and the solid hexis.  To adhere the rice paper to the tag and hexis, I used distress collage medium with a brush.


To add a bit of texture to the corners of the tag and some of the hexi corners, I used Tim Holtz transluscent grit paste.  The top photo of the 2 above show the grit paste just after it was applied - it is white and dries clear.  The second photo shows a hexi when the grit paste is dry and I have added some ground espresso and bronze distress crayon.  I also added some rub ons,


I sprayed a piece of ivory cardstock with a mix of distress sprays to use for die cutting.  I used weathered wood, rusty hinge, vintage photo distress ink sprays and added some uncharted mariner oxide spray.  I then did some die cutting using Tim Holtz Sizzix cogs and numbers dies.


I had a play around with everything I was using for the tag before deciding where I was going to stick everything down.  I added some Tim Holtz ephemera gauge pieces and a photo booth picture.


Final touches were the addition of the rusty wire through the tag hole and adding some vintage photo ink to the edges of everything before it was stuck down.

I would love to see anything you create if you have been inspired to have a play with a tag and some hexis.


Bye for now

Bernadette xxx