Friday, 13 November 2015

3D WEEK with Irit


 Hello my dear crafty  friends and welcome to my 3D projects week.
This time I used Tando chipboard to make a real useful project. So say Hello to my earrings holder.
I used this Santa's post box in the biggest size to make this holder.
First I painted the main part with red paint. Then I added kind of " snow color" white paint and added a lot of clear glitter over the wet paint.
I stamped and heat embossed the Holidays sentiment and colored the bird on the top with markers.
Actually this is all. Easy and fun project to make  and to give as a present, with or without the earrings.


 Tando chipboard used for this project:
Post boxes standing- set of 3


Post Boxes standing, set of 3

Tuesday, 10 November 2015

3D Week: Frosty Morning Arch


Hi friends! Dana here today sharing an arch I embellished with some dimensional elements for the 3D theme this week. The weather is turning here in the States. The leaves are falling from the tree, the mornings are frosty, and the color is slowly leaving the landscape. The only happy colors I have in my yard are from my roses that are doing their best to hang on and the occasional cardinal. This arch was inspired by the view from my front window.


I started this piece by outlining a tree pattern using the tree stencil from the Trees and Leaves 3-Part Stencil Set onto an inner piece from the Arabian Style Layered Arch Frame. I then tore up and twisted pieces of a brown paper bag to make dimensional tree branches that I glued over the stenciled tree pattern. Once the glue was dry I used acrylic paints and glazes to paint the tree, the background of the arch and the other pieces of chipboard I added to this piece.


I added a piece of Fence Flexistrip to the bottom of the arch. (This is the only chipboard from Tando that is flexible like this. It is great to bend and wrap around projects.) I topped the fence with a chilly rhinestone gust of wind and some Mini Flowers.

You can find the pieces I used for this project and more in the Tando Creative Retail Store! We'd love to see what you create for our 3D Challenge! To be in with a chance of winning some great Tando goodies of your choice, please make a piece based on our weekly themes and link your project, not just your blog, using the inlinkz tool located at the top of the Tando Blog. You don't have to use any Tando product, but, if you do, you will be entered into the draw twice! There are no limits to how many times you enter, however, we do request that you only enter your piece for 5 challenges. We look forward to seeing your creations!

Thanks so much for stopping by today!

Monday, 9 November 2015

Making 3D from flat items

Hello!  This week we are making up Tando pieces into 3D items.  I have used the insides of these GOTHIC ARCHES that were left over from another project to make a little container.  I have popped some liberated coffee stirrers in so that you can get an idea of size.


I glued the 4 arches together before painting them.  Some Sparkle Medium was pushed through the LONG FLOURISH STENCIL before being mounted onto a TWINCHIE.  Its a shame you can't see the sparkle though.


Please pop back for more ideas soon as we blog nearly every day.  If you would like to have a go then do join in our challenges.  You will find details on the tab at the top of the blog.

Thank you for popping by, Karen x

Sunday, 8 November 2015

November Colour Theme ~ Fridge magnet

Happy Sunday!

Gez here, delighted to be sharing my creation with you for the {November Colour challenge}


I've made a fridge magnet using a couple of the hearts below..


Grab Bag of Hearts

 I decorated the heart frame with some of the flowers from the {Mini - Flowers}set.

Tando Mini's - Flowers

No need for any Gesso on any of the chipboard pieces this week, I used acrylic paints and decorated the flowers by sponging more paint through the {Criss Cross Grid - Mask}

Mask - Criss Cross Grid 

I hope you like my fridge magnet, you could of course add photographs to your frame!


 Wishing you a lovely Sunday, Gez

Friday, 6 November 2015

November colour Theme with Dee

Hi everyone I hope you are all well! I am getting ready
to go to Ministry of Mixology and getting exited and
nervous in equal quantities. This is my take
on the November colour theme.
I wanted to show how versatile Tando boards are as I 
always use Deco Art and true this project does have
Deco Art Media products on it but it is coloured 
by Lindy's Stamp Gang powders.
Firstly I put Deco Art modelling paste through Tando's 
Harlequin Stencil. I waited till it had dried enough to form a skin
but not fully dry, I dipped my fingers in water & wet
 the stamp then stamped into the partially dry paste.
Next I painted the entire media board with a stone coloured 
acrylic paint.
I used various colours from Lindy's Stamp Gang and 
spritzed with water.
Another close up!
& another.
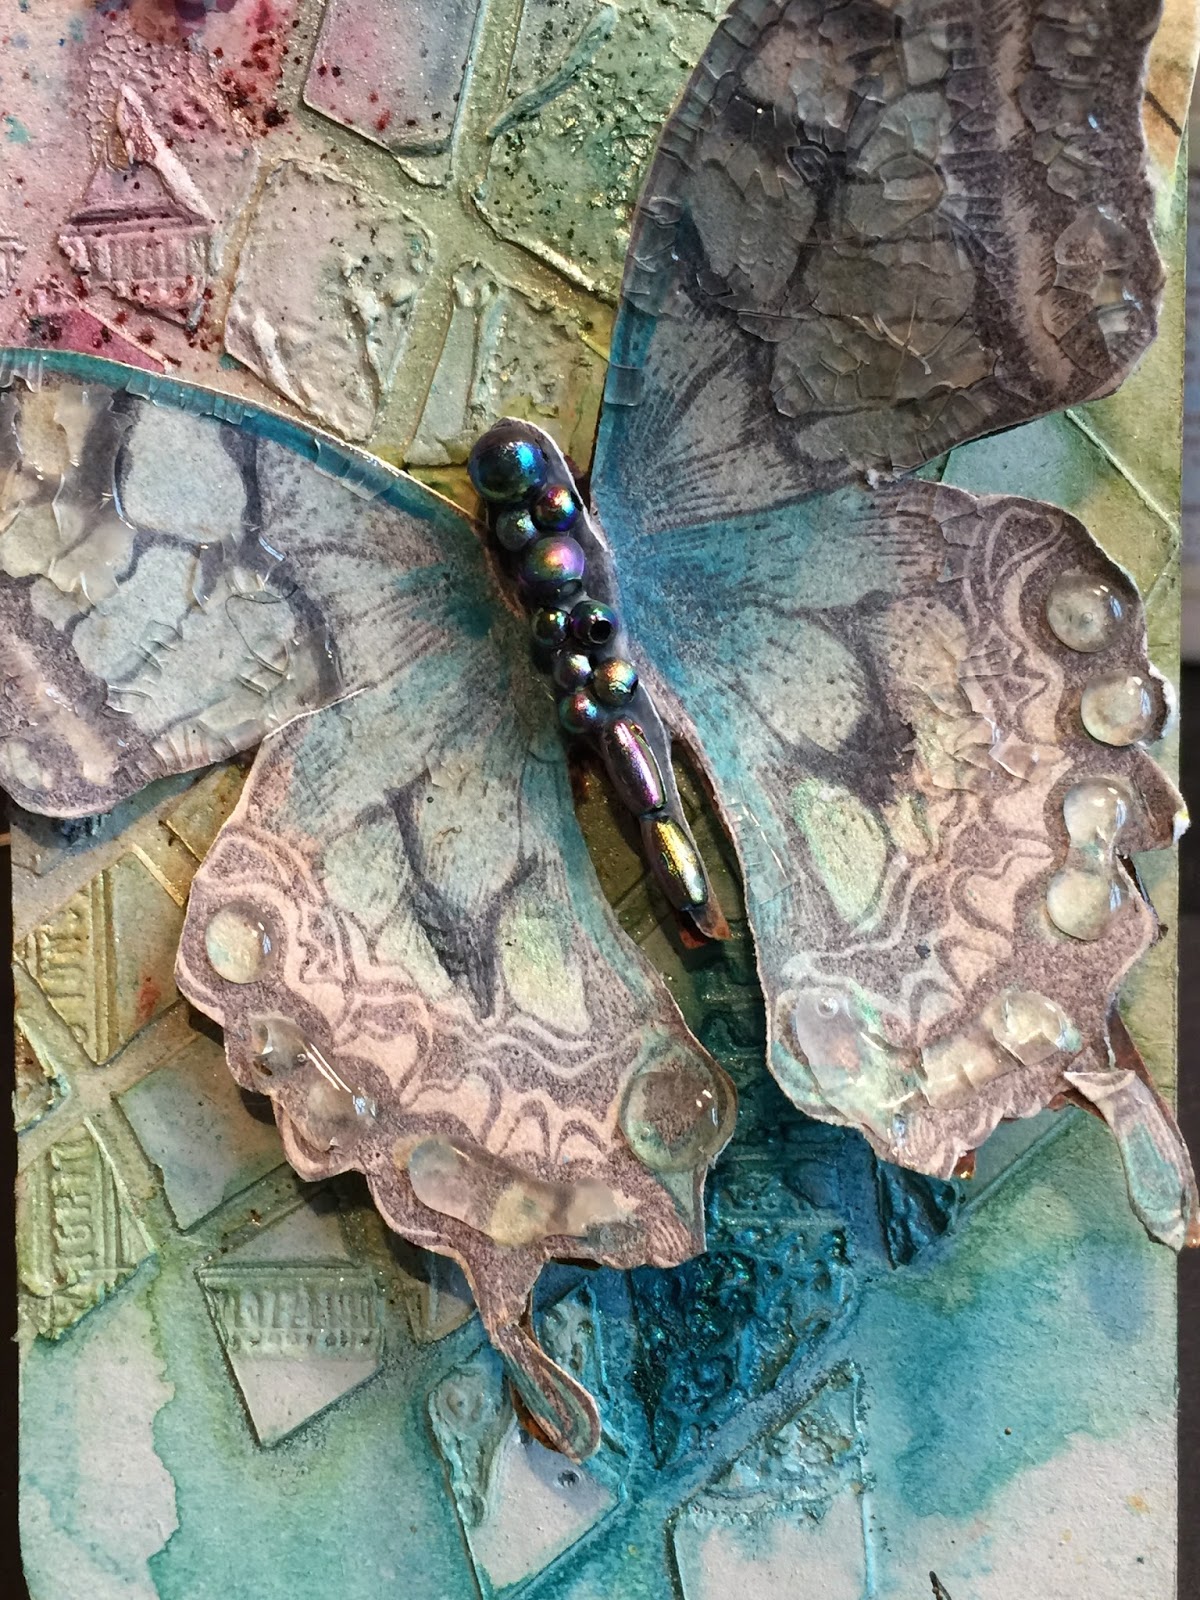
The butterfly stamp is a Tim Holtz stamped with Archival Ink
and coloured with Media acrylic and iridescent paint.
Liquid Glass was used to highlight the wings.
Hey presto! I hope you have like this project please feel
free to let me know what you think. Why not join 
in with us using this months topic's for 
inspiration.

Cheers Dee X

PRODUCTS USED
  1. Tando creative products used Distorted Harlequin MaskMixed Media Boards 74mm x 138mm.
  2. Deco Art products used Media Interference - TurquoiseFluid Acrylics Cobalt TurquoiseMedia: White Modelling PasteMedia: Clear Liquid Glass.
  3. Stamps from my stash, Archival ink & beads.
Okay the colours don't quite match!
Some do though.


Thursday, 5 November 2015

Colour scheme week

Hi guys Liz here, with my take on our colour challenge!!

Now believe it or not the colours are all there, only some have hidden themselves, lol

I took one of the Arabian style layered arch  with inner arches, I used two outer arches to build up some  depth and painted them with Deco Art  white Gesso, when dry i made a puddle of bundled sage distress ink into a old margarine tub and added some water, till i had the colour I wanted for the main frames,
 on the back piece behind Santa I used the snowflakes mask with some Deco Art modeling paste then before it was dry sprinkled on some glitter,
I then glued it together,
all the other colours were made using my copics on this older Magnolia stamp, I thought the frame made Santa look like he was reading his lists on the run up too Christmas, looking at him through his window,

Yes my mind does go off in it's own mysterious ways sometimes, lol
I made the window pane effect by using some acetate which I scored with my Scor Pal, then added some Deco Art  texture sand on the bottom edge to look like frosty snow, to finish it off I added one of the mini leaves 1 coloured with distress ink too,


Hope this has inspired you to have a go at our colour scheme, just click  on the link above,
Happy Crafting!!
Hugs Liz xx

Tuesday, 3 November 2015

November Colour Theme

Hello, its Karen here with a tag that I have made using this months pretty colour scheme.


I used a lovely *Ice-Skate* from a pack of 6 as the centre piece.  The 'spots' were made using the new *Mini Mask - Sequins*  These mini masks are fabulous for areas!  The spots were then covered with *DecoArt Liquid Glass*  which is fabulous stuff!  The skate was mounted onto some painted corrugated card then onto some glittery card.  Some wide organza ribbon, wire and a bead finished my tag off.  I will be adding a sentiment at a later date.  Here is the colour theme...

 
Thank you for taking a look today.  If you would like to play along with us then please take a look at Novembers tab at the top of the page.  There are prizes to be won ;-D

Hugs, Karen x