For my Product Focus this week i have chosen the Square Mini Printer tray. I love this set and it can be used in a multiple of ways for a multiple of different projects, think about using it as a three dimensional book cover or the lid for a square box for instance, create three as a tryptic or hinge two together and use it in book form with dimensional insides that hold trinkets.
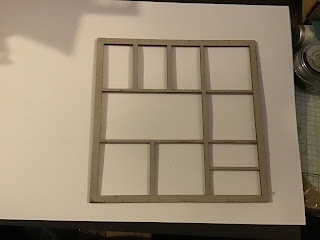
To start i have separated the three layers of the frame and sprayed with various media mister sprays on to white card.
I always do this to catch the over spray as you create amazing background pieces ready for use in other projects. Blot off excess ink with rice paper, it creates wonderful texture on your piece and also guves you another media to use on dimensional surfaces like glass jars of bottles. Also experiment with stacking your layers in different configurations, they don't all gave to go the same way, i like flipping, twisting and turning to creature different apertures. Layer your frames up when spraying them too to create different shapes in the overspray for more interesting backgrounds
While you are waiting for the frames to dry, colour the back board and printer tray supports in the same way
When dry i stencilled some Decoart Americana paint in Harvest through a Tim Holtz damask stencil found in the Halloween set with the zombies, onto the back board in three stages starting left bottom, centre them to top right, being careful not to smudge that which i had just laid down.


I left this to dry, then, using the same stencil over the top used decoart media gel medium which will dry clear
I repeated the same process applying texture paste through the same stencil in the other two opposite corners, being a paste this will dry opaque white so will have a different effect to the gel medium
I wanted to create more depth in my printer tray so i applied shaker foam tape to the outside edges of each layer, if you want to to be less noticeable use black foam. I removed the backing tape and adhered my first layer to the back board while my gel medium was still wet. If you leave your to dry first be sure to make sure you leave all edges gel medium free so that you have a flat surface to mount too
Once your first layer is on, clean your stencil on your printer frame to add texture to the bars that create the apertures


Leave to dry.
You can mount your frames all at once, either in a uniform fashion or by giving each grid a quarter turn or flip over, but before you do think about what curios or die cuts you are putting in it. Will it be easier to insert some while one layer is stuck down, do you want to weave anything up and over, or in between the layers etc
I love layers so i started putting my elements in after adhering the first frame and layered up as i went
Finally, to neaten your edges where the shaker foam may be visible go round all four sides concealing your workings with modelling paste, you may want to do a layer, leave it to dry and then to a second layer but remember to make sure the finish on the bottom side in particular is finished flat so thats your completed printer tray will stand on its support, by all means texture the three other sides if you wish and paint when dry
When everything is fully dried mount into the support bracket, sit back and admire your handy work x x
Products used
Selection of various ephemera from my stash


1 comment:
A fabulous project. Vee xx
Post a Comment