Sunday, 30 January 2022

February Kit - Vintage Twirly Whirly

 Hi this month's kit is really special. There's lots you can do with it as you'll see in the great inspiration coming up from the team. When I opened mine I knew exactly what I wanted to do with it and that was vintage. 


So my first step was to paint it all with black gesso. I put most of it together except the lid part just so I could get into the back. 


Next I added dabs of copper metallic paint.


I then added the rust effect by using rust effect paint in gold, red and brown. Once these were dry and I added a little turquoise paint too.


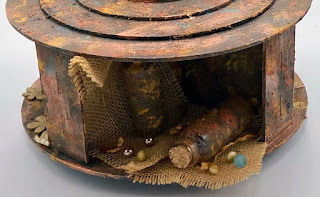
For my first compartment I used the rust effect on two mini bottles and cut a piece of hessian which I frayed. 


I then arranged the hessian so the bottles stood and sat on it. Next I added some little beads and ribbons.

For my little book I used an old gardening book and cut it to size, rubbed it over with vintage photo oxide ink and stamped some ink blots.


I made a little bracket for the book to put at the back so it stood upright and glued it into place. I added some inked lace and used Tando leaves from the mini 1& 3 sets. I also used some ink on them.
 

For the third compartment I used a Stamperia Art mould with air dry clay. Once the clay was dry I used the same rust effect on the pieces that I had broke off.

 I adhered the pieces to the back of the compartment and to the floor along with some little pieces of hessian. I adhered the brush to the front of the piece.


Next I made a little picture frame for my last compartment. I used a frame and base from a Tando off cuts pack and painted them and added a little gold wax. The picture was from the same old gardening book which I added the vintage photo ink.


For this one I adhered the frame to the base and ripped and inked some papers to go under it. Next I inked some flowers from the Tando mini packs and adhered them. 


To hide the nut I made a little frame. The piece on the right was actually attached to the bottom of the main frame but I cut it off to use on the back of the frame so the nut was hidden. The frame is also from Tando. I painted it with the gold and brown rust paint and added some gold wax. I then added two square, gold brads to the holes in either side. I just had this always in my stash, which I added to the middle. 


 And here you go my finished piece. 


Products: 
Tando February kit - Twirly Whirly
Tando mini leaves 1 and 3
Distress Oxide Ink - Vintage photo
All other products from my personal stash. 


I hope I've inspired you in some way to use the February kit, it really is a fun piece to craft with. 

Sharon 


Saturday, 29 January 2022

Twirly Whirly February kit by Julia Baker


As it’s the middle of Winter I decided to do a summer sea-shore theme


..


I started by gluing the main structure together with a good quality PVA glue.  

Keep the three top circles separate and decorate before gluing to the top


Paint with white gesso. 

,

When dry paint with gold acrylic paint.


Using air dry clay I made some rock shapes.  Using moulds and Stamperia cream paste I made shells and sea creatures.  Leave overnight to dry.


Going back to main structure, cut eight 6 1/2 centimetre square papers.  Edge with distress oxide, and glue inside structure.  Cut circles of patterned paper for top, and glue on.  Cut four pieces of patterned paper for side pieces and glue on.  

On the base of each quarter, add PVA glue then I sprinkled on Stampendous fragments to imitate the sea bed.  You could also use beads, glitter or anything else from your stash.

H '

Glue top circles together and add small shells around the top.  Stamp six small fish  ( Chocolate Baroque). Colour and glue round largest circle.


Colour clay stones and sea creatures.  Glue a seahorse to each of the upright sections.  
_

Tear small pieces of brown paper, roll up and put in four of the bottle’s to look like messages.  Fill the three larger bottles with glitter, beads or coloured water.  Glue on sea themed charms.

Glue rocks, sea creatures and small bottles each quarter.

Gluefine gold thread to some of the fish and glue threads to roof to give the impression of fish swimming.  Glue large bottles and some shells to the top and add a phrase to finish.

This is a great kit - the possibilities are endless!


Have fun x


Friday, 28 January 2022

24 Boxes of Advent (January) - by Kim

 The best definition for Advent I could find was basically a count-down to Christmas. So I thought, anything goes!

My inspiration for this one is, finding an old rusty safe and not knowing what treasure lurks inside. I started with an outside all-over base coat of grey (DecoArt Zinc), with the inside black (Ebony).

From my 'Tando's Leftovers' stash I found screw heads and a keyhole from Industrial Elements and stuck them on the front of the drawer. These were base coated with grey, too.

For the 'industrial decay' I used DecoArt Media Fluid acrylics. I tried to replicate the way corrosion runs down. First I used Transparent Yellow Iron Oxide, then Quinacridone Gold, then a little Green Gold. On the top, where the rust meets the paint I used Paynes Grey to define the edges.

I thought the idea of an interior lid would be fun - like a safe deposit box, so I made one with coffee stirrers, hinged at the back. 

To bling it up a bit I cut a No1 from waste grey board and painted it a bright, shiny gold.


Products:

Tando Boxes of Advent
Coffee stirrers
Offcuts/leftovers from Tando Industrial Elements
DecoArt colours - various Americana and Media Fluid Acrylics

My Spinney Thing by Nicky Roussou

Hello lovely people and welcome to my blog. 


So this is the new Kit for February 2022 and I must say.. When I got it and popped it all together I thought "What the heck am I going to do with this" lol

Once I decided on my theme, it was REALLY great fun to make! So much fun that I actually forgot to take photos during the process and it didn't leave my craft room until 3am lol

SO..... MY THEME...... ALICE IN WONDERLAND! 

Step 1**** MOST IMPORTANT**** Raid your children's Sylvanian  Family collection for items needed for a mad hatters tea party! 😂 They are the perfect size for this project and look great too! Failing that, I'm sure little elements could be made with Fimo clay or you can use the stampieria die cuts.


I started with my favourite good old fashioned Black Gesso...(got to love this stuff lol)

For the top I used a Tim Holts stencil. I really wanted a black and white checked paper but do you think I could find one? Nope! So if any of you lovely people know of anywhere I can get some please comment below Emoji I also added some moss that I had in my stash which looks very effective.

The Alice papers are by Stampieria and are just absolutely lovely. It kills me having to cut them up lol. I distressed the edges and added some watered down paint to age the colour of the paper. 

I also like to add some chiffon to the backs of papers. burnt with a heat gun or a naked flame, 

this technique was used for the sides too where I added a white rabbit charm too.


Inside this little cubby I have used the Stamperia Alice in Wonderland Papers and the packet of Die cuts.  I distressed the edges with Tim Holtz Vintage Photo distress ink. Added some twine tot he pocket watch and some lighter coloured moss I had in my stash. and finished off with a key.


In the above cubby I again used the Stamperior Papers for the base. I 3D embossed the brick wall and added the die cuts playing cards and some more green moss. I also added a little jar with green glitter which looks very cute. 


In the above phot you can see the burnt chiffon more clearly. I love this rustic effect. The table I stole again from my childrens toy collection (I'm sure they wont miss it lol)
I used gilding waxes to give it some texture. The tea pots are from the pack of die cuts too. And some more moss!


The above pics I used some more of the beautiful Alice papers and the chess pieces are from the die cuts and the metal pieces from my stash.

This has been a great project to work on and I cant wait to make another one!

I hope you have enjoyed my blog!

Nicky x

TIM HOLTZ STENCIL
STAMPERIA ALICE IN WONDERLAND PAPER
STAMPERIA ALICE IN WONDERLAND DIE CUTS


Thursday, 27 January 2022

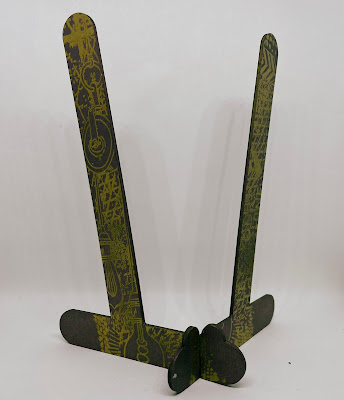
Sew Special Whirly Twirly Art Stand

 Hello there, I hope you are having a great day 😘

So being a kit ambassador for Tando Creative I was sent the February kit....!?!? What on earth is it?? So it comes flat packed and looking at it I couldn't work out what it was.

I started building and it soon became obvious just how cool it was and even better, something to stretch my imagination.

I figured I could go decorative or functional....then it came to me 😊🧐 I had a birthday coming up for a family member who loves to sew so I decided to go for something functional but would also be great to look at on display in her sewing room.

As always DecoArt americana acrylic paint was my chosen paint, so many colours to choose from and only one coat required because of its pigment and fluidity.


What do you think? and more importantly what will you do with yours? Let your imagination run wild 😉


Lots of love

Sharon Quinn xx


Wednesday, 26 January 2022

Entropy - Zoë Sanderson

Entropy, what happens to a system if it is not maintained.  Generally thought of as an engineering term, but it applies equally to any system or process.  Entropy is the gradual breakdown of the system over time.  I'm not sure entropy ever ends the system just falls into disuse.


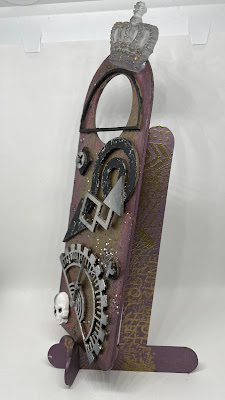
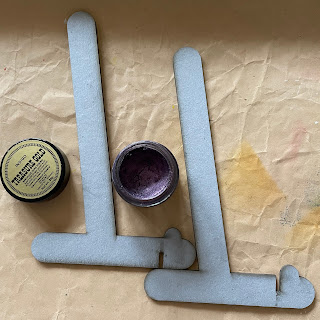
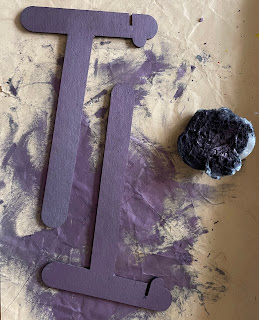
Industrial, Mechanical Breakdown, Steampunk all contributed to this project.  Truth is I just wanted to make & have a play in the craft room, things went from there.  Starting with a Tando large tag holder, and some gilding wax.


For me the best way of applying a full wax cost is with a cotton wipe especially with a solvent based polish like this one which will stain your fingers when applied directly by hand.  A wipe also makes it easier to really work the medium in and polish it.


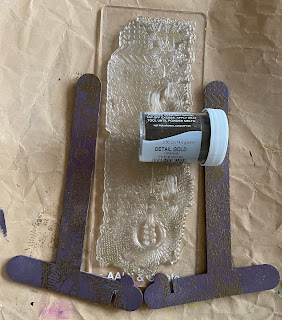
Once satisfied with the base finish using a Studio Light stamp and some fine detail gold ep we given a decorative finish.


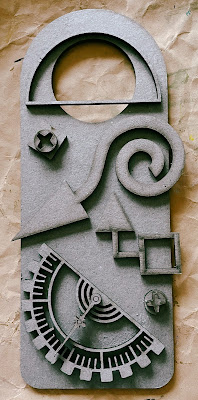
Next up a Tando door hanger (Style B) and elements from various grab bags etc.   The idea is to lay them out to establish the design.  Taking a photo is a good way of recording how your project is going to be laid out.

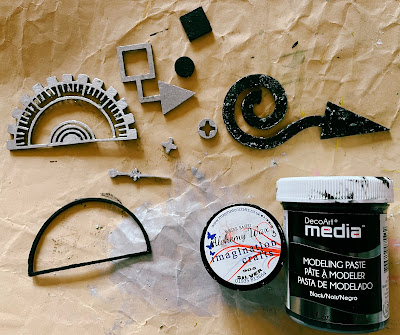
Liking all the shapes and layers time to get more mediums out and fussy them up.  The base hanger was given the same treatment at the arms of the holder.   Gilding wax, stamped and embossed.   The other bits and pieces were either given a coat of ArtDeco Modelling paste or a cost of silver gilding wax.  The modelling paste served not just to colour but also to add texture, which when it was dried was touched with more of the silver.


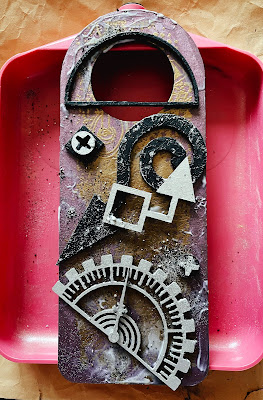
And assemble using a matt gel medium.    Not quite the same as the intended layout but .......


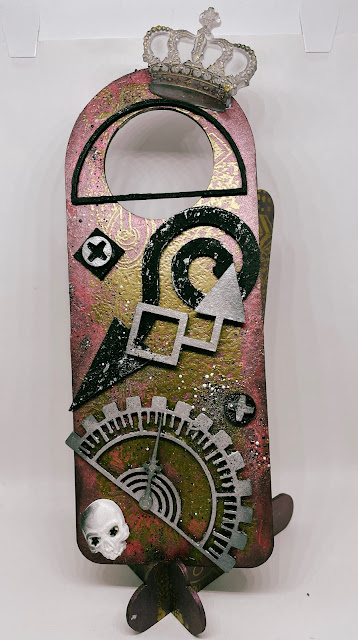
It didn't feel quite finished so a couple of moulded pieces were added, the skull is air dry clay the crown is resin.   With everything finally in place black distress ink worked round the edge and partially over the moulded additions.


This was a fun way to pass a Sunday afternoon.

Products Used

Tando Tag Stand.
Tando Steampunk Parts
Tando Grab Bag of Screws

Metallic Lustre - Silver

Distress Oxide - Black Soot

Everything else from my personal stash.

You know we have a Facebook Group don't you?  We would love to see some of your Tando based projects there.  It is also somewhere that you can find all sorts of inspiration, ask questions and generally discuss your crafty thoughts.

Tuesday, 25 January 2022

Hex Tech Tuesday - Klimt wall hanging by Sharon Nettleship

 As soon as I saw the Tando Hexagons I knew I wanted to make something to hang on the wall. I thought the Klimt papers would go really well with them. 


Here's how I made it


I started off by using a 12x12 piece of cardboard that I had in a scrapbook paper pack. I covered it with a piece of  black linen cardstock. Next I randomly stamped my word stamps onto the black with clear ink and gold embossed them using a gold embossing powder. 

I wanted to give the hexagon frames a rusted effect. 


I did this by using Prima rust effect paint in brown, red and gold. I applied the brown first all over by stippling it onto the frames. I then randomly stippled the red and gold. For the complete look I added a little turquoise acrylic paint too. 


I covered the base of the hexagons with Stamperia Klimt papers. I also added some of the little chipboard pieces in the collection. And to give it a bit of a luxurious look I added some gold wax. 


The eye triangle pieces came with the Klimt pack and I gessoed them with black and added gold wax. 


All I needed to do then was to arrange the hexagon bases and frames into a configuration that I liked.


There are so many projects you could make with the hexagons and have fun whilst doing it. 


Ingredients:

TandoCreative Hexagons

Stamperia Klimt Collection

Black card

Gold gilding wax

Gold embossing powder

Prima rust effect paste in brown, red & gold

Turquoise acrylic paint


Sharon N x