Showing posts with label 2oz chalk paint. Show all posts

Wednesday, 28 October 2020

Halloween Week- Nevermore- Fiona Randall


Morning all it's Halloween Week here on the Tando Blog.

Rather than the Traditional Halloween of Scary withches, Pumpkins, Skeletons and Bats I decided to go Dark and Gothic With a Poe themed project.


I started with a Tando Gothic Arch Layered frame and glued together all the frame pieces and then gave it a coat of DecoArt Chalky Finish in Carbon. Then added a couple of coats of DecoArt Ultra Matte Varnish to seal. I then decided to create my background Paper using a gothic Halloween Stamp from Tim Holtz. I used the old technique of stamping with versamark ink adding embossing powder and heat set. Next I inked all over with black soot distress ink. I then covered with a piece of paper and applied a hot iron all over to remove the embossing powder leaving me with a grungy distressed background. I  then cut a piece of Tando greyboard to the desired size and added the background paper and then inked the edges with a Black Archival Ink Pad. I then cut another panel of grey board to size used an edger die to achieve the Ornate edge at the top. I then gave this the same treatment as the frame. The gothic layered fram comes with arch shaped inner pieces and I applied the left over background paper to this also. I then glued the frame to the arch base and inserted the paper covered inner piece. A tando bookplate was then painted and a stamped image of Poe attached. this was then glued to the inner frame. Some Tando Harlequin extra thins were given the same embossing treatment as the background paper. A raven and the title were then stamped and fussy cut. Finally all the layers were applied to the base layered up with off cuts of grey board to give depth and dimension. The title and the raven added to complete.

I hope you have enjoyed this short little tutorial. Do stop by the rest of the week to see what the other Team Members have in store for you.
Thanks for stopping by today
Stay Safe
Hugs Fiona.


PRODUCTS USED.


Other Products

Archival Ink- Black

Tim Holtz Distress Embossing Glaze Hickory Smoke

Tim Holtz Distress Ink- Black Soot

Tim Holtz Stampers Anonymous Halloween Background Stamps.

Poe and Raven Stamps- Discontinued from my own stash.


Thursday, 23 July 2020

Stencil Week- Fiona Randall


Morning all it's Stencil Week here on the Tando Blog.


I've used one of my favourite go to stencils from Tando- The Long Flourish Stencil on the large circles and also the Tando Dot Stream stencil in the background. Teamed up with Chocolate Baroque Butterfly and Text Stamps. Love how this came together with just a few simple supplies.
 
Do stop by the rest of the week to see what the other Team Members have in store for you.
Thanks for stopping by
Stay Safe
Fiona xx
 
 
Products Used.


Other Supplies.
 
Black Archival Ink Pad
Watercolour Paper


Tuesday, 21 July 2020

Stenciled Square

Hi there!
Celia here, and this week our theme is stencils. I’m a bit obsessed with stencils so I thought I’d just let rip on one of the Tando greyboard squares. First I put down a quick background of DecoArt chalk paint in Escape and Vintage.
Then I started layering up with some blues (Tando 4x4 ‘distressed diamonds’ , stitches)

...and some purple (4x4 ‘distressed sequins’ , Andy Skinner ‘Whirlpool’)

...and some green (long stencil ‘rings’ ) and some numbers in black (Tando 4x4 ‘numbers’)
...and then some circles with the Chalk Paint (Tando 6x6 ‘Grid Round’). Then a bit of crackle paste and Andy Skinners ‘Baroque’ stencil, which I painted with a wash of Prussian Blue when dry.
Here’s the finished background. You can see that by layering up the stencils you can obtain a very complex looking background.

Then I painted my embellishments with gold and silver, and used embossing powder on the heart. (Small clock, Hearts Grab Bag) before sticking it all together.
And here’s the finished piece.

I hope you manage to get creative with stencils this week!

Thanks for stopping by,

Celia x


Monday, 16 March 2020

Anything Goes Week- Layered Tag Plaque-Fiona Randall


Morning all it's the start of another week here on the Tando Blog and this weeks theme is Anything Goes.
 
 
For my project this week I decided to create a layered plaque using Tando Grey Board Sheets and one of my Layered Tags from Set 3. Two Grey board panels were cut to size and given a coat of DecoArt Chalky Finish in Carbon. The base was then stamped with a flourish stamp using Platinum Brilliance Ink. Both panels were then edged with DecoArt Metallic Lustre in Silver Spark. Next up the layered Tag. The base was given a coat of DecoArt Chalky finish in Carbon. The top tag was run through an embossing folder given a coat of DecoArt Media Fluid Acrylic in metallic Silver and then A coat of DecoArt Black Antiquing Cream applied and wiped back to give an aged finish, before adhering together. A Butterfly and sentiment were then stamped onto white cardstock, Fussy cut and then adhered to the tag as shown. Finally all pieces were layered up using off cuts of Grey Board to give depth and Dimension.
 
Do check back this week to see what the other team members have in store for you.
we really appreciate you stopping by.
 
Fiona
 
Products Used.
 
Products used.


Tando Grey Board Sheets


Other Supplies
 
Tsukineko Brilliance Inkpad- Platinum Planet
 
Paper Artsy Stamps- Tracey Scott Eclectica 26


Thursday, 24 October 2019

Crackle Media Board- Fiona Randall


Morning Fiona Here and it my turn on the blog for this weeks theme which is Crackle.
 
 
I decided to create a media board using Tando Grey Board Sheets which I cut to size.
I then applied a piece of Inky Cardstock to the grey boar base. Next up DecoArt Crackle Paste was applied with a pallete Knife and then set aside to dry for the lovely cracks to appear.
 I applied a rusty treatment to some plaster wings using DecoArt Media Fluid Acrylics. The same treatment was applied to the Tando Minis range bookplate and a quote added. A Tiny Heart from The Tando Grab Bag of Hearts was given a coat of DecoArt Chalky finish in Rouge and attached to the wings. Washes of DecoArt Media Fluid Acrylics were the applied over the crackle until the desired effect was achieved. The wings and bookplate were then attached to the base to finish.
 
 
Here's a close up.


Thanks for stopping by today


Products used.


Tando Minis- Bookplates.


Other supplies
 
Distress Ink Spray
Woodgrain Embossing Folder.


Monday, 25 December 2017

Holly Peace - Brenda

Hi it's Brenda here with the last of my Christmas stand up cards for this year which uses the beautiful holly chipboard which I have cut to fit to the size of the chipboard back piece.


Like the others in the series I have adhered all the chippies and die-cuts before painting with DecoArt media acrylics and stippled over with chalky finish paint.


 I added some watery washes over the top to create more depth of colour on this one .....


... and added a die-cut sentiment.


From Di and Tony at Tando Creative and from all the Design Team we wish you a very
Merry Christmas 
and a happy, healthy and peaceful new year.

xxxxxxxxxxxxxx

Friday, 22 December 2017

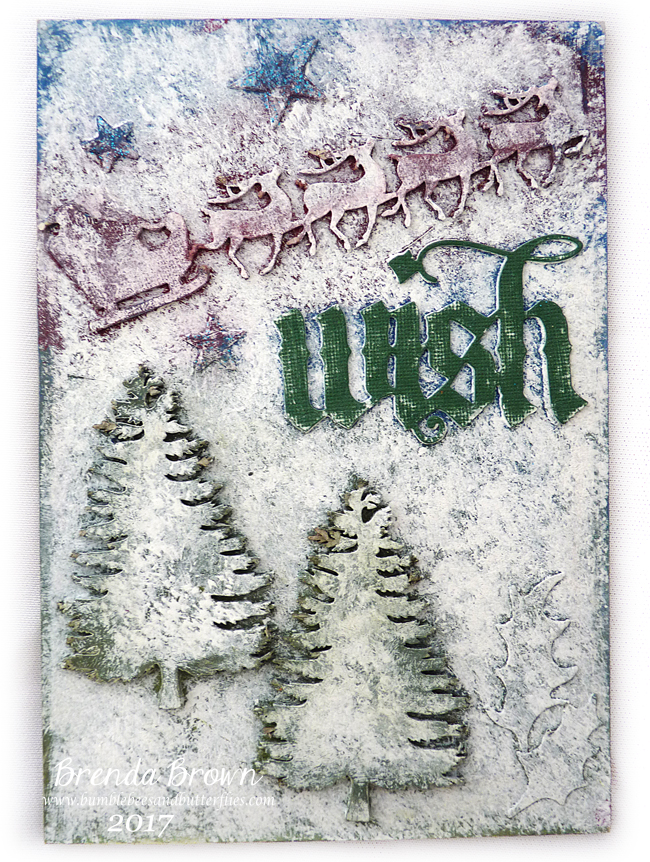
Santa's Wish - Brenda

Continuing the series of Christmas stand up cards this one has a chalky finished background and uses the white backed greyboard and gorgeous embellishments supplied by Tando.


Only 3 more sleeps till the big day.

hugs Brenda xxx

Saturday, 16 December 2017

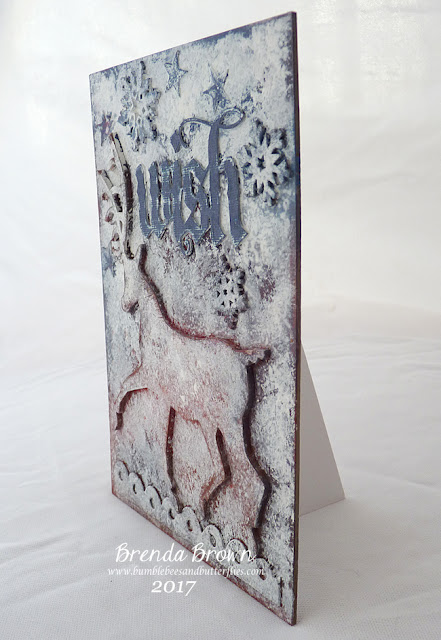
Reindeer Wish - Brenda

Hi Brenda here with another of my stand up media cards in a Christmas design. It was made in exactly the same way as the Snowflake Noel card I showed here on Monday using DecoArt media acrylics and chalky finish paints.


Di has this gorgeous reindeer in her Christmas selection both in this large size and in a smaller one too.


The sentiment is a Tim Holtz die, I love the very old manuscript style of font and the snowflakes can also be found in the Tando online shop. Just click the links and you will be transported over to the products.


I used various blue, red and brown paints to get the background colours and stippled Everlasting chalk paint over the top when it was dry.


I also added an easel to this particular card but others I have designed have a stand up frame on the back just made from two pieces of card.


I hope all your Christmas preparations are going well.

Have a great weekend.

hugs Brenda xxx

Monday, 11 December 2017

Snowflake Noel - Brenda

Hi Brenda here with one of my stand up cards using white backed media chipboard cut to 12 1/2 x 18 cms. This design uses a snowflake flourish set I had in my supplies made by Tando but I'm not sure if it is available at the moment. The techniques and finish were inspired by attending Andy Skinner's Mixology class back in November and I used media fluid acrylic paints and chalk paint to get this lovely coloured snowy feel.


The chipboards and die-cuts are adhered to the greyboard first of all....


.... and when they are dry paint a good coat of blue with decoart acrylics and when that has dried stipple some Everlasting chalky finish paint over the whole surface but leave some of the blue showing through. You have about 15 minutes to knock back areas and edges of the shapes to reveal a little more of the blue beneath. Use a damp babywipe and dry kitchen towel.


I had glued one of the sentiment diecuts on the greyboard and once the layers of paints had been added and dried I stuck another over the top cut from textured card and sanded so that it still looked part of the shabby snowy feel.


The only embellishment is a single gem in the middle of the snowflake .....


.... and I added a stand at the back so that it can become a stand-up Christmas card.


I am still making Christmas cards, I seem to be so behind with things but I am sure it will all get finished before the big day.

Media boards, Christmas chipboards and DecoArt acrylic paints and chalky finish paints are all available in the store.

Thanks for stopping by.

hugs Brenda xxx

Saturday, 10 June 2017

Black Modelling Paste by Nikki

Morning everyone,


My turn to share a make with you today, and our theme was to use Black Modelling Paste.

I decided to do one of my favourite Tando pieces, a little heart shelf.  It lends itself to so many ways of decorating, and is very easy to put together, and very sturdy when glued, as it's made from mdf.

I assembled and painted the shelf with tinting base, and then a coat of Vermillion.


As I was on holiday, and had taken limited supplies, I had to improvise to get my top coat colour.  I wanted a crackle effect, but realised I'd forgotten the weathered wood, and chose to use chalk crackle instead.  I coated the orange with the crackle medium and left to dry.

For the top coat, I'd only taken one colour of chalk paint, so decided to mix some fluid acrylic into the colour I had, to make a turquoise.  I picked a bit of everything at this point!  Just be careful not to add more than 10-15% fluid acrylic, otherwise the crackle reaction may be affected. (This is not a problem if you were just mixing a paint colour).


When painting the top coat, do even strokes, and try not to go over a patch you've just done, as it crackles almost immediately, it's brilliant to watch!


The black modelling paste was then used through a stencil.  You can use black modelling paste exactly the same way as white or clear, and can paint over it if you wish.  But sometimes it's nice to use it as a feature, and it also makes certain colours pop when put over it, or acts as a contrast to metallic lustres etc.  It's a firm favourite of mine.


Once stencilled and dry, I added Copper Kettle Metallic Lustre on my finger, to the raised area's of the modelling paste, to highlight the skull and bring the colours together.  I also ran my finger around the edge of the shelf, to tie in.


Thank you for joining me today, don't forget to check out the rest of the week's projects by my lovely colleagues, and let us know what you think.

Best Wishes,

Nikki K. xxx

Products Used:
Tando Creative - Heart Detail Shelf.
DecoArt - Chalk Crackle, 2oz Chalk paint Yesteryear, Fluid Acrylics: Vermillion, Cerulean Blue, Cobalt Turquoise Hue, Cobalt Blue Hue, Green Gold. Tinting Base, Black Modelling Paste, Metallic Lustre in Copper Kettle. Decopage Glue.