Showing posts with label Grab Bag of Spiders. Show all posts

Tuesday, 15 August 2023

Tando ATC matchbox - Arachnophobia by Kim


 Today we are using the Tando ATC Matchbox and Cards and Coins set. 

First, put your ATC box together and paint all surfaces. I used DecoArt Lamp Black on the matchbox, and DecoArt Black Gesso on the cards.

I wanted to create a spooky feel to this project and there are always spiders lurking in the woods. On the main surface of the matchbox I created a misty woods scene. I started by dry-brushing the mysterious distant light with DecoArt Indian Turquoise. 

To dry-brush you need a fairly firm bristle flat brush. Dip the brush in the paint and make sure the bristles are loaded, then wipe the brush on a paper towel until nearly all the paint has been removed - you really do need it to be dry! Lightly draw the brush across the surface so that the barest minimum of paint is left on the surface. It is better to apply more light coats than a single heavy application. Practice on a spare piece of greyboard if necessary.

The distant glow was created by choosing a centre point for the glow and dry brushing outwards from it so that I got 'rays' radiating. These rays got fainter the farther out they travelled. 


Next, I added some creepy, distant trees and bushes by dry-brushing the shapes lightly with Lamp Black over the turquoise. Then a little more turquoise 'rays' to push the trees back into the woods. 

Paint foreground trees with Lamp Black, with a few additional 'rays' in Whispering Turquoise. Finish with a small white dot in the centre of the light source.

To frame the picture I used one of Fiona's small ornate frames, chopped to make two 'L' shapes (sorry Fiona!) and painted gold.

I repeated the spooky turquoise rays on either side, but without the woods.

I used the small hanging web spider from the Grab bag of Spiders set for the main surface. It was painted Lamp Black with small white highlights and Zinc grey detail. One one side I used the large round spider, but had to trim the legs at the edge of the box. On the last side I used the small creeping spider.


I used white and creepy lettering to add text to the sides. I snuck the small round spider in the bottom of the drawer just for fun.

The ATC cards were painted with black gesso and, when dry, a very watery mix of Zinc was layered over the top giving a creepy look. I found some fear-relevant quotes and hand lettered the cards.


(Image inspired by the work of Jane Font (Painting with Jane)

Products:

Tando ATC Matchbox set: ATCMTCHBOX
Fiona's Ornate Frames set, small: FRORNTFRMMEDSML
Tando Grab bag of Spiders: GRBBGSPDERS
DecoArt Americana colours:
    Lamp Black
    Indian Turquoise
    Whispering Turquoise
    Zinc
    Titanium White
    Venetian Gold
    Black Gesso

Monday, 11 October 2021

Woo! Halloween - by Kim


 Well, what a time to be creating my first piece for Tando Creative! Halloween!


The Gothic Arch with all its natural spookiness was an ideal place to start. I removed all the cut out panels and set them aside. To enhance its 3D-ness I staggered the layers to give it that down-in-the-dungeons look. Each layer was about 5mm higher than the one before. (My first idea was to make stones around the arch - hence the lines - they were not used)

I decided that every decent dungeon has a door, so I used one of the cutouts. To make the planks of the door I started from the centre line and measured 10mm spaces and marked pencil lines. Using the edge of a ruler I ran a small embossing stylus along the pencil line until I was happy with the line.


This was the time that I marked and cut out the coffin shaped window using a sharp craft knife - BE CAREFUL if you intend to do a window as the greyboard is tough and not easy to cut and craft knives are very sharp - this bit is not important and can be left out if you are not confident.


Next, I painted everything black and let it dry while I prepared the bits for inside.

From the Minis Halloween Mix pack I used the eyes from the pumpkins. while they were still in the frame (because they are easier to hold) I painted them with yellow then added a little Scarlet red to make them a little fierce. 

From the same pack I took the spider webs and painted them white. One I cut to fit the curve of the arch and the other was glued across the window in the door.


One of the small bats was painted black and lightly edged in white, with dotty eyes in Scarlet.


From Tando Creative Spiders Grab Bag I took the small spider, base coated in black, a little Burnt Orange over the top and some dots to make her pretty. 


 Before I glued the pieces in I painted the inside of the arches by lightly dry brushing, first Burnt Umber, then Burnt Orange.


The spooky mist is from a cotton face pad.


I then turned my attention to the outside. I needed to add a hinge to the door, this had to be done before the finishings. I used a strip of brown packing tape, but painters masking tape would work.


To hide the tape I applied Texture Sand Paste to the door frame (which is why I didn’t need the lines from earlier). This made a super, rocky surround. Make sure it is thoroughly dry before you carry on.


I re-basecoated the frame and hinge on the door with black before lightly brushing the frame texture with Burnt Umber, Burnt Orange, then very lightly with True Ochre.


I added nails to the door with Liquid Glass - these take quite a while to dry, too. But make sure they are properly cured before you continue.


I found a small key in my ephemera stash, drilled a tiny hole and glued it in. Then using True Ochre and Black Plum lightly dry brushed to texture the door, allowing the True Ochre to highlight the nails. 


I used a pumpkin from the Halloween Mix, painted in Tangerine with Scarlet stripes to finish the door.


Note: Before you glue on the door hinge, make sure the door fits the hole and opens easily because after it has been painted it might need adjusting! And don’t get bogged down with colours - whichever you have that is similar will do.)


I hope you are inspired to be spooky for Halloween!


I used these products:

Tando Creative:

    Gothic Arch

    Minis Halloween Mix

    Spiders Grab Bag


DecoArt Media:

    Texture Sand Paste

    Liquid Glass


DecoArt Colours as in the text


Friday, 1 November 2019

Spooky & Creepy by Nikki


Hi everyone,

It's Spooky and Creepy week here at Tando, and I've just got a tag to share with you that I made for Di's recent Hochanda shows, but it didn't get seen as I was poorly, so I thought I'd share with you now.

The tags were designed by my lovely teamie Fiona Randall, and brought to life by Tando.  This is just one way you could decorate yours if you were lucky to get them on Hochanda last week.


I started by putting modelling paste through a stencil, and then painting the whole tag black, front and back pieces.  They were then glued straight together, making sure I glued around the keyhole well so it was a sealed 'bezel'.

I used Pebeo Paint in Fantasy Prism, and carefully used a lolly stick to spoon paint all the way into the key shape.  When this dries it does mad things and creates fab patterns in the paint.

I painted a  spider in black, and a cobweb, and adhered to the tag.  Finally I dry brushed the whole thing with silver, to pick out the detail.


Hope you like it, don't forget to check out the rest of the team's Spooky and Creepy makes this week. x

Best Wishes,

Nikki K
xxx

Products Used:
Tando:
Spiders Grab Bag
Layered Tags
Haunted House stencil (bats)

DecoArt Media Line:
Metallic Silver
Black Gesso

Other:
Pebeo Fantasy Prisme paint.

Thursday, 29 October 2015

Anything Goes - Halloween Card


Hi Tando fans! Dana here today sharing a card for the Anything Goes theme this week. I absolutely love Halloween crafts, so I couldn't resist sharing one last creepy project this month. I created a card base with a mix of patterned paper, corrugated cardstock and canvas and then topped it with a satin bow.


My card was missing the scare factor, so I added a Spider that I colored with black paint and a layer of glaze to the center of the bow. This Grab Bag of Spiders includes 3 different designs in two sizes, so you're sure to find a creepy crawler perfect for your project!

You can find the spider I used for this project and more in the Tando Creative Retail Store! We'd love to see what you create for our Anything Goes Challenge! To be in with a chance of winning some great Tando goodies of your choice, please make a piece based on our weekly themes and link your project, not just your blog, using the inlinkz tool located at the top of the Tando Blog. You don't have to use any Tando product, but, if you do, you will be entered into the draw twice! There are no limits to how many times you enter, however, we do request that you only enter your piece for 5 challenges. We look forward to seeing your creations!

Thanks so much for stopping by today!

Tuesday, 20 October 2015

Spookilicious: Lights Out Altered Switch Box


Hi friends! Dana here today sharing an altered switch box that I created for the Spookilicious theme this week. I recently went camping with my family and the kids found this rusty switch box in the woods. They were going to throw it away, but I hid this treasure away while they were on a hike! I had a lot of fun giving this piece a second life for the challenge this week!


I embellished the top of the box with a leftover piece of tombstones from the Halloween Art Room I put together last year. I also added a piece of Grass Flexistrip, a Mini Pumpkin and a skull from the Mini Mixed Halloween Set. I filled in some of the empty space with plastic bones and a bit of moss for color. (I didn't think of it until typing up this post, but I may add the Tando designer names to the tombstones!)


I attached a plastic skeleton to the front of the piece. I added another Mini Pumpkin. The entire piece is glued to a coffin piece I had leftover from the Layered Coffin with Cobweb that I assembled last year.


The wires coming out from the top of the box were the perfect support pieces for a couple Bats and a Spider. I painted the bats and spider with black acrylic paint and then covered them with a layer of flock for a furry finish.


Here is what the box looked like fresh from the woods. I didn't alter the finish at all. This natural rusting a patina beats anything I could try to recreate in my studio. I did add some fake spider webs.

If you're looking for a strictly chipboard piece to assemble for Halloween here are a couple examples:

Layered Coffin with Cobweb Detail (Hinges Not Included)


Halloween Art Room


You can find the chipboard I used for this project and more in the Tando Creative Retail Store! We'd love to see what you create for our Spookilicious Challenge! To be in with a chance of winning some great Tando goodies of your choice, please make a piece based on our weekly themes and link your project, not just your blog, using the inlinkz tool located at the top of the Tando Blog. You don't have to use any Tando product, but, if you do, you will be entered into the draw twice! There are no limits to how many times you enter, however, we do request that you only enter your piece for 5 challenges. We look forward to seeing your creations!

Thanks so much for stopping by today!

Thursday, 30 October 2014

Frighten Me Spiders!

 I have made this card which would definitely frighten my arachnophobe nieces!!


I've painted the spiders from the ~{Spider Grab Bag}~ with black acrylic paint and when dry, added Glossy Accents. When that was dry I added some highlights with Uni Posca pens.

I added 'BOO!' through the ~{Have Your Say Mask}~ and outlined the letters, finishing off with a Spiderweb stamp and some doodles.

Hopefully you managed to see past the spiders to the writing!!!

Kaz xxx

Sunday, 26 October 2014

Free For All - Layered Arch with Cobweb


Hi Tando fans! Dana here today sharing an Layered Arch with Cobweb that I created for the Free For All theme this week. I could have used the entire arch set to create a 4-layer arch, but decided to use only 2 layers and save the other pieces for a future project. I covered both layers of the arch with a coat of black acrylic paint. I dressed up the top layer of the arch with glitter glue, for some fun sparkle, and some white dimensional paint, for a more realistic looking cobweb.


I added a thick coat of glittery flock to this Spider.

http://www.tando-creative.co.uk/catalog/layered-arch-with-cobweb-p-735.html http://www.tando-creative.co.uk/catalog/grab-spiders-p-740.html


Here is the same arch set designed with all 4 layers, created by Di. In addition to the pieces I used, she incorporated a tree from the Graveyard Set and added the bats to the background using the Haunted House Mask.

Thanks for stopping by today! You can now swing by the Tando Retail Store to pick up these pieces for yourself!

~Dana

Friday, 8 August 2014

Grey and black with Irit

Hello my dear crafty friends and welcome to our Grey and Black week here on Tando!
 Irit is here again.
Here is my project- kind of a weird one as I made a Halloween card with Best friends sentiment. But then they look so good together, those 2 spiders, don't they?

I used Tando Spider web mask with black gesso over the glittered dotted white cardstock and then added some mist over it to make it grey. (Teal pigment was in this grey mist, so you see a bit of teal too). Both spiders were heat embossed with black powder and glued over the masked image. Then I was looking for a sentiment and this one was just great! Funny and in the right colors.
Hope you like my work this week.

And here the products I  used for this week project


Sunday, 13 October 2013

Black & Orange - Happy Halloween Card


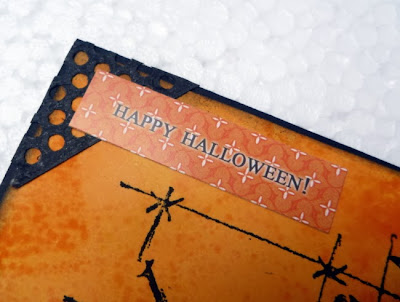
Hi Tando fans! Dana here today wrapping up the week with a black and orange card. I colored a piece of white cardstock with orange Distress inks for the base of my card. I then inked the edges with black Distress Ink and stamped the spider web.


I added a spider, that I spritzed with a light coat of Glimmer Mist, from the Grab Bag of Spiders to the corner of the web with some adhesive foam. These spider designs are so realistic and I'm terrified of spiders, so I did this part as quickly as possible! 


I added some bright orange trim and a strip of patterned paper to the bottom of the card and tied it all together with some twine and a metal token.


I embellished the top corner of the card with some Magic Mesh and a simple sticker sentiment.


Thanks for stopping by today! If you've missed the posts from earlier this week, scroll down for a treat. Join us here again next week when our ideas will really take flight!

~Dana