Showing posts with label Anything Goes. Show all posts

Monday, 11 October 2021

Woo! Halloween - by Kim


 Well, what a time to be creating my first piece for Tando Creative! Halloween!


The Gothic Arch with all its natural spookiness was an ideal place to start. I removed all the cut out panels and set them aside. To enhance its 3D-ness I staggered the layers to give it that down-in-the-dungeons look. Each layer was about 5mm higher than the one before. (My first idea was to make stones around the arch - hence the lines - they were not used)

I decided that every decent dungeon has a door, so I used one of the cutouts. To make the planks of the door I started from the centre line and measured 10mm spaces and marked pencil lines. Using the edge of a ruler I ran a small embossing stylus along the pencil line until I was happy with the line.


This was the time that I marked and cut out the coffin shaped window using a sharp craft knife - BE CAREFUL if you intend to do a window as the greyboard is tough and not easy to cut and craft knives are very sharp - this bit is not important and can be left out if you are not confident.


Next, I painted everything black and let it dry while I prepared the bits for inside.

From the Minis Halloween Mix pack I used the eyes from the pumpkins. while they were still in the frame (because they are easier to hold) I painted them with yellow then added a little Scarlet red to make them a little fierce. 

From the same pack I took the spider webs and painted them white. One I cut to fit the curve of the arch and the other was glued across the window in the door.


One of the small bats was painted black and lightly edged in white, with dotty eyes in Scarlet.


From Tando Creative Spiders Grab Bag I took the small spider, base coated in black, a little Burnt Orange over the top and some dots to make her pretty. 


 Before I glued the pieces in I painted the inside of the arches by lightly dry brushing, first Burnt Umber, then Burnt Orange.


The spooky mist is from a cotton face pad.


I then turned my attention to the outside. I needed to add a hinge to the door, this had to be done before the finishings. I used a strip of brown packing tape, but painters masking tape would work.


To hide the tape I applied Texture Sand Paste to the door frame (which is why I didn’t need the lines from earlier). This made a super, rocky surround. Make sure it is thoroughly dry before you carry on.


I re-basecoated the frame and hinge on the door with black before lightly brushing the frame texture with Burnt Umber, Burnt Orange, then very lightly with True Ochre.


I added nails to the door with Liquid Glass - these take quite a while to dry, too. But make sure they are properly cured before you continue.


I found a small key in my ephemera stash, drilled a tiny hole and glued it in. Then using True Ochre and Black Plum lightly dry brushed to texture the door, allowing the True Ochre to highlight the nails. 


I used a pumpkin from the Halloween Mix, painted in Tangerine with Scarlet stripes to finish the door.


Note: Before you glue on the door hinge, make sure the door fits the hole and opens easily because after it has been painted it might need adjusting! And don’t get bogged down with colours - whichever you have that is similar will do.)


I hope you are inspired to be spooky for Halloween!


I used these products:

Tando Creative:

    Gothic Arch

    Minis Halloween Mix

    Spiders Grab Bag


DecoArt Media:

    Texture Sand Paste

    Liquid Glass


DecoArt Colours as in the text


Tuesday, 15 October 2019

Mini Houses

Hi there, Celia here!

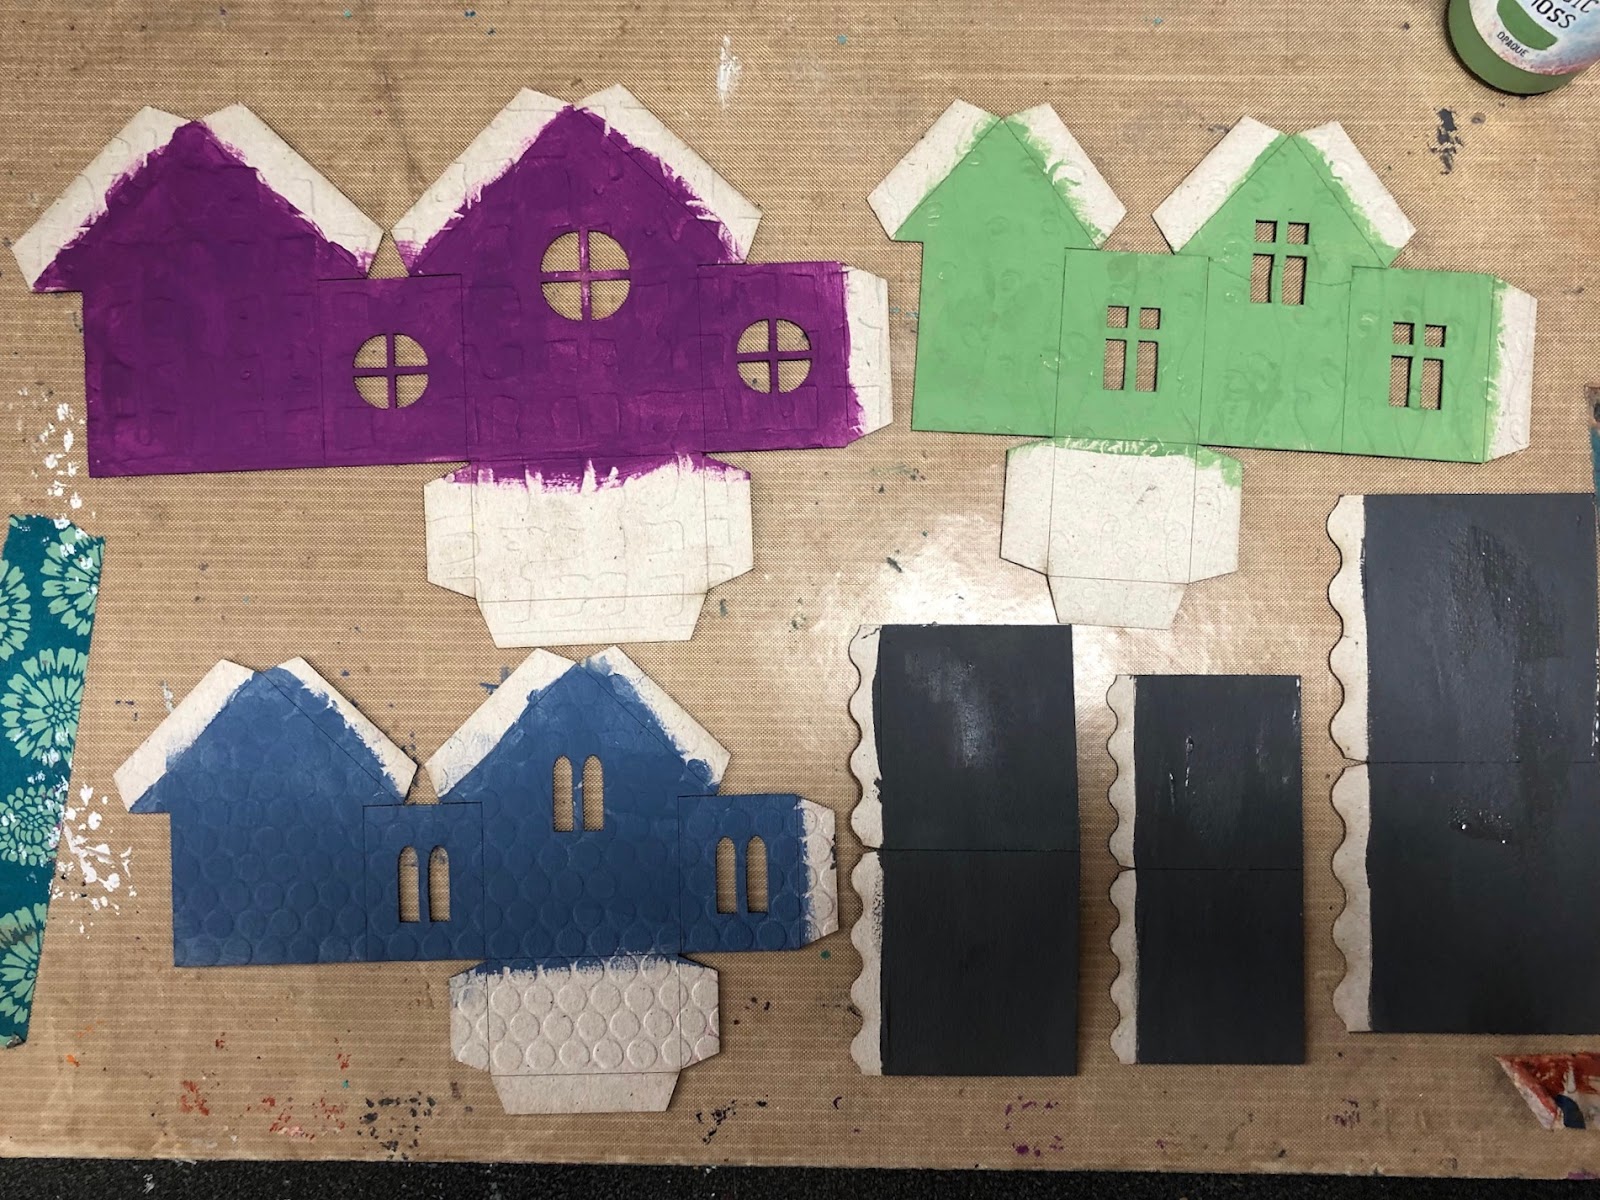
This week it's 'anything goes', so I thought I'd have a little play with these cute mini houses. I decided to go colourful and a bit fairy. I embossed them first for a bit of texture, then primed each of them in a different colour using chalk paint. 

Then I stamped them with the Chocolate Baroque Abstract Fragments stamps and added some washes of Decoart Fluid Acrylics, allowing them to pool around the texture from the embossing.

For the rooves, I first primed them in Relic chalk paint, then stamped one of the Abstract Fragments stamps with Versafine and heat embossed with a Cosmic Shimmer powder to get the tiles effect. 

I also used heat embossing powder on the doors and windows.

A bit more stamping with some flowers, then assembled. I think these houses are really cute - you could make a whole village!

Thanks for stopping by,

Celia  x

Thursday, 14 June 2018

Anything Goes Week - Joker Media Board by Nikki K.

Hi everyone,

It's my turn for the Anything Goes week, and I've combined mine with the Same but different week we had a week or so ago, where everyone made their piece from the same kit.  I liked my kit so much I asked if I could keep it and use it as my make and take at the Ministry of Mixology workshops, and share it with you later (now).

So this was the kit we were sent: (photo by Brenda).


All I did was ask for the words to be changed for me to use for the make and takes, and had 'Ring Ring'.

I painted the Media board in Tinting Base, and added some 'harlequin' pattern by using a Tando mini stencil with Crackle Paint, and then gave it a diagonal wash each of Blue Green Light, and Dioxazine Purple.  Let one colour dry before adding the other wash, or you end up with mud.

The background scratches were then stamped with Pyrrole Red, and Roulette Wheel in Carbon Black.  (You could use ink if you prefer).


The dial was also painted with Pyrrole Red, and then covered in Crackle Glaze.  When dry I rubbed Antiquing Cream into the cracks and wiped off, to make it look aged.  The numbers and Joker picture were given a 'dirty wash' (an Andy technique) with Paynes Grey and Quinacridone Gold.


The words were painted Red, the top layer Silver, and then Antiquing Cream was added, which sort of pooled over the letters which I liked so I didn't rub it off.


Finally Paynes Grey was washed around the edges of the board to darken them, and Red drips added to the top edge.


Hope you like it :)

Best Wishes,

Nikki K.
xxx

Products Used:

Kit by Tando Creative.
Joker Vector - Andy Skinner
Andy Skinner Stamps.
DecoArt Media Line Paints - Pyrrole Red, Dioxazine Purple, Blue Green Light, Carbon Black, Metallic Silver, Quinacridone Gold, Paynes Grey.  Antiquing Cream - Raw Umber.
DecoArt Media Crackle Paint
DecoArt Media Crackle Glaze


Sunday, 19 July 2015

Christmas in July !!


Hi! Gez here today, delighted to be sharing a little Christmassy offering with you for the 'Anything Goes' theme this week!


I started with one of the circles from the {Grab bag of circles} 
 These are so versatile..

Grab bag of Circles

I sprayed the circle with ink sprays and water and allowed it time to dry. 

While the circle was drying I painted two of the wonky trees
with gold acrylic paint..

Grab Bag of Wonky Trees

close up..


with Christmas in mind I added a little glitz!

Thank you for calling I hope you like my idea for an early Christmas card.
Happy creating, Gez


Tuesday, 21 April 2015

Anything Goes - Brothers Layout


Hi Tando fans! Dana here today sharing a layout for the Anything Goes theme this week. I had a blast making this page as a gift for my Sister's friend with the help of a sketch by Kristine Davidson. I have two daughters, so I'm thrilled when I get to scrap some boys, especially when they are this adorable!


I cut a portion of the Square Grid and painted it with acrylic paint to add some fun dimension under the photo.


I had fun inking up pieces from the Grab Bag of Stars to use as colorful embellishments.

You can find this chipboard and more in the Tando Creative Retail Store! We'd love to have you join the Anything Goes Challenge! To be in with a chance of winning some great Tando goodies of your choice, please make a piece based on our weekly themes and link your project, not just your blog, using the inlinkz tool located at the top of the Tando Blog. You don't have to use any Tando product, but, if you do, you will be entered into the draw twice! There are no limits to how many times you enter, however, we do request that you only enter your piece for 5 challenges. We look forward to seeing your creations!

Thanks for stopping by today!