Showing posts with label Embossing. Show all posts

Sunday, 2 April 2023

PapillonHouse

 Happy Sunday everyone. I am stopping by to bring you a little quick and easy project using my favourite 3d House style 1.

These 3d houses are great little projects to complete and can be decorated in all manner of ways and are perfect to give as a handmade gift.


I started by assembling and gluing together the house pieces and then gave it a coat of DecoArt chalky finish in Carbon all over. Once dry I gave it a coat of DecoArt Ultra Matte varnish to seal and protect.

Next I cut a panel from white 300gsm cardstock to fit the front of the house leaving a small border.

I then glued a piece of Tim holtz collage tissue ( you could also use rice paper) to one side of the panel and dried with a heat tool.

I then spritzed the cardstock panel with water and embossed with a Tim Holtz 3d Brick embossing folder through the big shot. The panel was then glued to the house front.

Next I took a piece of the Tando Moroccan grid , applied versamark ink and sprinkled with white embossing powder and heat set. I then fussy cut a Butterfly ( you know I love Butterflies right) from my stash and inked the edges with black Archival Ink.

The Moroccan grid was then glued to the house offset to the left and the Butterfly then glued into place at a jaunty angle.

To finish the word Papillon was created using a Dynamo and mounted onto a piece of white cardstock and trimmed to create a border. This was then attached to the house as shown.

A quick and easy monochrome project with splash of colour using minimal supplies.

Thanks for taking the time to stop by and read.

Hugs Fiona.


PRODUCTS USED.

Tando 3D House Style 1

Tando Grids- Moroccan

DecoArt Chalky Finish- Carbon

DecoArt Media Ultra Matte Varnish

Stampendous Chunky Embossing Enamel- White


OTHER PRODUCTS

Tim Holtz Collage Tissue

Tim Holtz 3D Embossin Folder- Brick

Butterfly from my own stash

Tuesday, 9 February 2021

Love Plaque- Fiona Randall

 Morning All.

 The theme this week on the Tando Blog is LOVE.


Using my go to supply of Tando Grey Board I created a little layered plaque with a Tando Heart as the focal Element. Some background stamping with a Chocolate Baroque Stamp and Transfer Foiling applied ( something new I am exploring). finished off with some string and a metal key wrapped around the heart, before layering onto some offset straws. 
Not my Normal I know but I am continually challenging myself to try new things.
Thanks for stopping by today
Stay Safe
Hugs Fiona xx

Products Used


Other Supplies

Black Archival Ink Pad
Sticky Stuff Embossing Powder
Clear Embossing Powder
Deco Transfer Foil- Champagne
Tim Holtz Stams- Distressed Text
String
Metal Key Charm.


Tuesday, 15 October 2019

Mini Houses

Hi there, Celia here!

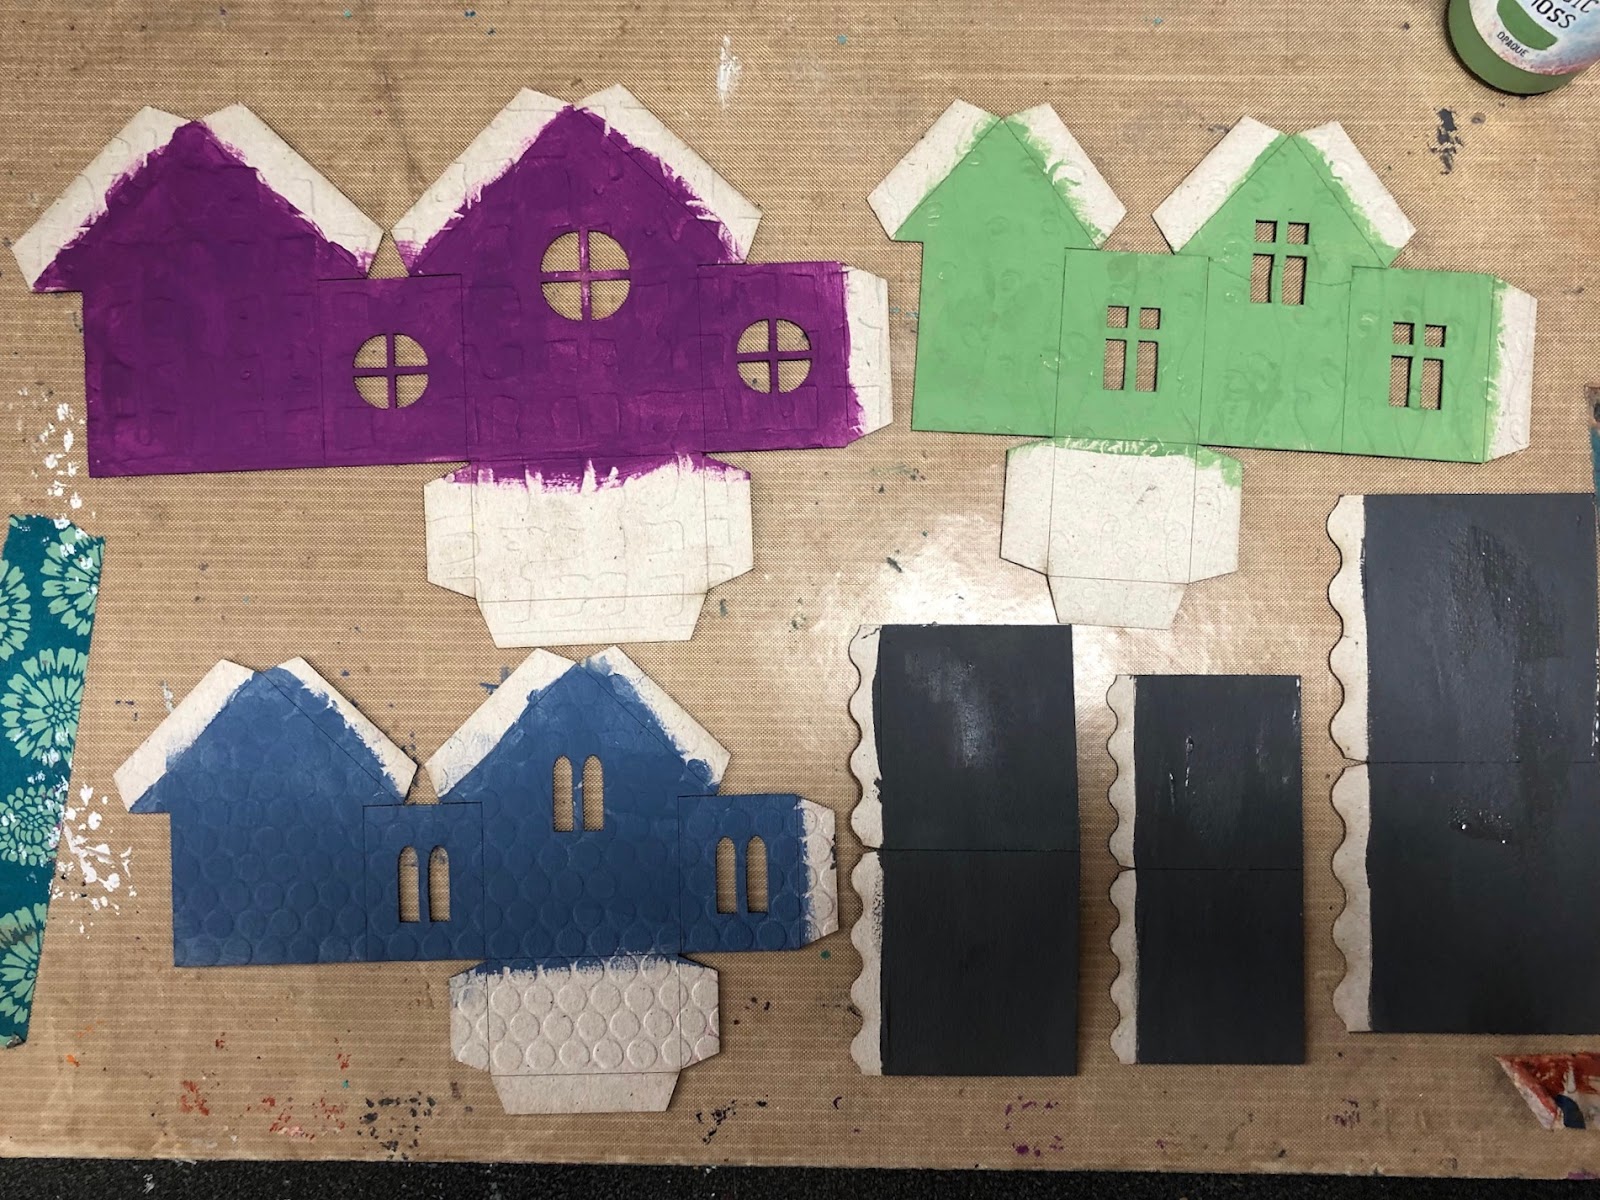
This week it's 'anything goes', so I thought I'd have a little play with these cute mini houses. I decided to go colourful and a bit fairy. I embossed them first for a bit of texture, then primed each of them in a different colour using chalk paint. 

Then I stamped them with the Chocolate Baroque Abstract Fragments stamps and added some washes of Decoart Fluid Acrylics, allowing them to pool around the texture from the embossing.

For the rooves, I first primed them in Relic chalk paint, then stamped one of the Abstract Fragments stamps with Versafine and heat embossed with a Cosmic Shimmer powder to get the tiles effect. 

I also used heat embossing powder on the doors and windows.

A bit more stamping with some flowers, then assembled. I think these houses are really cute - you could make a whole village!

Thanks for stopping by,

Celia  x

Saturday, 31 August 2019

Heat Embossing with Lisa

Helllllooooo.... lovely people. 

Lisa here, and this week at Tando Creative the theme is 'heat embossing'. 

As soon as I first discovered heat embossing (too many years ago to mention) I instantly fell in love, and still continued to be astonished with the process to this day.

So for this tag, I used a selection of Tando stencils, the new Andy Skinner Embossing Powder and stamps.


I first painted a Tando tag using DecoArt Premium Acrylic Paints in Colbalt Teal Hue mixed with White Gesso. Then heat emboss using a Tando stencil with clear embossing ink and Andy Skinner's Embossing Powder.


I then heat embossed Tando Thins with the clear embossing ink and another of Andy Skinner's Embossing Powder.


Using Andy Skinner's new stamp - Gypsie Queen stamped with clear embossing ink and White Embossing Powder, twice on to white card,cut out then inked one with a dark blue ink and one with a light blue ink. Then over layed them and glued them together.


Stamp the sentiment on to white card using clear embossing ink and white embossing powder. Then inked with the blue ink.


Add some blue wool under the sentiment and add some thread through the tag hole.


Thanks for popping by,
Lisa x

Monday, 18 March 2019

Anything goes week- Dream Tag by Monika

Good mornig all,
It's 'anything goes' week on so I have decided to show you one of my latest tags that I have made for Tando show at Hochanda tv today.


I'm using size 8 Tando Tag  for this project. Using Prussian Blue Media Fluid Acrylic I have painted the background, straight on the greyboard. I have applied one coat in the middle section, and two coats on the top and bottom of my tag.
I have splattered  watered down White Chalky Finish Paint across the tag to create the stars. Next step was to heat emboss the stamped images of the trees and moon, once cooled I have added a light wash with white paint.
I have also mixed some Prussian Blue paint with white chalky paint and dyed the ribbon and Andy Skinner greyboard 'dream' plate.


I hope you have enjoyed this very simple tag inspiration today.
Don't forget to watch Di at Hochanda today to see all of the new amazing products. 
See you next time
Monika 
x


Sunday, 4 November 2018

Anything Goes Week - Mechanical ATC by Nikki K

Morning all,

Today I have a little project for you, but with a lot of texture! 
I used a Tando ATC for my base, which are pre cut to the perfect size.  These are greyboard and take nearly any punishment with mediums and paints you want.  I started by painting it with a coat of Metallic Silver.

The raised area's are Sand Texture Paste, which I also used a spatula to add dimension, by just tapping and lifting it lightly off the surface.This gave a really nice cratered effect. 


I carefully added paynes grey to the textured area's, and when dry, washes of Quinacridone Gold over the whole piece, concentrating more on the raised parts, to show deep rusting.

The Tando cogs were painted in Raw Umber, and a wash of Quinacridone Gold. I then used Stampendous Embossing Powder in Aged Copper, and then made a mix of powder's to get the dark green/copper effect on the others.  These were partially heated, to keep the particles from melting in completely, but enough to give the mottled rusted effect. The round bolts on top were painted with Raw Umber, and then Cobalt Turquoise mixed with a little Titan Buff for a verdigree look.


The Mechanical sign was just printed onto a piece of paper, and aged with watered down Quin Gold and Paynes Grey. 


You can make a completely different look to your ATC's by glueing patterned paper to them, an easy design choice.  This is another one I made, totally different but still fun with embellishments from your stash.


I gave the paper a wash of Raw Umber on this one to make it more 'vintage' looking. 

Hope this inspires you,

Best Wishes,

Nikki K.
xxx

Products Used:

Tando Creative:
ATC's.
Cogs.
Industrial Elements Kit.

DecoArt Media Line:
Metallic Silver
Paynes Grey
Quinacridone Gold
Titan Buff
Raw Umber
Cobalt Turquoise
Texture Sand Paste.

Other Items:

Stampendous Embossing Powders.
Printed Sentiment.
Embellishments from own stash.

Monday, 7 May 2018

Embossing folder texture

Hi it's Brenda here.
I thought I would create a textured media board for embossing folder week and I liked it so much I decided it would become my 'Make and Take' project at Ministry of Mixology last month. (I was well ahead of myself with projects as I had a holiday coming up and wanted to get loads of projects scheduled well before hand).


I adhered a few pieces of torn/cut left over embossed card randomly onto a media board using matte medium and left it to dry between wax paper under a heavy box.


Don't worry about gluing the pieces over the edges, you can remove these when it's perfectly dry.


Next I scraped over some texture sand paste and heat dried it.


Paint a coat of white gesso to give it some tooth for the next layers and then spend quite some time spritzing water, dipping media acrylic paints into it, letting it move around a little and drying it. I repeated this step lots and lots of times using raw umber, quinacridone gold, burnt sienna and carbon black.


I wanted to highlight the textures a little more so I took a palette knife and white gesso and lightly scraped it over keeping the blade flat to the surface.


The White gesso is very stark so mix a dirty watery wash of paynes grey and quin gold and paint over the whole surface, dry it and seal with a varnish - I used soft touch.


I took some elements I had already rusted and a word (I have no idea why I chose the word 'waiting' although there is something special we are waiting for later in the year - that's my unconscious mind taking over perhaps!) and I put it together to finish it off. I'm really happy with this.


The textures from the embossed card are random and give a completely distressed look to the background.

If you have a try with this technique please let us know.

For now have fun creating.

hugs Brenda xxx


Supplies
Embossed card (my own supplies)


Thursday, 22 March 2018

Crackle Paste/Glaze week - with Nikki


Morning everyone,

I kind of mis-read the brief for this week, and thought it was texture, but that's next week.  So my make has a mix, but there is crackle glaze there :)

I started by using a small Gothic mdf arch from Tando, and put some black gesso through a brick stencil for a little texture.  Next was Texture Sand Paste all around the edge with a palette knife. 


Paint over the whole arch with white Gesso:


Make a very watery wash of Pthalo Turquoise and Pthalo Green blue, and add the turquoise at the top, merging into the green blue towards the bottom.  Try and keep inside the arch.  The paint will pool nicely in areas.


Take Medium Grey Value 6, and paint your edges, and the brickwork carefully.  Water some Paynes grey slightly and use to deepen the edges of the bricks and highlight the arch texture.


Add a wash of Quinacridone Gold, in areas, and splatter some over the blue area, not fully covering the whole arch.  Mix a little Pthalo Green Blue with Quin Gold, and repeat the wash just on the right hand side, this gives a bit of depth to the colours.  Stamp and cut out images from the Spook set (Illusionary Artists).  Colour the Gargoyle with some of the green-gold wash you have left to tie in the colours.


I also stamped in Versafine Toffee ink some text across the background of the tag.


Emboss the crosses with Stampendous Aged Green Embossing Powder, and then give a Payne's grey wash over the top, to age further. 


Stamp some words onto card, and emboss with clear embossing powder.  Make a wash of Quin Gold and Payne's Grey, and coat the card.  Edge with neat Paynes Grey. Heat dry.


Glue the stamped elements on the Arch, adding some more Paynes Grey around the Gargoyles feet on the brickwork to ground him, just a shadow.  Add Crackle Glaze on top of the Gargoyle and leave to crack. 


Here are some close-ups and the finished piece:


Hope you like him :)  Remember to catch up with the rest of the team's makes this week too,

Thanks for stopping by,

Best Wishes,

Nikki K.
xxx