Showing posts with label Dry Embossing. Show all posts

Wednesday, 9 September 2020

A Vintage Tag


Hi there!

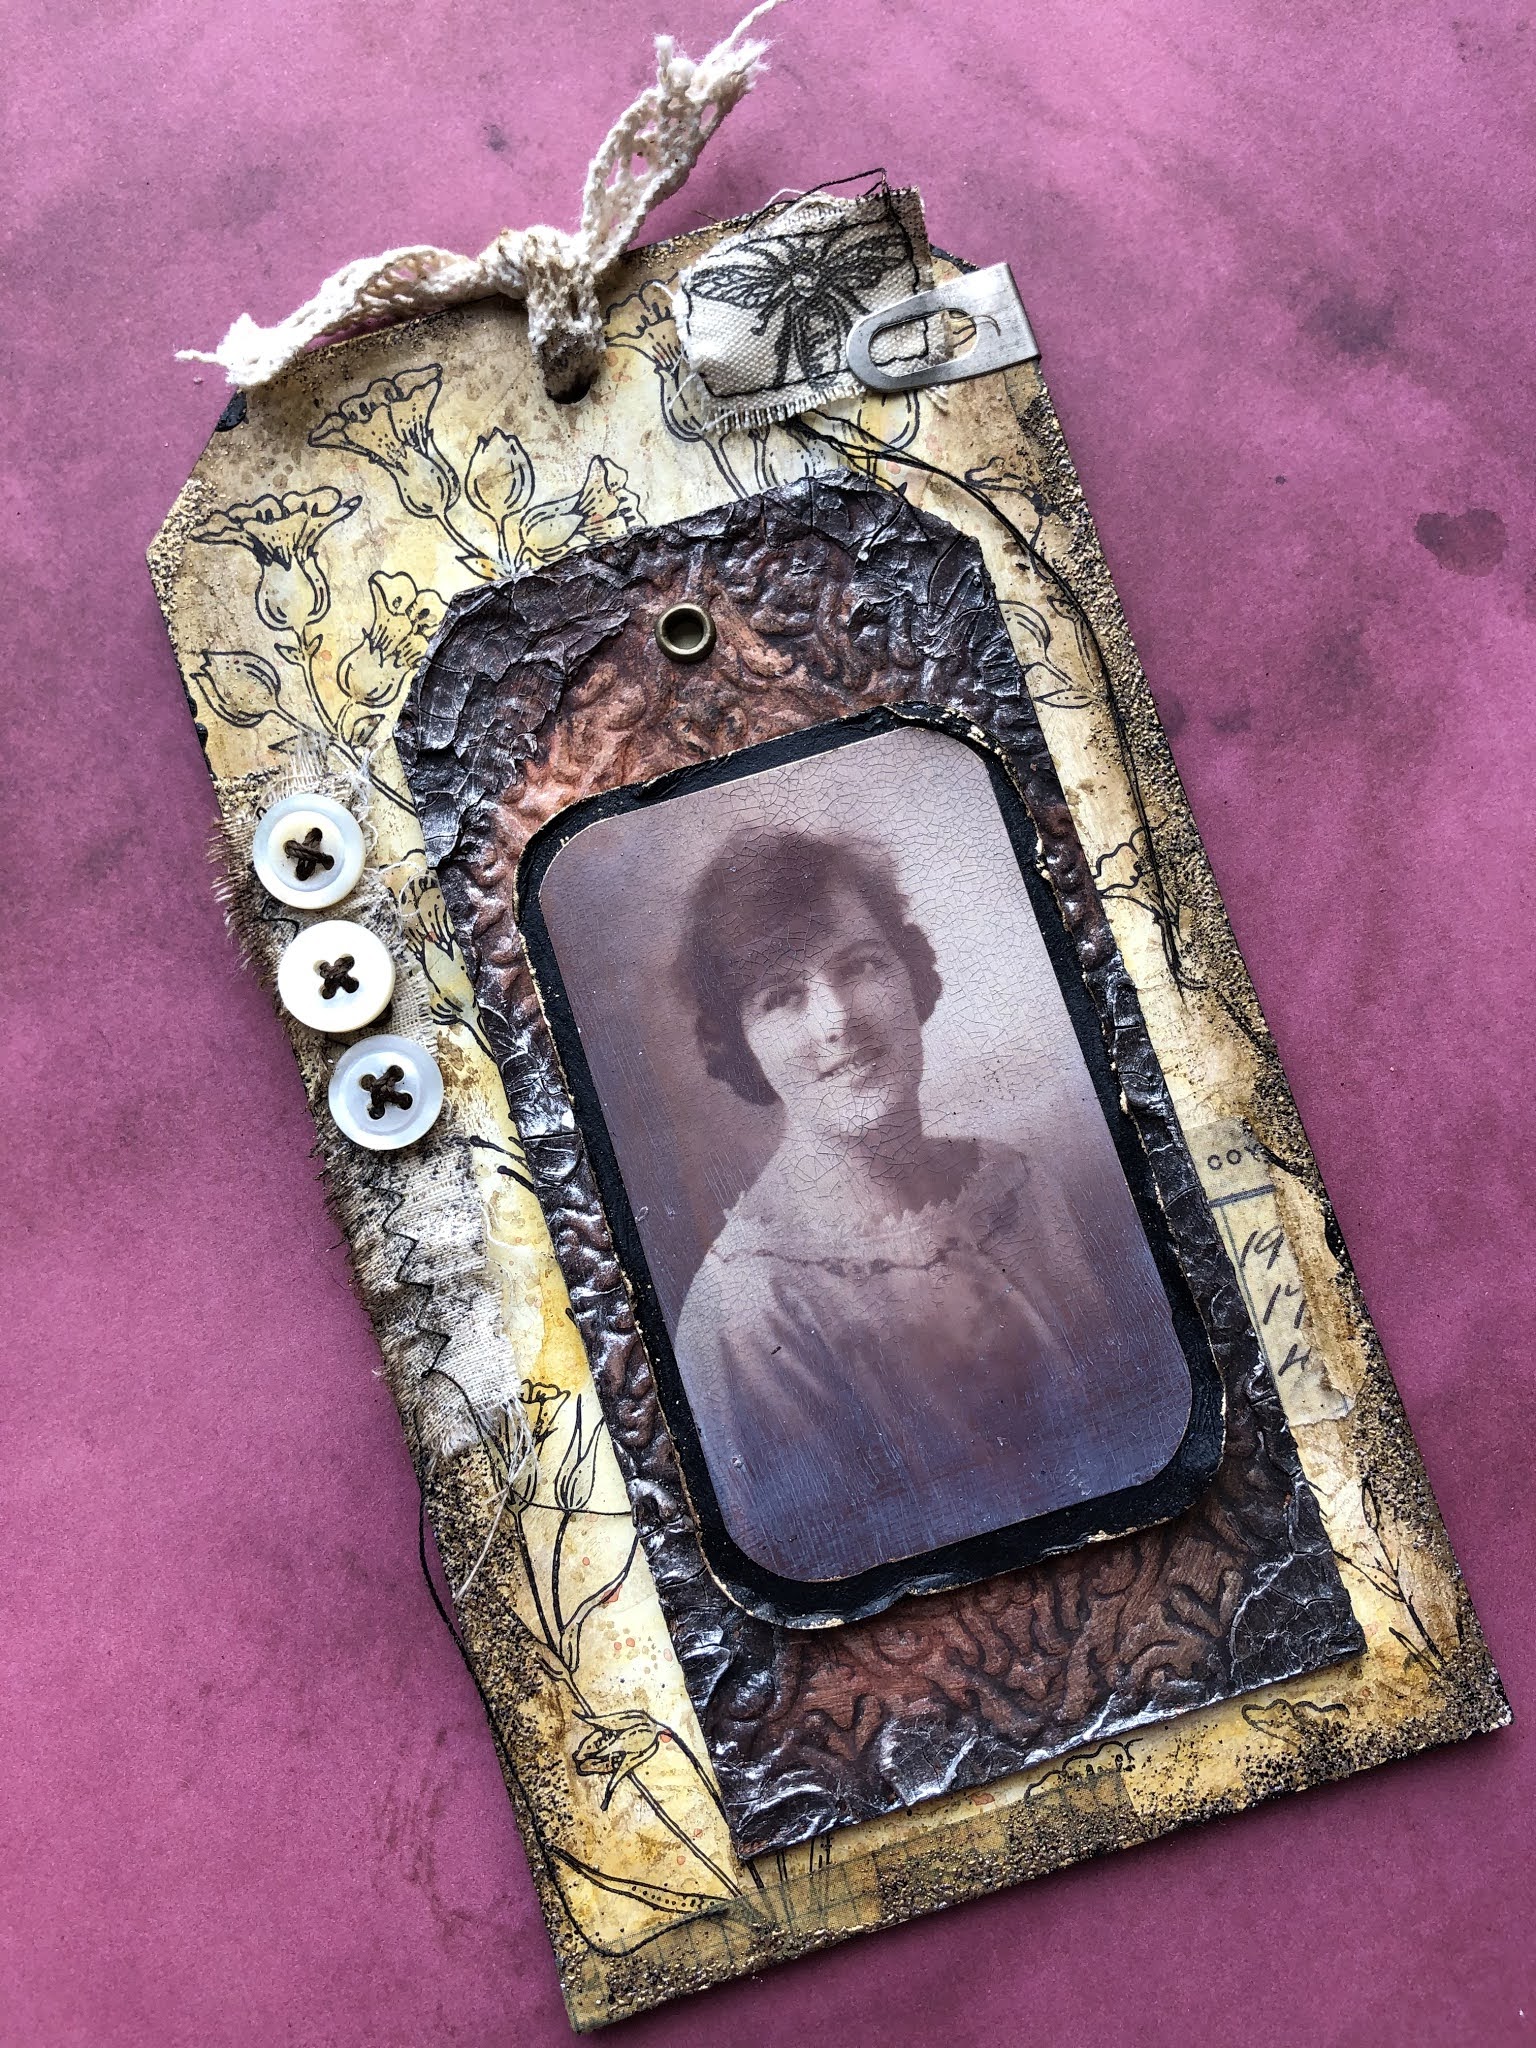
Celia here with a tag for our ‘vintage’ theme this week. I have been making a few vintagey things recently, which is a change from my usual bright colours.

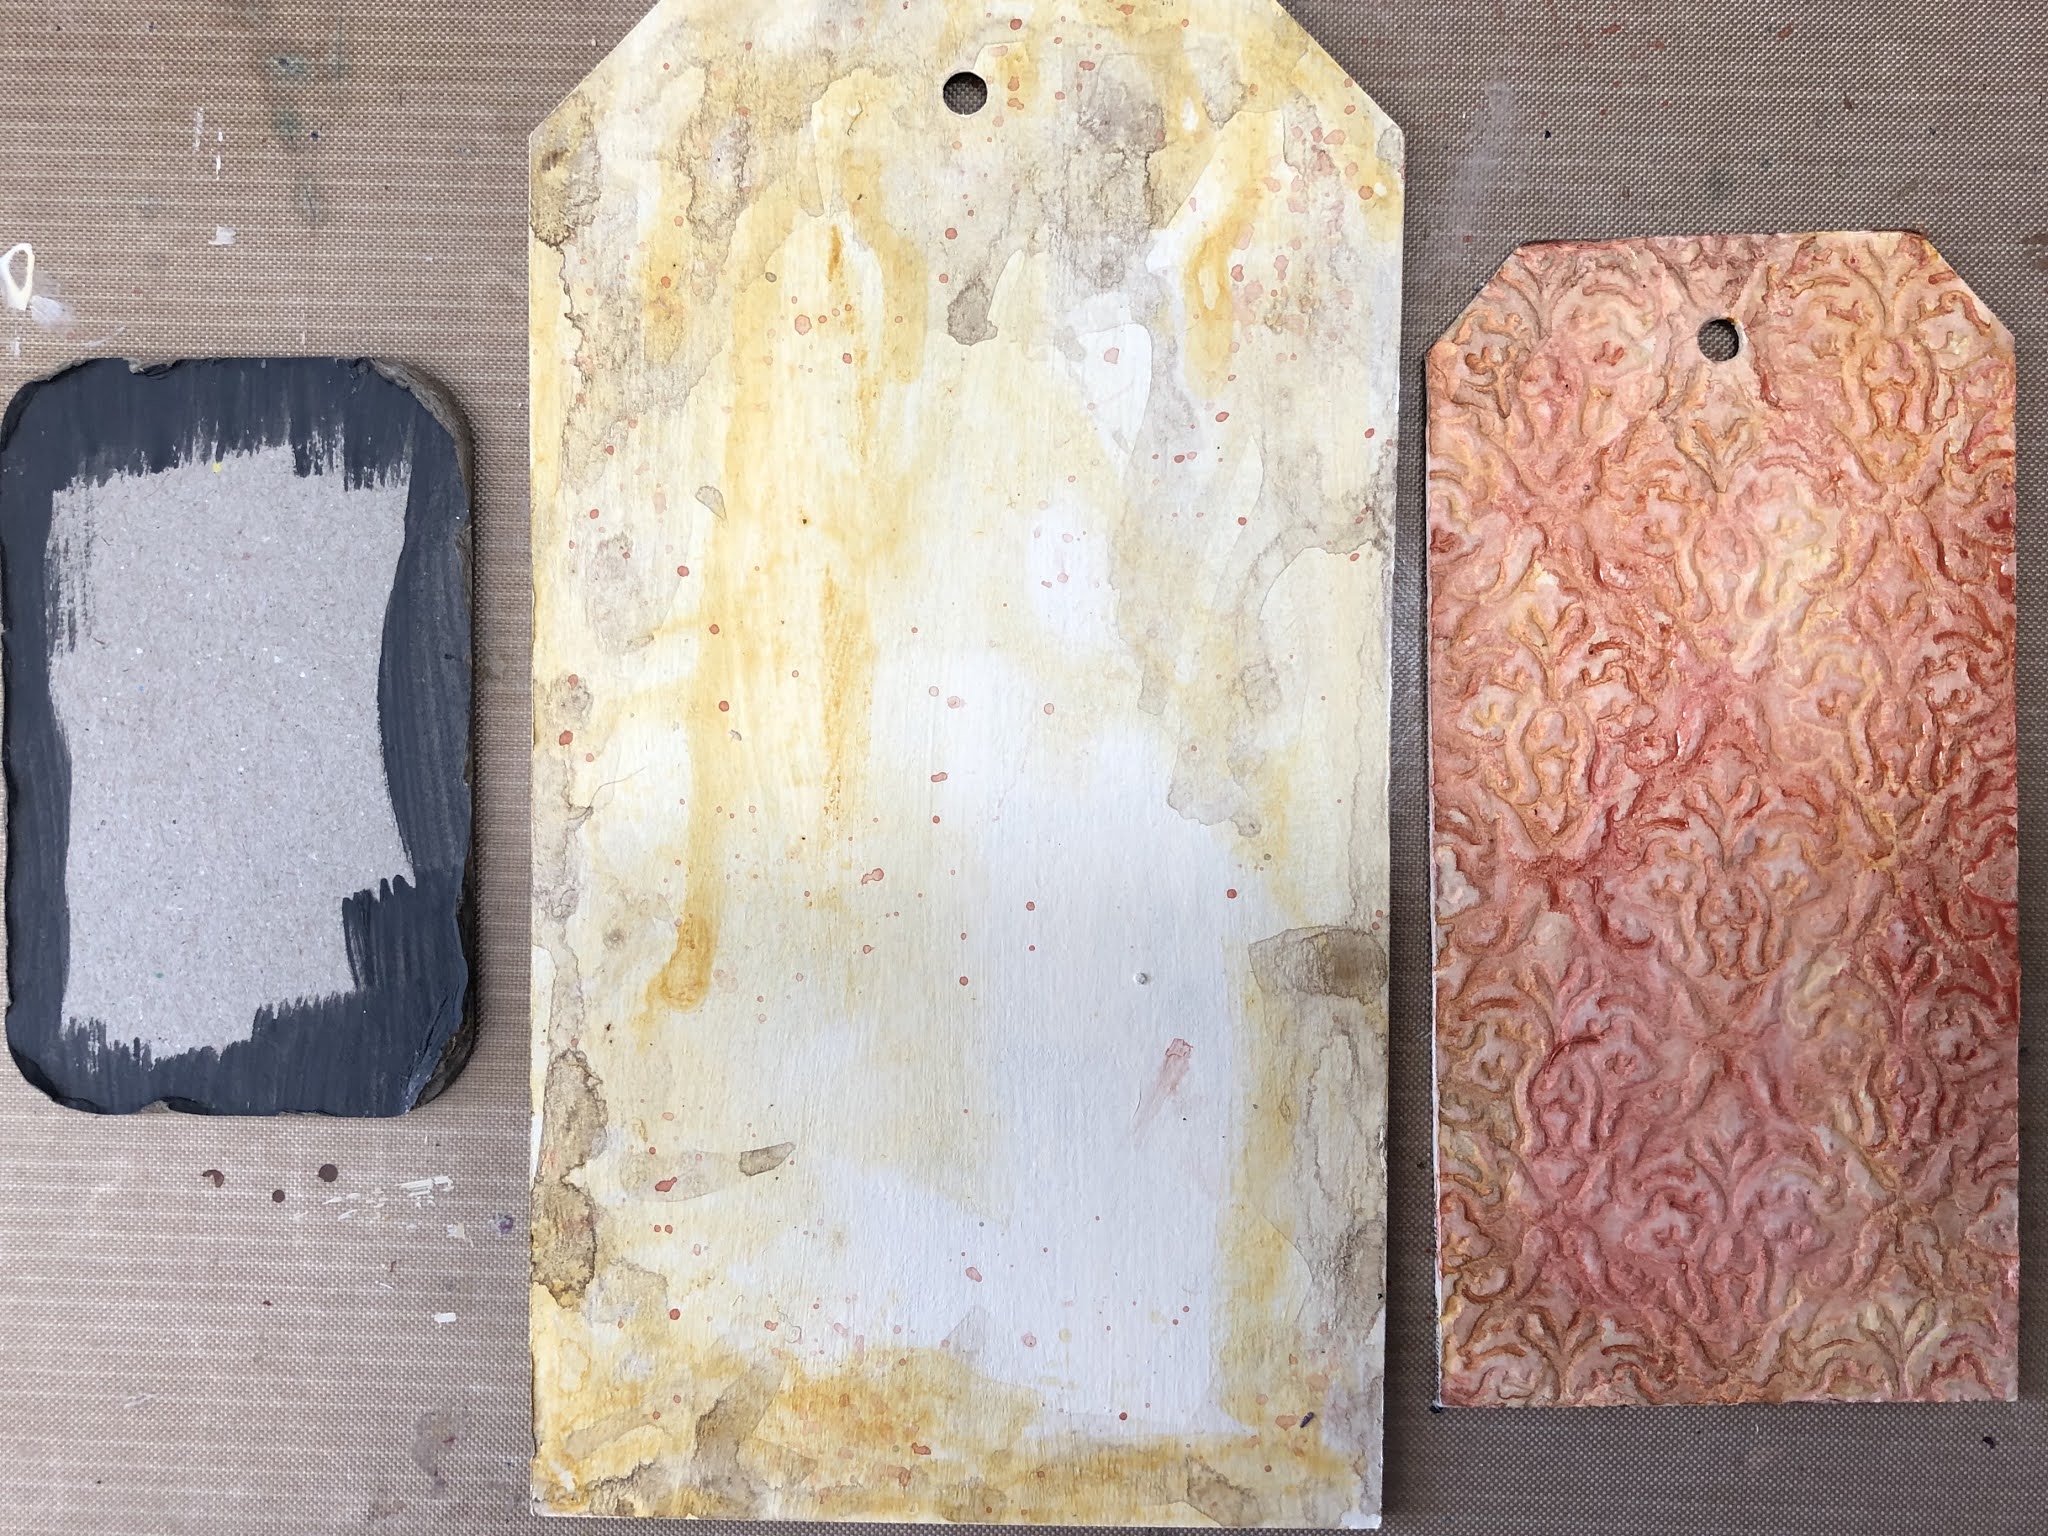
I picked out a couple of tando tags (size 5 and size 9) and a media board. I embossed the small tag with an embossing folder, then primed the tags with Whisper chalk paint and the media board with Relic. Then I added some washes of Yellow Iron Oxide and Raw Umber to age them, followed by English iron oxide on the smaller tag.

Then I added some stamping to the large tag, using the Harebell stamps from Chocolate Baroque. Also some random texture stamps in brown Archival. Then I used some crackle paste round the edges of the small tag and painted it brown when dry, followed by black antiquing cream and some silver gilding paste.


I found an old picture of my granny, scanned it and reduced it in size & printed it onto photo paper. I gave it a coat of matte medium then some One Step Crackle. When this was dried I used grey Antiquing Cream to age the photo. For the media board, I wetted the edges and used a craft knife to peel open some of the layers. Then edged in Paynes Grey and finally treasure gold. 

Then I added a few bits and pieces of fabric, washi tape and buttons before glueing the tags together. My granny was an excellent dressmaker, so the buttons and fabric seams appropriate. I edged the large tag with brown ink, then added some vintage gold embossing powder.


Here’s the finished tag. The greyboard is great for throwing lots of different mediums at so you can really go to town when ageing a piece. 


Thanks for stopping by!

Celia x

Monday, 7 May 2018

Embossing folder texture

Hi it's Brenda here.
I thought I would create a textured media board for embossing folder week and I liked it so much I decided it would become my 'Make and Take' project at Ministry of Mixology last month. (I was well ahead of myself with projects as I had a holiday coming up and wanted to get loads of projects scheduled well before hand).


I adhered a few pieces of torn/cut left over embossed card randomly onto a media board using matte medium and left it to dry between wax paper under a heavy box.


Don't worry about gluing the pieces over the edges, you can remove these when it's perfectly dry.


Next I scraped over some texture sand paste and heat dried it.


Paint a coat of white gesso to give it some tooth for the next layers and then spend quite some time spritzing water, dipping media acrylic paints into it, letting it move around a little and drying it. I repeated this step lots and lots of times using raw umber, quinacridone gold, burnt sienna and carbon black.


I wanted to highlight the textures a little more so I took a palette knife and white gesso and lightly scraped it over keeping the blade flat to the surface.


The White gesso is very stark so mix a dirty watery wash of paynes grey and quin gold and paint over the whole surface, dry it and seal with a varnish - I used soft touch.


I took some elements I had already rusted and a word (I have no idea why I chose the word 'waiting' although there is something special we are waiting for later in the year - that's my unconscious mind taking over perhaps!) and I put it together to finish it off. I'm really happy with this.


The textures from the embossed card are random and give a completely distressed look to the background.

If you have a try with this technique please let us know.

For now have fun creating.

hugs Brenda xxx


Supplies
Embossed card (my own supplies)


Thursday, 15 October 2015

Dry Embossed Halloween ATC


Hi friends! Dana here today sharing the ATC that I created for the Embossing Folder Challenge this week. I really enjoy Halloween crafting, so I'm making the most of it this month with this second creepy card! I put an ATC into a butterfly embossing folder and ran it through my Cuttlebug. I then colored the ATC with orange ink, outlined the butterflies with a black pen, and then lightly sanded the raised butterflies to help them pop.


For the second layer of this card, I stamped and colored a Butterfly and then topped it with a skeleton.


I finished this card with a sentiment sticker and a coat of Rock Candy Stickles.

You can find Artist Trading Cards and more in the Tando Creative Retail Store! We'd love to see what you create with chipboard and an embossing folder! To be in with a chance of winning some great Tando goodies of your choice, please make a piece based on our weekly themes and link your project, not just your blog, using the inlinkz tool located at the top of the Tando Blog. You don't have to use any Tando product, but, if you do, you will be entered into the draw twice! There are no limits to how many times you enter, however, we do request that you only enter your piece for 5 challenges. We look forward to seeing your creations!

Thanks for stopping by today!

Tuesday, 13 January 2015

Queen Bee Mixed Media Board - Embossing Challenge


Hi Tando fans! Dana here today sharing a Mixed Media Board that I altered for the Embossing Challenge this week. I embossed the board with a honeycomb embossing folder and then covered it with a light layer of gesso. I added color with yellow and white mist, distress ink and gelatos. I embossed the bee onto the board using black embossing powder. I finished the piece with a stamped sentiment and some stamped honeycombs. These boards are really fun to work with and hold up well to wet mediums and heat. You can purchase these boards in two sizes in sets of five from the Tando Creative Retail Shop.

http://www.tando-creative.co.uk/catalog/mixed-media-boards-80mm-116mm-p-791.html

We'd love to have you join the Embossing Challenge! To be in with a chance of winning some great Tando goodies of your choice, please make a piece based on our weekly themes and link your project, not just your blog, using the inlinkz tool located at the top of the Tando Blog. You don't have to use any Tando product, but, if you do, you will be entered into the draw twice! There are no limits to how many times you enter, however, we do request that you only enter your piece for 5 challenges. We look forward to seeing your creations!

Thanks for stopping by today!

Saturday, 7 June 2014

Yellow and Black - Bee Happy Arch


Hi Tando fans! Dana here today sharing an arch for the Black and Yellow theme this week. I've been wanting to use this set of embossing folders for some time and this color palette was the motivation I had been looking for. I started with an inside cut from the Arabian-Style Layered Arch Frame.


I added some small flowers from the Floral Grab Bag. I primed them with several light coats of gesso and then dabbed on some pale yellow ink and finished them with some doodling and a metal pearl.


I chose a small cloud from the Grab Bag of Clouds to add to this arch for a touch of whimsy. I just used a simple coat of gesso to color this piece that I topped with an embossed bee.


Thanks so much for stopping by today!