Showing posts with label metal. Show all posts

Friday, 26 November 2021

The World in a Matchbox - by Kim


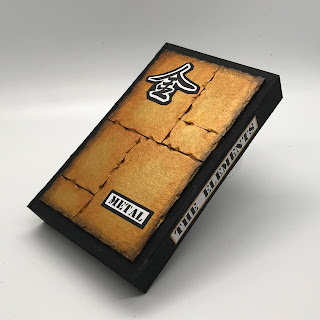
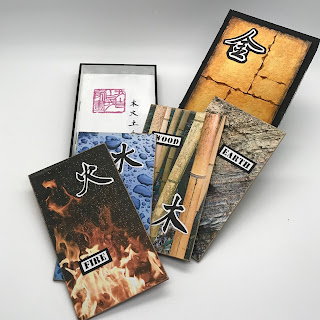
Ever thought it would be nice to carry your whole world in a matchbox? Well, I’ve sort of done it by putting all the Oriental astrological elements in one box; fire, earth, metal, water, wood.

I’ve used, from Tando Creative, their Matchbox, Medium with inserts. It arrives flat packed but assembly is easy and straightforward. I used ordinary PVA to stick it together.


I decided that I would use four inserts and the cover would be the fifth element, and that would be a dramatic ‘metal’ finish. 


For the individual 'metal' plates I used pieces from Tando Offcuts. I chopped the edges randomly to to make them less than perfect, and more interesting, then glued them to the surface of the cover. (Be careful when using sharp blades!)


Base coat the entire cover - except the plates - with Lamp Black, including going inside by a brush width incase it is visible on the finished piece.


I painted two coats of DecoArt Venetian Gold on the plates so that it was well covered. Next I aged the edges by blending Quinacridone Gold Media Fluid Acrylic. Finally, I blended Paynes Grey Media Fluid Acrylic around the outside, to give more depth to the ageing.


Now to the inserts. I printed four pictures*, one for each of the remaining elements, and glued them on. I cut them slightly larger than the insert so that I could use coarse sandpaper to ‘blend’ the edges to fit.
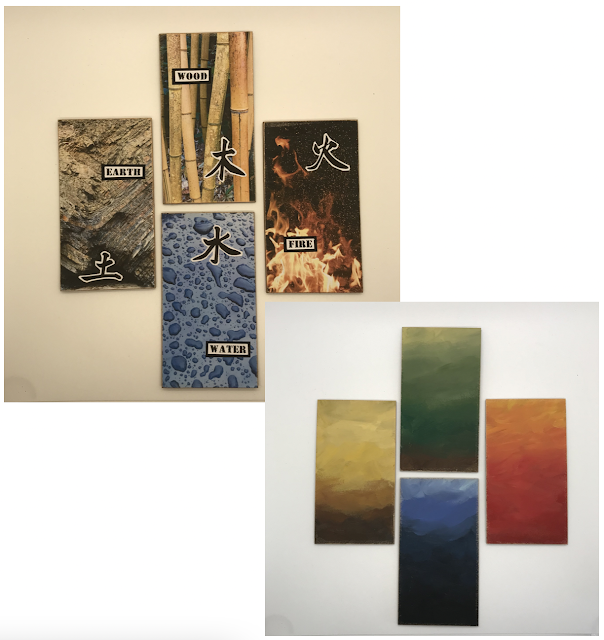


To embellish the pictures I printed the Chinese characters and words. For the back of each card I used the element’s associated colour; earth - yellow, wood - green, fire - red, water - black,(metal is white) and a slip-slap graduated blend of DecoArt colours. A little gold wax rub-on round the edges finished it off.
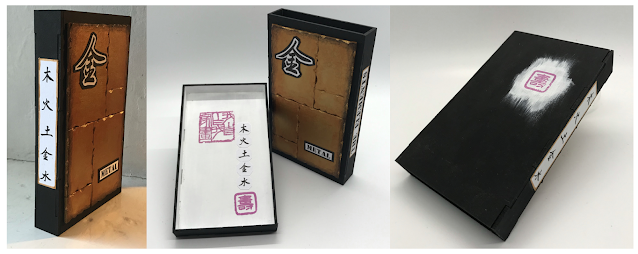


Back to the cover. I added characters, words. and title to the outer. The inner tray was painted black outside and white inside. I stamped ‘I paint what I like’, added characters, and finished with ‘long life’.


(*Make sure you have permission to use the pictures)


Products used:

Tando Creative : Matchbox Medium with inserts

Tando Creative : Off cuts 50g

DecoArt Colours:

Venetian Gold Metalic acrylic paint

Lamp Black

Titanium White 

Media Acrylics:

Quinacridone Gold and Paynes Grey

Various colours of your choice for the backs

Also:

Gold rub-on wax

Pictures as appropriate 

Rubber stamps with Chinese characters


Friday, 16 February 2018

Anything Goes Week - Time Flies

Morning everyone,

Today I've got a tag/hanging for you that I was playing with backgrounds for a while on, and loved this bright but grungy style.  I also like putting colours together that don't initially 'go', but always end up working.


The background was some red, orange and pink paint, just randomly applied to the tag.  To pull it together I used a Media Mister in Violet, and spritzed the tag all over.  I then spattered black, and then white paint on the tag, drying in between stages so they didn't mix.  A honeycomb heart stencil was used with black modelling paste to give texture, and some number's stencilled to one side.  The sentiment is a printable.


The heart in the centre was stencilled with the treadplate stencil, then given the same red and pink paint treatment as the background.  On top of this, white antiquing cream was added and rubbed back when dry.  I also spattered with black and white paint.


Cogs were added, using a very very simple rust technique, it's just two colours, Burnt Umber and Pyrrole Orange, stabbed loosely with a paintbrush and nice and wet, and then heat dried until the paint bubbles slightly.  This gives great texture and is very quick to do.


The clock in the centre was a metal embellishment with separate hands.  I first gave it the rust treatment without heat, and then used Crackle Glaze all over once glued together.  The crackle glaze helps to hold it as well.  I used White Antiquing cream again in the cracks of the glaze, and wiped back when dry.  I wanted a matt effect on this and the cogs, so used Ultra Matte Varnish to seal.


Don't forget to check out the rest of the teams design's this week :)

Thanks for stopping by.

Nikki K.
xxx

Products Used:
Tando Creative Tags, Cogs, Hearts & Mini Stencil - Criss Cross.
Andy Skinner stencil - Industrial Elements
DecoArt Media: Pyrrole Orange, Pyrrole Red, Primary Magenta, Titanium White, Carbon Black, Burnt Umber.  White Antiquing CreamBlack Modelling PasteMedia Mister-Violet.
Mixed Up Magazine Printables.
Rusty Wire.


Saturday, 13 January 2018

Fax Metal(s)

Hi. it's Brenda here and I would like to say Happy New Year to you all from me.


My sample for this week's theme of 'Faux Metal' includes probably one of the most simplest ways you will find for creating a TARNISHED SILVER  look. I have been teaching this very quick technique recently for part of a workshop project and when the frame I used it on is layered with other elements it looks really quite cool.


My Tando make for the theme has the Tarnished Silver technique on the clock - it's so easy - but I've also used metallic lustres, other media paints and gesso to create this overall metallic look to the piece and added an easel die cut on the back


Firstly take the media board (cut from Tando greyboard) and give it a coat of black gesso to seal it and dry. Then paint a coat of media silver acrylic paint and dry before stamping with shapes and text (I used the Andy Skinner Steampunk set).


I wanted to keep the silver feel to this background so I mixed some gesso with the silver paint and when the ink was perfectly dry I rubbed it all over with my finger whilst spritzing it with water. I then dabbed a piece of kitchen roll into it to remove quite a lot of the paint before heat drying it. I also distressed the edges.
TOP TIP
I will nearly always distress/sand the edges of my pieces and use distress inks to frame the substrate  also to give it a lovely timeworn look.


Take the clock  - you can use chipboard or die-cuts for this technique - and paint it with black gesso, heat dry and then give it a rough coat of media silver acrylic paint. When that is dry randomly sand the edges so that you go back to the black or the original board and then blend in a dark brown distress ink. If you need to lighten some of the silver rub a very little of the silver paint or silver metallic lustre in random places to bring back some of the shine. That's it!!!!!!


 The inner circle of the clock was first painted with the silver paint, sanded and scratched and rubbed over with a little elegant emerald metallic lustre then covered with ground espresso distress ink. I flicked it with water and then dried it and repeated a second time.


The large cog was painted with media acrylic gold paint and sealed with ultra matte varnish. I lightly sanded some edges rubbed in vintage photo distress inks then also rubbed over some black shimmer metallic lustre and then dipped it in water and dragged a dry wetwipe over it ro remove some. I still
have a bit of a silvery effect on it. To finish I added some stamped scratches using Andy's Toxic set.


The heart was painted with a custom mix of paints which gave me a gorgeous bronze shade. This chart shows the stages it went through to achieve the final colour.


A coat of the custom colour. a mix of silver and black stencilled through the Tando cog stencil and then some splatters of silver and the silver/gesso mix finished it off.


The number was simply painted with black gesso, rubbed with a little silver spark metallic lustre and then the edges distressed with sand paper and vintage photo distress ink rubbed in.


The word was also painted with black gesso, stippled with the natural sponge and the silver/gesso mix and distressed.


Well I hope you have enjoyed the Faux Metals theme this week and that it's given you some inspiration for your own projects.


You can find a downloadable PDF tutorial for this project HERE.

Thanks for stopping by.

hugs Brenda xxx


Products


Thursday, 11 January 2018

Faux Metal week with Nikki


Hi everyone,

It's my turn today here on the Tando Blog, for Faux Metal week.  I inevitably included a lot of rust!

The background is a media board, stencilled with modelling paste, painted in silver, and then a wash of Payne's Grey with a little salt added.  Rub off the salt when dry for a weathered metal look.  I added Quinacridone Gold in certain areas and to the edges, and put some on thick in places, so that when heat dried it bubbled up, giving extra texture.


I gave a pair of wings Andy's Skinner's Rust treatment - and bound them in rusty wire.  The skull was a resin skull I had at home, painted in silver and then antiqued with Black Antiquing Cream.  I added some black stencilling to the background, just a couple of 'marks'.


I gave a book plate (minus it's bottom scroll) a quick rust technique in just two colours, Raw Umber and Pyrrole Orange, and the same with a couple of 'screws'.  Toxic Hazard was stamped onto card, and aged with Yellow Iron Oxide, then cut to fit the book plate.  Onced fixed to the background I added two holes to the top of my board with a Cropodile, and added some more rusty wire with curls.


I had great fun making this guy :)  Hope you like him too.  Don't forget to check out the rest of the team's makes this week too.

Happy Crafting,

Nikki K.
xxx

Products Used:

Tando Creative -
Book Plates
Media Board
Wings
Rusty Wire

DecoArt Media -
Quinacridone Gold
Payne's Grey
Metallic Silver
Yellow Iron Oxide
Black Antiquing Cream
Tinting Base
Modelling Paste
Sand Texture Paste

Andy Skinner Stamp -
Toxic


Wednesday, 12 January 2011

Home hanger

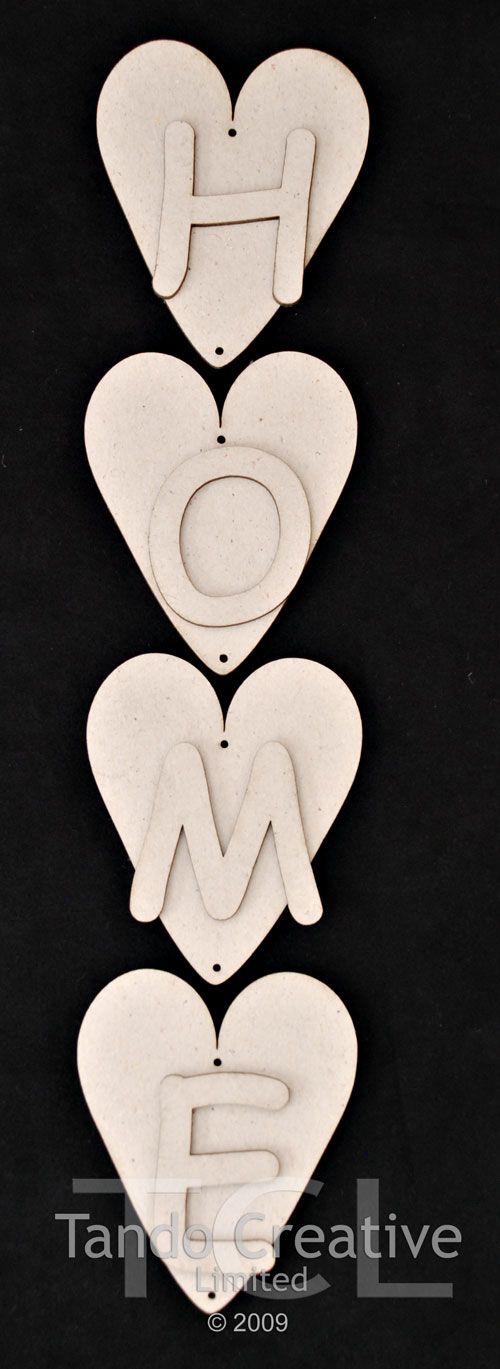
I finally used the letters from the heart hanger set to make my own  plaque.  If you remember I previously used the hearts for other projects.  I had lots of fun with this ... layering and making flowers and cutting some yummy basicgrey paper.


The letters are covered with some metal that had been put through the script cuttlebug embossing folder.
With the thin metal then adhered to the chipboard I coloured the surface with peeloff marker pens and then sanded it back slightly to expose the silver metal beneath. 


A few paper flowers and a twisted wire hanger and hey presto... another pretty to hang in my living space.

Happy crafting
hugs
Chris xx