Showing posts with label Matchbox. Show all posts

Tuesday, 31 October 2023

ATC Matchbox - A Clockwork ...

 Just a simple ATC box this week, with a little faux leather and steampunk.

You will need tissue paper and some old watch or clock parts. 

Once you have glued your box together, and it is dry spread a thin coat of PVA glue on one side. Lay the tissue on the glue then give a little squidge with your fingers to wrinkle the surface. Repeat on the other sides. Set it aside to dry.

First, base coat the entire box with Burnt Umber, when dry, dry brush the surface with Primary Red.

To enhance the texture of the wrinkles lightly dry brush with gold.

I just happened to have a few cogs and an old strap. I gave them a bit of a polish and used strong glue hold them in place.


Products:
DecoArt Burnt Umber
DecoArt Primary Red
DecoArt Venetian Gold
Tissue Paper
Random watch/clock parts


Tuesday, 26 September 2023

Halloween B and H Collection ATC Matchbox - by Kim

 You'll have plenty of time to get this done for Halloween!

Construction:

First, build your ATC matchbox and drawer (see previous posts for construction if necessary). 

We need to make a space for our skeleton, a hidden layer! For this I used leftover greyboard, about 85x105mm, and some coffee stirrers. 
I cut a coffin shaped hole in the main board and built up the edges with coffee stirrers, I used clothes pegs to hold it all in place until the glue had set. 

Paint everything black. When dry paint the skeleton onto the box top so that it will appear to be laying in the coffin. I used some pumpkins from the Minis - Mixed Halloween set to add extra scariness. After painting I glued them so they appear to be coming out of the coffin.

When it's done, glue the coffin layer on the box top so that the skeleton is revealed behind the pumpkins.

Next, I needed the graveyard scene to go on top. I used another piece of leftover greyboard for the ground, same size as the coffin layer, and a smaller piece for the gravestone. The 'freshly dug' mound is made of texture paste - this will take quite a while to cure properly as it is a thick layer. The spade is a piece if bamboo stick from one of those room smelly jars with a piece of greyboard for the blade. As the texture paste dried a crack appeared just the right size for the spade, but otherwise use a craft knife to cut a slot. The cat was leftover from a Casa Bonita project.

I used ribbon as a hinge for the graveyard scene.


Painting:

I used Forest Green and Foliage Green for the grass, the mound is Burnt Umber with a light beige dry brushed on to the raised detail. The gravestone was painted Zinc grey with random streaks of black, Green Gold and Quinacridone Gold Fluid acrylics, and light beige. The inscriptions are in light beige. 
The cat is black with Tangerine eyes,

Underneath, the coffin layer is Burnt Umber, Forest Green edging, and black surround to the hole - all drybrushed on to blend with each other.

The bat dangles from a piece of narrow ribbon and 'appears' from the coffin when the grave is opened. It is from the Minis - Mixed Halloween set.

The matchbox is black inside and out.

ATC cards and coins:


I just had to make the cards in to mini gravestones. Trim the top to a suitable shape, base coat in Zinc grey, add an inscription in light beige, then add colours as per the gravestone on the lid.

The coins are decorated to look like pumpkins. Basecoat in Burnt Orange, add dark stripes with Burnt Umber - use this colour to round-off the bottom of the segments to give it a pumpkin shape. Drybrush Burnt Umber as shadow around the bottom. Use light beige to add highlights to the tops. Finish with a green stalk.

Add a suitable title for your collection of ATCs and ...

... that's it.

If you don't have large enough pieces of greyboard hanging around for the coffin and graveyard, heavy cardboard or art board will work. Paint colours are not too important, any greens, browns, beige, and orange will do.

I hope you enjoy putting this spooky project together for Halloween - post yours on the Tando Creative Zone on Facebook!

(Why Burke and Hare? - Link to their Wikipedia page)

Products:

ATC Matchbox with cards and coins
Tando Minis - Mixed Halloween
150g Greyboard Offcuts - useful for projects
Coffee stirrers or similar

DecoArt Americana Paints
I used Lamp Black, Forest Green, Foliage Green, Burnt Umber, Burnt Orange, Oyster Beige.
Green Gold and Quinacridone Gold are DecoArt Media Fluid Acrylics.

Friday, 26 November 2021

The World in a Matchbox - by Kim


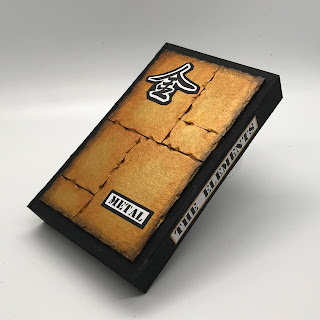
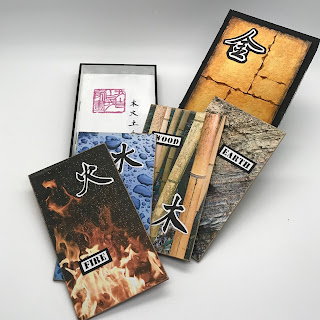
Ever thought it would be nice to carry your whole world in a matchbox? Well, I’ve sort of done it by putting all the Oriental astrological elements in one box; fire, earth, metal, water, wood.

I’ve used, from Tando Creative, their Matchbox, Medium with inserts. It arrives flat packed but assembly is easy and straightforward. I used ordinary PVA to stick it together.


I decided that I would use four inserts and the cover would be the fifth element, and that would be a dramatic ‘metal’ finish. 


For the individual 'metal' plates I used pieces from Tando Offcuts. I chopped the edges randomly to to make them less than perfect, and more interesting, then glued them to the surface of the cover. (Be careful when using sharp blades!)


Base coat the entire cover - except the plates - with Lamp Black, including going inside by a brush width incase it is visible on the finished piece.


I painted two coats of DecoArt Venetian Gold on the plates so that it was well covered. Next I aged the edges by blending Quinacridone Gold Media Fluid Acrylic. Finally, I blended Paynes Grey Media Fluid Acrylic around the outside, to give more depth to the ageing.


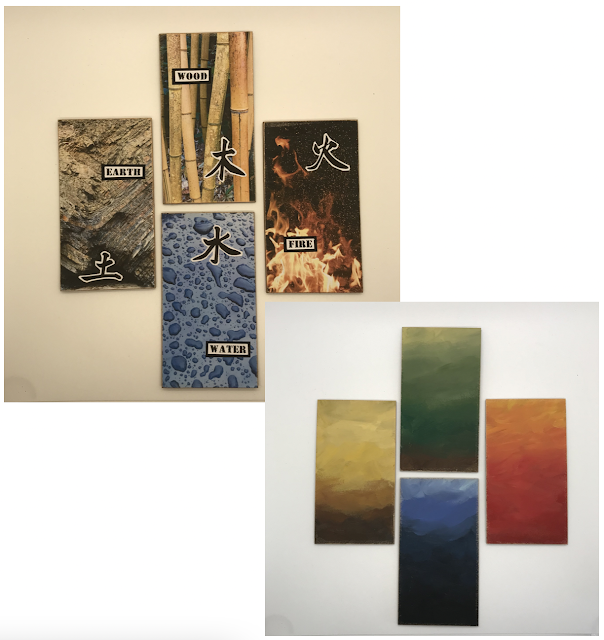
Now to the inserts. I printed four pictures*, one for each of the remaining elements, and glued them on. I cut them slightly larger than the insert so that I could use coarse sandpaper to ‘blend’ the edges to fit.


To embellish the pictures I printed the Chinese characters and words. For the back of each card I used the element’s associated colour; earth - yellow, wood - green, fire - red, water - black,(metal is white) and a slip-slap graduated blend of DecoArt colours. A little gold wax rub-on round the edges finished it off.


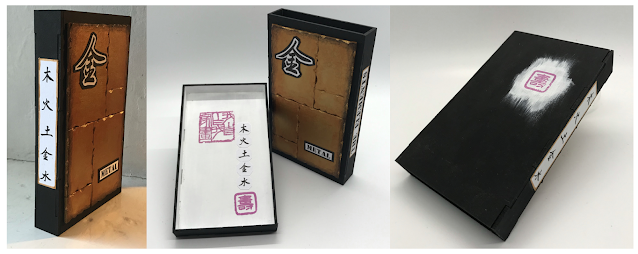
Back to the cover. I added characters, words. and title to the outer. The inner tray was painted black outside and white inside. I stamped ‘I paint what I like’, added characters, and finished with ‘long life’.


(*Make sure you have permission to use the pictures)


Products used:

Tando Creative : Matchbox Medium with inserts

Tando Creative : Off cuts 50g

DecoArt Colours:

Venetian Gold Metalic acrylic paint

Lamp Black

Titanium White 

Media Acrylics:

Quinacridone Gold and Paynes Grey

Various colours of your choice for the backs

Also:

Gold rub-on wax

Pictures as appropriate 

Rubber stamps with Chinese characters


Tuesday, 16 November 2021

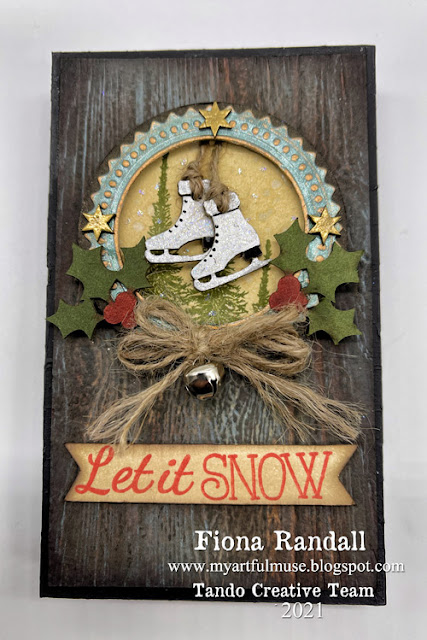
Let it Snow- Anything Goes Week - Fiona Randall


Morning All t's Anything goes week here on the Tando Blog.

Following on from my Facebook live over on Crafting Together With All Brands last week

You can see the Video HERE

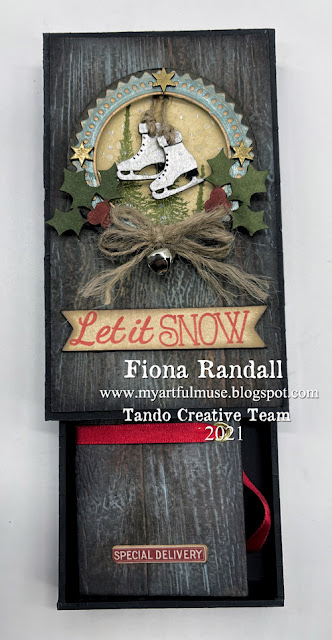
I decided on creating another of the Tando Medium Matchboxes again using a Christmas Theme along with some Christmas Themed Tando Elements.


After assembly of the matchbox both cover and insert drawer were given a coat of DecoArt Chalky Finish in Carbon black. Then finished with a coat of DecoArt Media Ultra Matte Varnish.
Water colour cardstock was embossed with a Lumber 3d Embossing Folder then spritzed and sprayed with Distress Ink and Oxide Sprays. Edged in Ground Espresso Distress Ink. This was then adhered to the matchbox cover with DecoArt Decoupage Matte Glue.
Next up the Decoration using Tando Elements and a Die cut frame. Some stamping and glitter touches and a little Jute String bow with bell added .


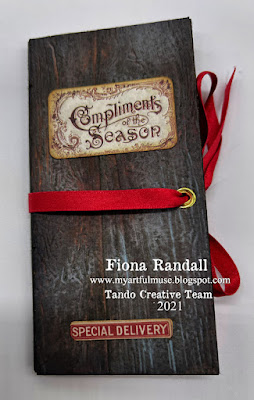
I decided to create a little gift card holder booklet using two of the matchbox inserts for my covers.


The covers were decorated to match the outer matchbox cover. With some ephemera added for interest.


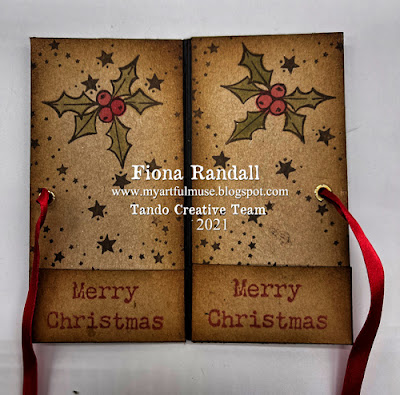
The inside covers were created using craft card and stamped in the christmas theme.
A strip of black card was then cut to create the hinge mechanism for the booklet and adhered to the front and back cover before attaching the Inner covers. holes were then punched into the covers and set with eyelets before threading some ribbon through to act as a closure.
A fun and easy project to complete and something different for gift giving.
Thanks for taking the time to stop by and read. Do come back the rest of the week to see what the DT has in store fore you.

PRODUCTS USED.


OTHER PRODUCTS USED.

Tim Holtz 3d Embossing Folder - Lumber
Tim Holtz Switchlet Embossing Folder- Seal.
Tim Holtz Distress Spray Stain- Walnut Stain, Vintage Photo, Frayed Burlap
Tim Holtz Distress Oxide Spray-  Evergreen Bough.
Tim Holtz Seasonal Distress Mica Spray- Frosted Juniper
Tim Holtz Distress Ink Pad- Ground Esspresso, Antique Linen, Forest Moss.
Tim Holtz Ideology- Christmas Snippets Ephemera.

Jute String
Silver Bell
Glitter
Gold Wax
Black Posca Pen
Ribbon
Gold Eyelets.
Various christmas stamps from my stash.


Thursday, 16 September 2021

Anything Goes Week- Fiona Randall


Morning all it's Anything Goes Week here on the Tando Blog.

I love the Tando Matchboxes both the deep and the shallow versions.

They lend themselves to so many decorating options and I just can't stop paying around with them.

I have used the medium shallow matchbox for my project this week.

Full Frontal View.


Angled Front View.


I started by applying Modelling Paste through my Star Shower Stencil to the top and sides of the matchbox. I then took one of the Matchbox inserts and  and applied the  Tando Harlequin extra thins to opposite corners and The Tando Flourishes to the opposing opposite corners.This was then glued to the Matchbox top. Next step was to stamp and emboss onto a piece of black card using one of my new stamps from the Sacred Set. This was then cut to size and attached to the the resin frame. The frame was then attached to the top of the matchbox. The whole matchbox was then given a coat of DecoArt Chalky Finish in Carbon making sure I got into all the nooks and Crannies. The whole piece was then dry brushed with DecoArt Media Fluid Acrylics. I used a mix of Dioxazine purple mixed with Silver Metallic to create a Metallic Purple shade. DecoArt Metallic Lustre in Goldrush was then applied to highlight all the high points. A fun project to create and this one is to store my bracelets in.
Thanks for stopping by today.
Do check back to see what the rest of the DT are up to.
Stay Safe
Fiona xx

PRODUCTS USED.


Other Products

Frame cast from resin using Finnabair Mold

Black Cardstock
Gold Embossing Powder.


Monday, 9 November 2020

Project: Artist in Residence


Hi there fellow artists! Celia here.

This whole 'Artists in Residence' idea came from an article in Cloth Paper Scissors magazine, by one of my art inspirations - Seth Apter. He went to Taos in New Mexico to immerse himself in art and just create stuff. I thought this second lockdown would be the perfect time to do the same. When life gives you lemons, and all that.

So I was working on a small matchbox and that has become the first piece in my ‘installation’. Pretentious, moi? It has been well and truly Sethed, if that is a verb. Lots of layers, paint, stencils, stamping, embossing powder... So much so that the little book is too fat for the drawer. Oh well.


I’ve also made a door for my sign, which is, of course, purple. 

What’s next, I hear you ask? Who knows. I might even finish off one of my (many) unfinished projects. Most likely though is that I will start something new. I am ready to immerse myself in art now and see what happens as I dive into the pool of creativity.