Tuesday, 24 May 2022

Hex Tech Tuesday - Haunted Windmill by Kim

I think I got a bit carried away this time! 
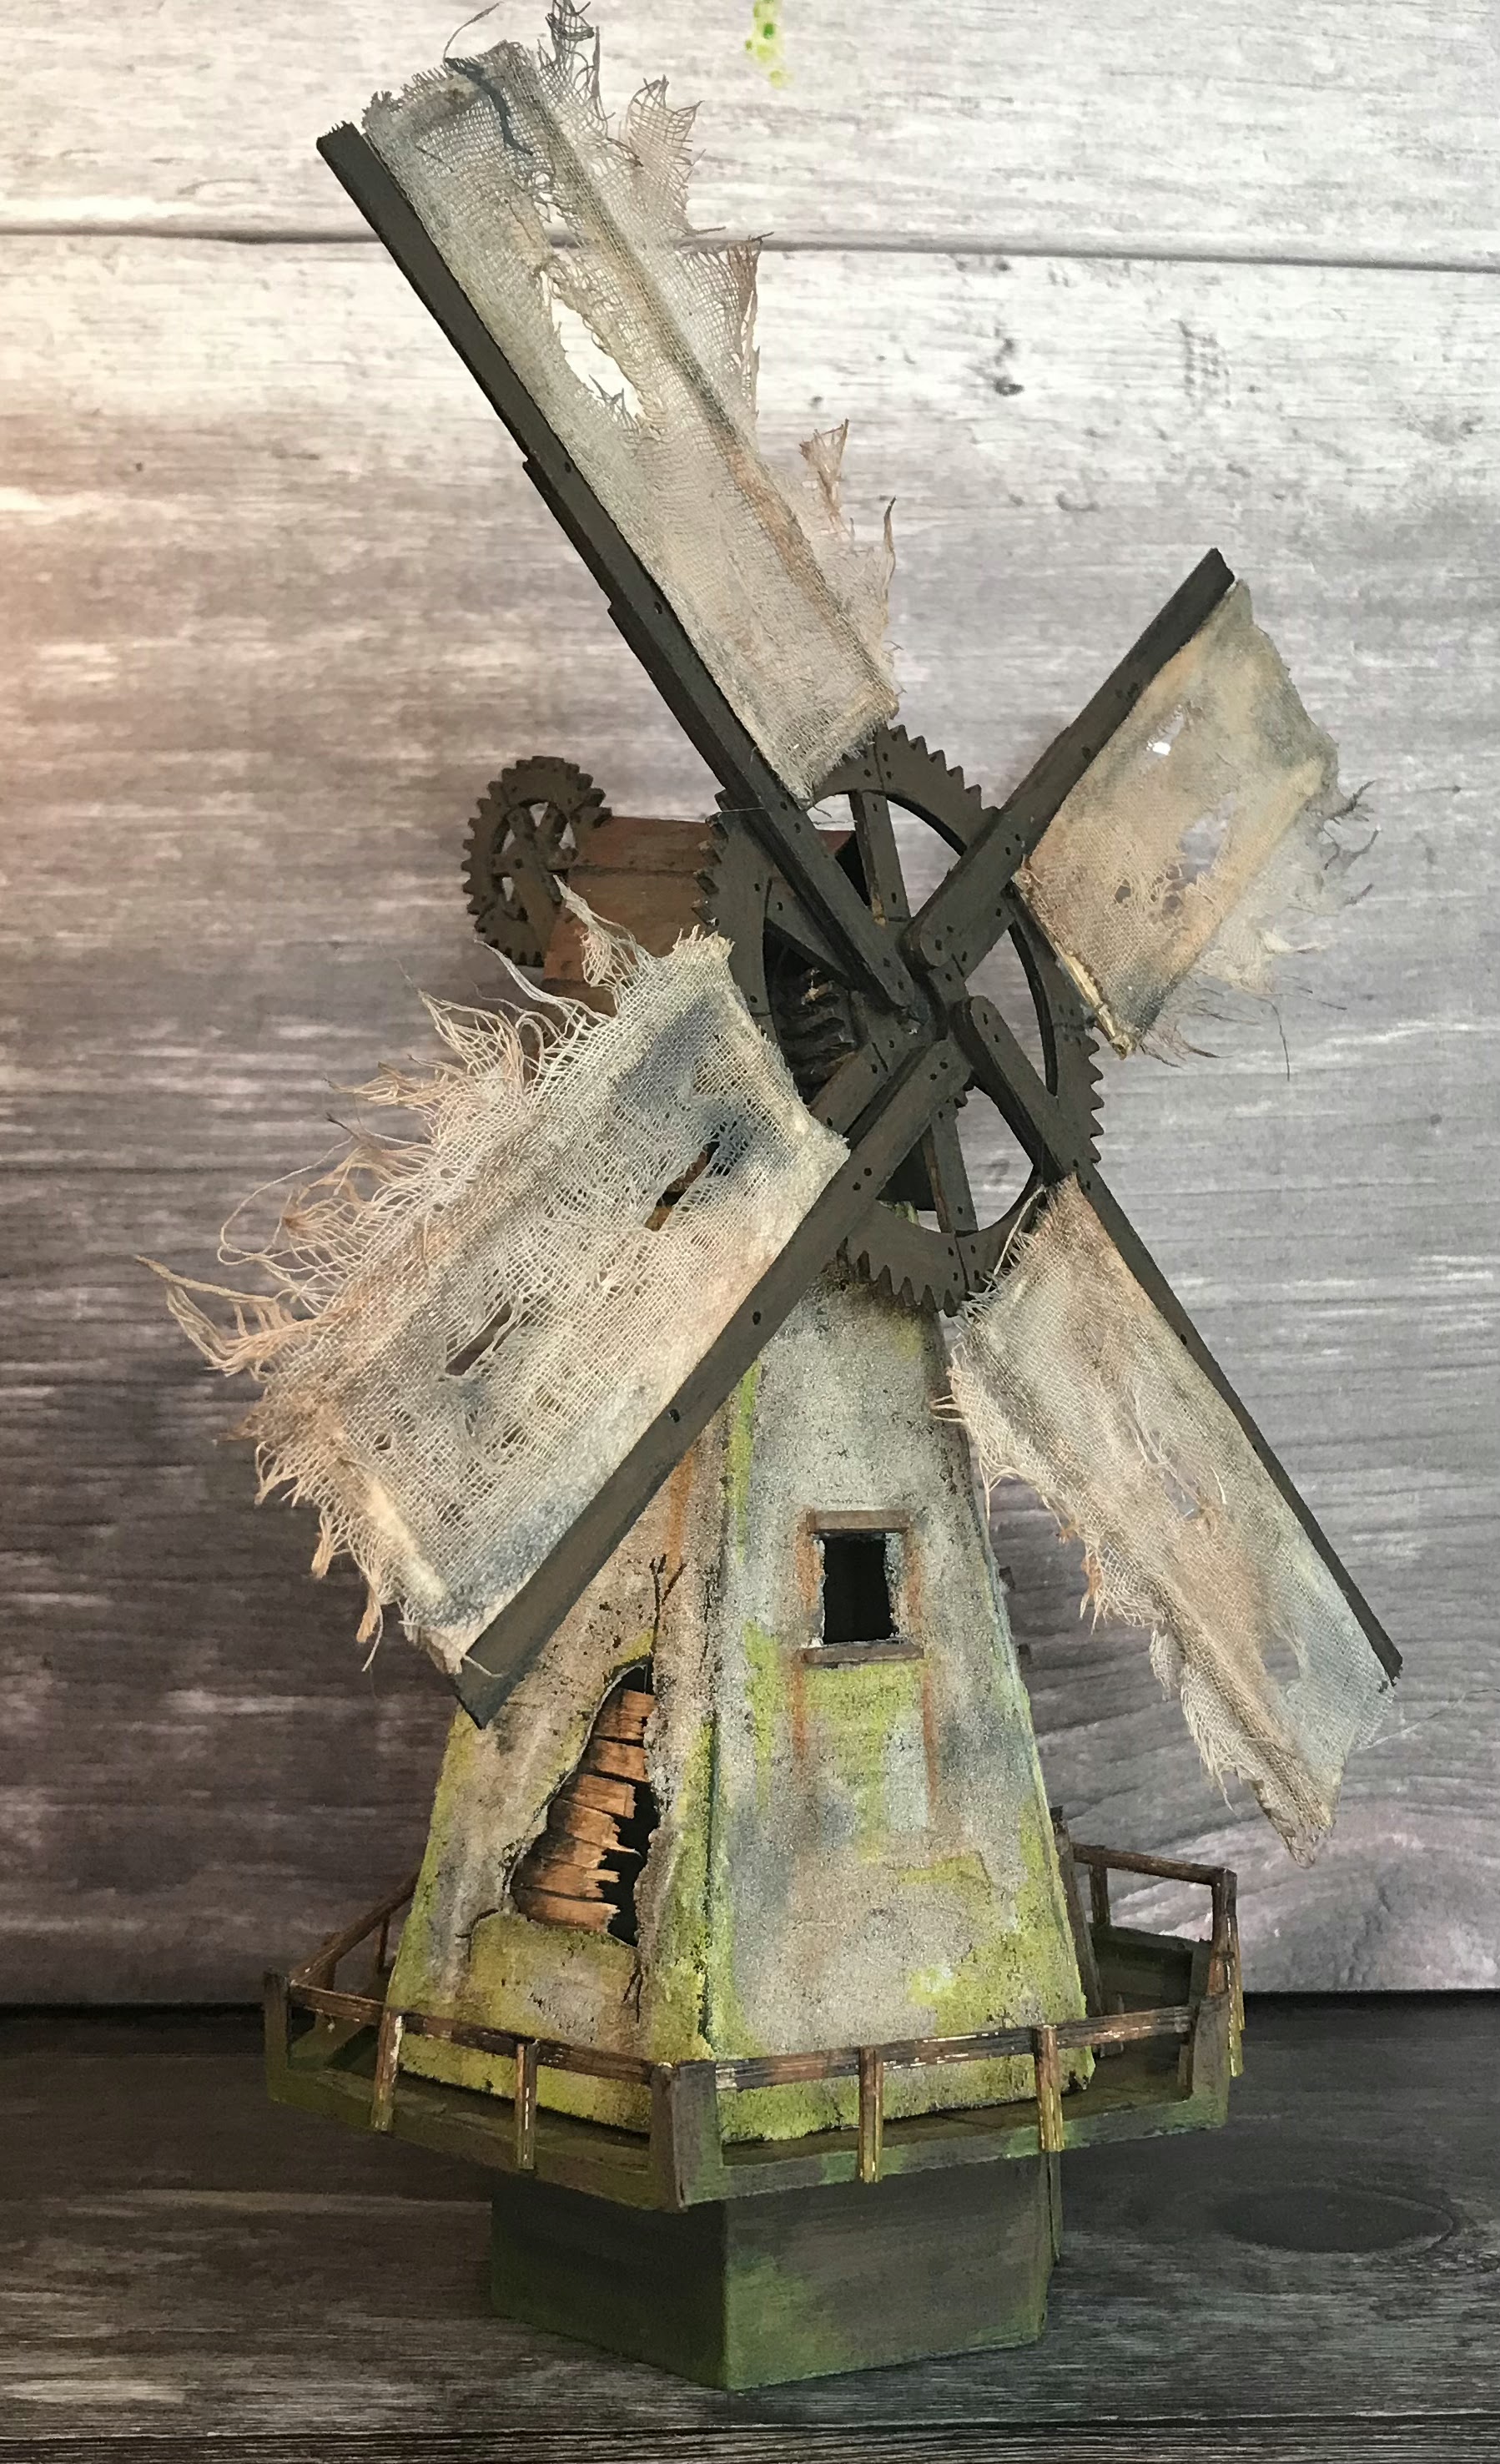
The basis for this construction is the Hexagons set from Tando Creative, and I’ve gone for the derelict, haunted look.


The main building

I used the same cereal box method of construction as I did for the lighthouse (Beacon of Hope), but this time I used the largest hex with sides of 5cm for the bottom. Make sure you use the one with a frame because you will remove the centre later, so that you can put a battery light inside.


For the top I used the centre from the smallest hex, about 2.5cm. The windmill is shorter than the lighthouse.


As an alternative method you could cut six separate side panels - and make sure you include an extra flap on one side of each one, so you have something to glue the next one to.


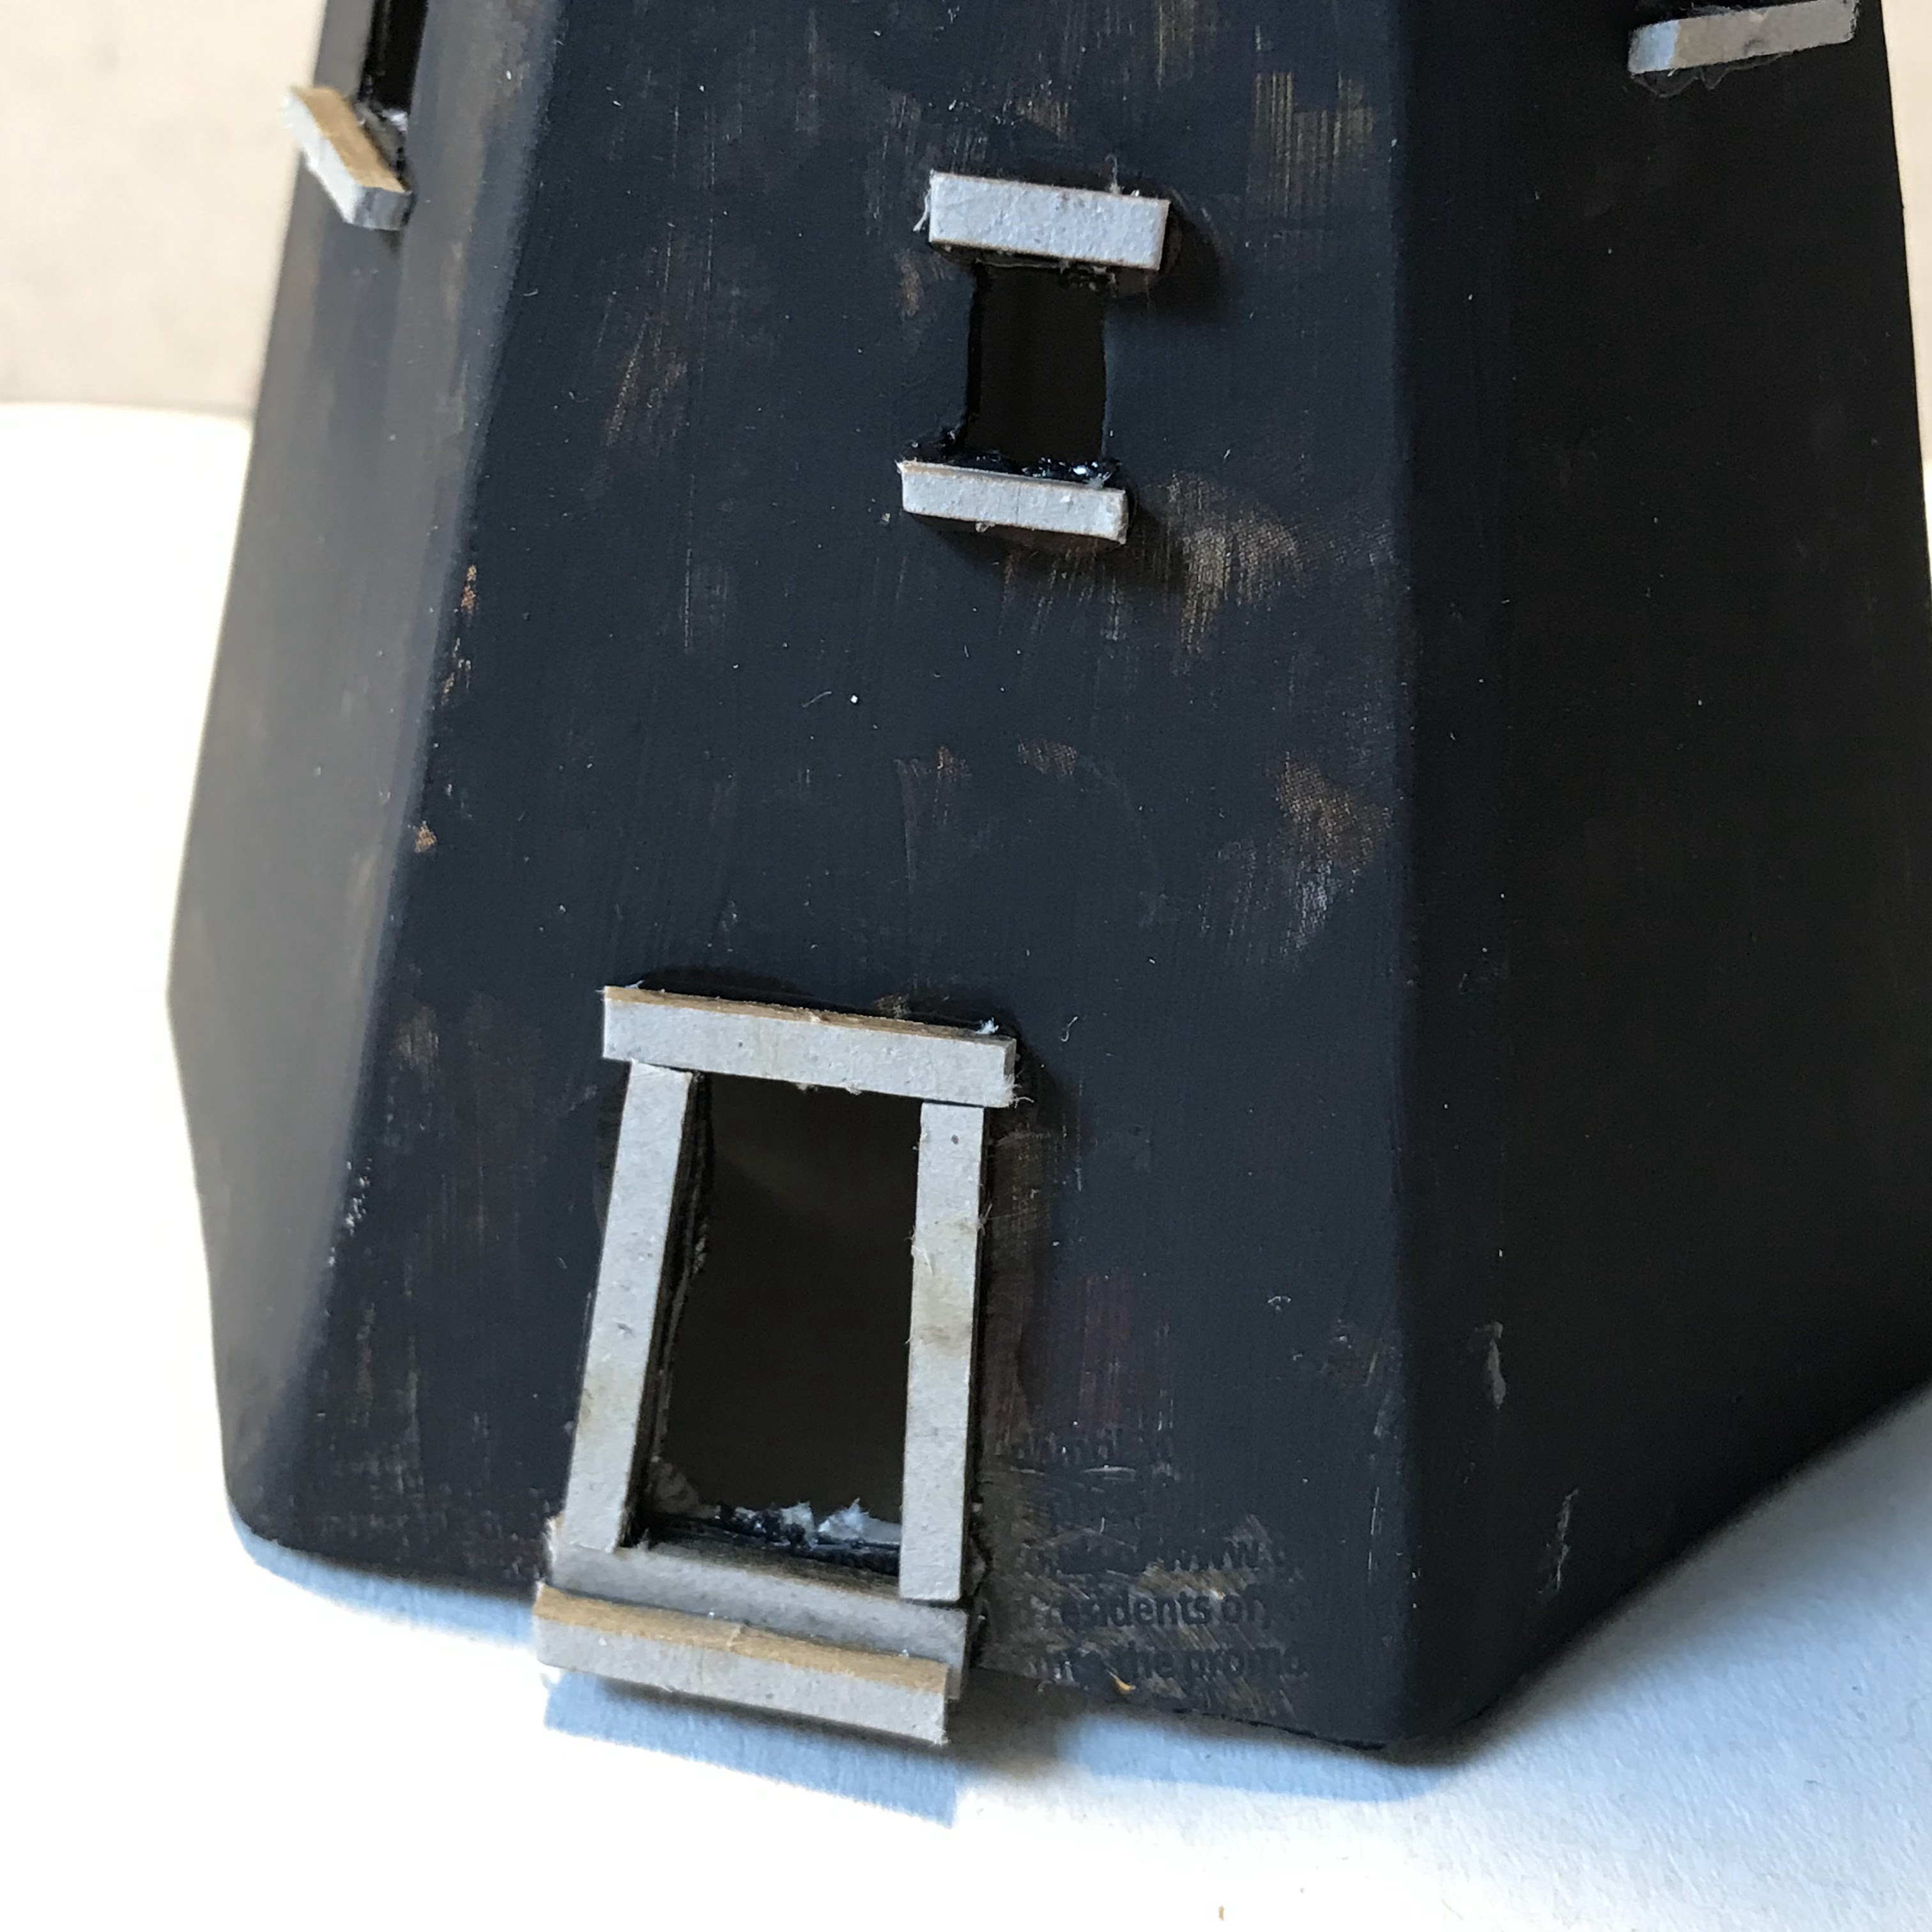
Once the glue has set I used a very sharp X-acto craft knife to cut windows and a door. I also cut a random shaped hole for added decay. I add exposed laths to this hole from the inside with broken ends. These are wooden coffee stirrers split in half lengthways with snapped off ends.


I used thin strips of waste greyboard for the door frame, windowsills and lintels.


I used solvent glue for the above because it grabs and dries quickly.


Once all the glue has set I painted black gesso all over, then plastered the outside with DecoArt Texture Sand in a rough manner to give that old ‘cob wall’ look. 


The cowl

The base of the cowl is a hex with 3cm sides. To get the shape for the cowl I trimmed the top from a Tando Creative Gothic Arch Layered Frame kit.

I cut a section off the hex to get a straight front. The cowl insert is angled backwards slightly so that the sails don’t hit the building. This insert is supported with a ‘wedge’ of leftover greyboard.


Using more cereal box I used scissors to cut the roof section. These parts are glued together using as many fingers as you can muster to hold them until set.


The bit at the back (that turns the mill to face in to the wind) is made from greyboard offcuts and a small cog wheel from the Industrial Elements greyboard set. 


On the front I glued 4 greyboard washers to space the arms away from the cowl. I drilled a hole in the centre for a piece of bamboo chopstick as a spindle.


The Base

I used 2 x 4cm hexes wrapped with more cereal box. I then cut a large piece of cereal box in a hex shape with 7cm sides for the floor.


To add the handrail I first had to cut a 3cm and 4cm hex frames to make support around the edges, then glued a 1.5cm strip around the outside. When I realised my first idea wasn’t going to work I cut away all but the corners then glued in some bamboo sticks (from an aroma diffuser) as they are more handrail-like.


Arms and Sails

I used a large cog wheel from Industrial Elements and a few wooden coffee stirrers for the arms. At the back I glued on 4 small cog wheels to ensure the arms could turn without hitting anything else.


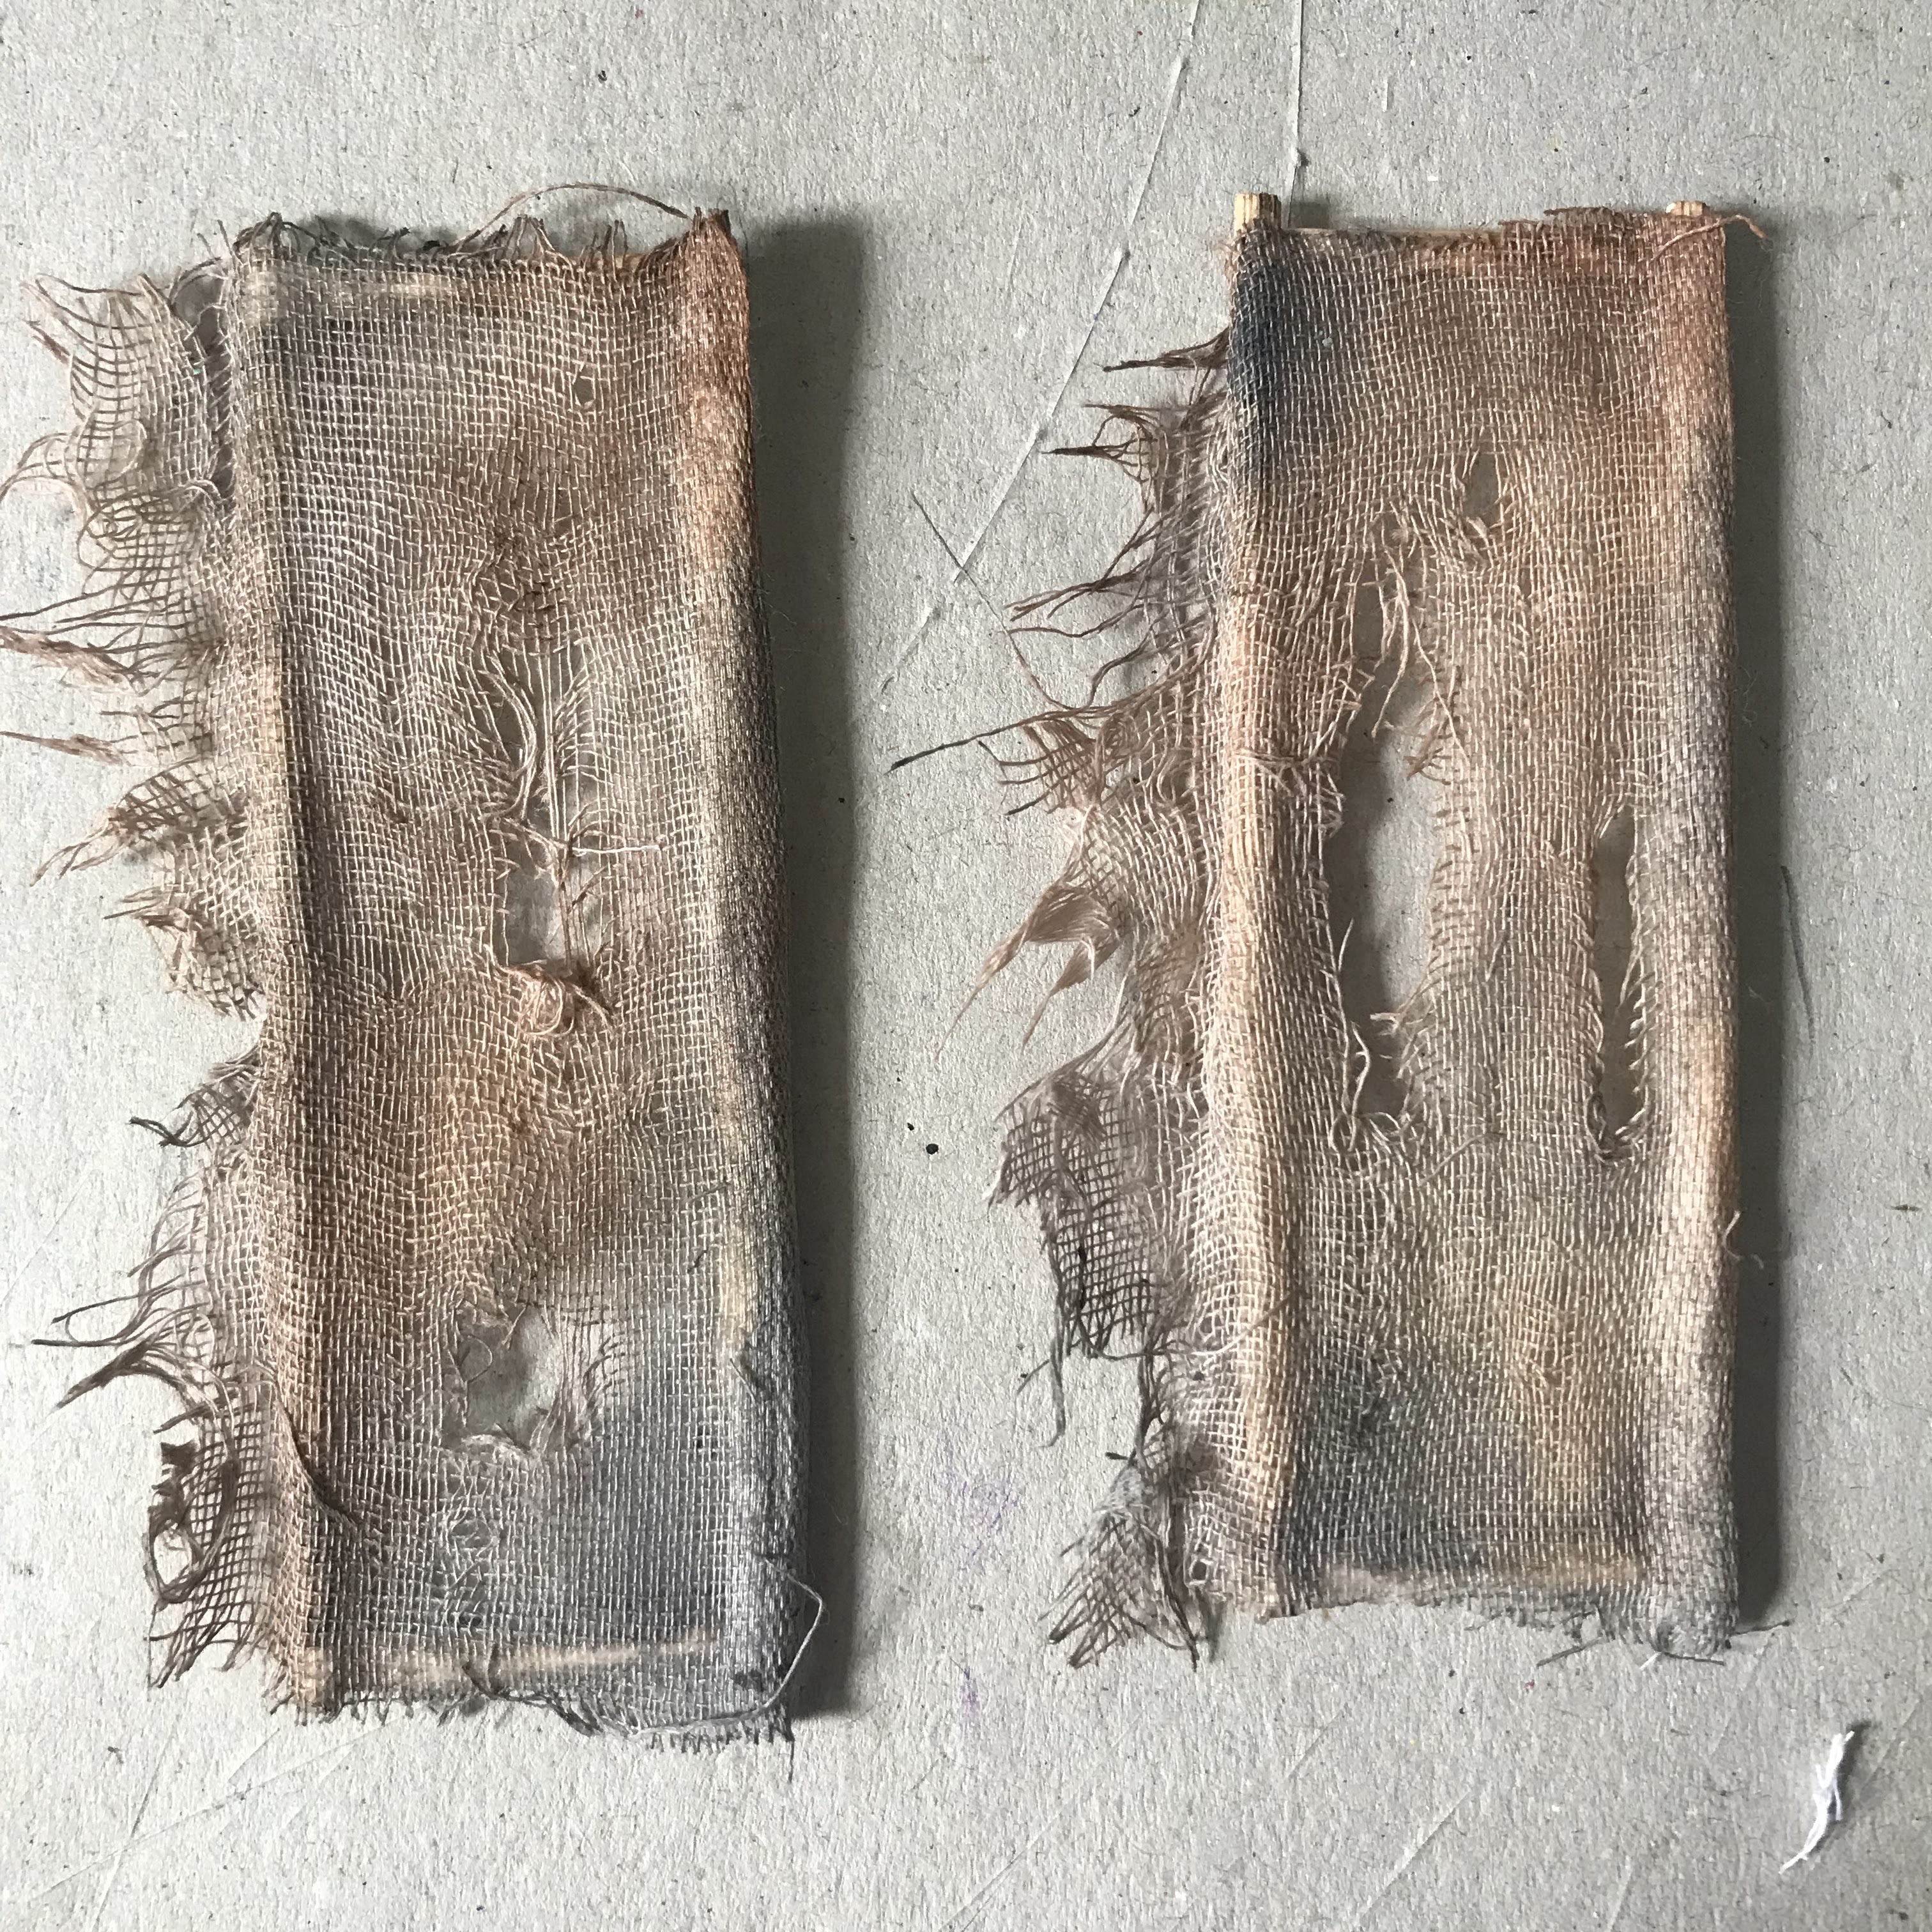
After trying all sorts of things to get the sails looking just right I went with bamboo diffuser sticks glued in to an oblong shape, with muslin glued on to the frame thus formed. I cut and slashed the muslin with scissors and a craft knife to get the frayed and torn effect.


They were glued into place on the arms - but not until they had been painted and dried.


Painting


Once the Texture Sand on the main building was dry I used DecoArt Media Fluid Acrylic in Grey Value 6 as a wash to colour the whole area - no need to get even coverage, then Grey Value 3 as a wash to add stained areas, followed by patches of Paynes Grey as a wash. Weathered stains of mould and decay were added with Burnt Umber and Green Gold Fluid Acrylics. Windows and door frames were painted with watery Burnt Umber. The broken laths were stained with Burnt Umber then shadows of Paynes Grey where they go behind the outer ‘cob’.


The cowl was base coated with DecoArt Americana Lamp Black. Americana Burnt Umber was stroked over the top of the small gear structure to give an aged wooden look. The cowl roof was stained with streaks of Media Quinacridone Gold to give a rusty tin look. Detail of nails and joins were added with a dip pen and Media Paynes Grey.


The base was base coated in Lamp Black, then Americana Burnt Umber, then Americana Espresso was stroked over to give the impression of wood. The bamboo handrails were stained with Burnt Umber. To continue the decayed look Media Green Gold was dry brushed on to look like moss and mould. A few touches of Media Paynes grey to give the rotten look to some of that wood.


The arms were base coated in Lamp Black, then Americana Burnt Umber stroked over the top. Details were added with dip pen and Media Paynes Grey to give the look of old timbers held together with bolts.


The sails were stained with washes of: Media Grey Value 6, Burnt Umber, and Paynes grey.


To finish, the centre section was removed from the base of the mill (if not already done) and a small battery powered lamp was placed on the base and covered with the mill - instant spooky!




Thanks for dropping by - take care walking home in the dark … especially if your path takes you past the old windmill!


DO NOT - DO NOT PUT A NAKED FLAME TEA LIGHT OR ANY OTHER NAKED FLAME INSIDE THE MILL - IT WILL BURN!


Products:

Tando Creative Hexagon Set

Random greyboard offcuts and an empty cereal box

Coffee stirrers and bamboo sticks

Tando Creative Industrial Elements - cog wheels

DecoArt Texture Sand Paste

DecoArt Americana colours

DecoArt Media Fluid Acrylics colours

Tando Creative Gothic Arch Layered Frame

Tuesday, 17 May 2022

It's A Beautiful Day- Tag Plaque- Fiona Randall


Morning All Fiona here with a Tando Tag Plaque

 and of course using a Butterfly theme.


I used one of my Gelli Printed backrounds which was cut to size and adhered to a Tando size 10 Tag.
I then inked the edges with black Archival Ink
 Onto a lighter portion of the gelli print waste that was left after cutting the tag shape,
 I stamped the large butterfly from the Butterfly Mind set from Chocolate Baroque and fussy cut it out.
I then layered and attached a pale blue organza butterfly to the larger fussy cut butterfly with a spot of glue.
Next I die cut the pediments for the top and bottom of the tag from Tando Grey Board using a Tim Holtz Die. I gave them both a coat of DecoArt Media Fluid Acrylic in Silver and dried with a heat tool. I then applied a coat of DecoArt Antiquing Cream in Carbon Black to the pediments and wiped back with a damp paper towel to give an aged effect.
I then glued and attached the pediments to the top and bottom of the tag as shown.
The layered Butterfly was then glued to the tag at a jaunty angle.
A rub on was added to the top left of the tag and a sentiment to the bottom right of the tag.
Shading was then added around the sentiment strips and under the pediments with a stabilo All pencil and blended out with a water brush.
I then cut a piece of Tando Grey Board to size and gave it a coat of DecoArt  Premium Acrylic in Carbon Black.
The tag was then attached to the grey board base using offcuts of grey board to give depth and dimension.
A simple project with limited supplies with a vintage feel.
Thanks for taking the time to stop by and read.
Hugs Fiona.


PRODUCTS USED.


OTHER PRODUCTS.

Sizzix Bigz Die- Pediments- Tim Holtz

Tim Holtz Rub on Transfers.

Snarky Words Sentiments- Tim Holtz.

Organza Butterfly from my stash.

Stabilo All Pencil

Water Brush.


Friday, 13 May 2022

Tando Advent White Christmas Box by Art Angel


This is a very simple yet very pretty Advent Box and would make a fabulously magical gift or keepsake for a child's room. Using the papers of your choice don't forget these are suitable for all times and occasions throughout the year not just Advent 


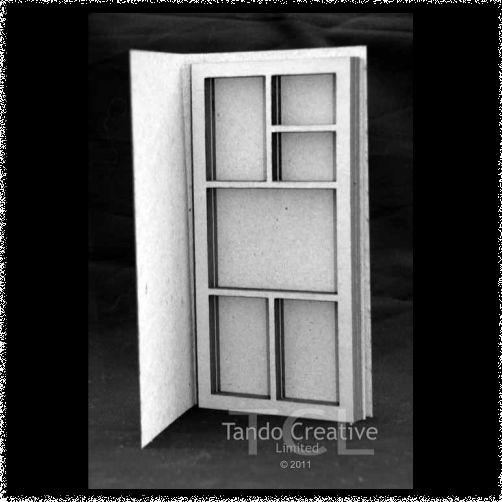
Your Advent Kit creates two components, and outer box and a inner sliding drawer


The precision cut tabs and notches makes it very easy to snap together just secure with a good pva glue

Lay all your pieces out before gluing so that you’re confident that everything is in the right place


This will be your drawer front


Start but giving both components a base coat of Decoart Lace Chalk Paint


I chose to use some Christmas papers from LaBlanche to decorate my box but you could use anything from your stash, whether thats Christmas, birthdays, weddings or any other papers for any occasion

I cut a panel slightly smaller than the drawer front and inked around the edges using Walnut Stain Distress Oxide and adhered to the box using DecoArt Matte Medium


I repeated the same process for one side of the drawer

And then the other


I also cut a panel to fit on the inside back wall of the drawer

I used DecoArt metallic Lustre in Iced Espresso to finish off all edges


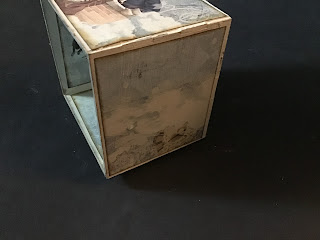
I then moved onto the box that the drawer will sit in and cut panels to cover all inside surfaces matching up the design to create a cohesive scene, remember to ink your edges with the oxide before sticking down


Do the same for the top of the box


And again for the sides


Like i said simple but oh so effective, perfect way to let your beautiful papers speak for themselves it is a brilliant way to showcase papers that you have a hard time cutting in to!!!

Look out for loads more inspiration from the wonderful Tando Team x x

I used
LaBlanche papers

Sunday, 8 May 2022

School Days Collection

Today I bring you a cute little project I have been pottering about with for a few weeks. Sticking to my promise of using up all my old vintage Scrapbook papers i stumbled across some cute little children at school papers and just knew i had to use them. And what better why to highlight the good old Days of school with a Tando printers tray and two large cubbey's.


Materials Used

Selection of vintage school themed papers & Ephemera

Black Gesso or Paint


Collection of Alpha stickers, all random

PVA Wood Glue

Tando Greyboard

Tando cubbey's.

Tando Printers Trays: rectangle


Instructions

I knew roughly my plan which was to have my cubbey's stacked on top of each other and have my printers tray next to it so I arranged then on my piece of greyboard, moving about until I was happy with the arrangement. I had to sacrifice the front cover of the printers tray sadly. Once finally happy, I cut the greyboard to size and gave everything a couple of coats of black gesso. At the same time I did a Tando Display Stand just in case. 


The greyboard back piece measured 8" x 8" in the end. I covered it in a piece of burgundy cardstock just slightly smaller. I then added a matt of green spotted patterned paper with sanded edged to that and set aside for later.

I glued my two cubbey's together, I secured with extra tape all over too. This will be hid with patterned paper. I cut strips of patterned papers and decorated both the inside and out side of my cubbey's. I sanded all the edges for a vintage worn look. I wasn't bothered about gaps or joins in my wallpapering inside as i knew the ephemera would hide it. The printers tray was a wee bit trickier. I placed a sheet of patterned paper on top and left it too dry over night. I then carefully used a craft knife to cut out the small holes. i sanded the edges down to give the aged vintage feel again. I added backgrounds to the cubbey's too. At this stage i glued both the cubbey's and printers tray the greyboard back piece and left over night to dry. I have said it before. I am a convert to the PVA wood glue that Di has on the web site, super strong and the applicators, where have you been all my life, lol


Next i just took a square at a time and began to just build up a little scene, adding layers of paper ephemera and 3D objects, moving stuff around until i was happy. This took awhile. I was like a kid with a new dolls house. 

First the Cubbey's


Then the smaller printer tray squares


The top of the display looked a little bare so i decorated it with some alpha stickers which i made little stands for 


I hope you like the little display of school days fun. I had so much fun tinkering about for days on end, it was like i was back at school again. Would love to see your creations if you have ago 

Sarah xx


Tuesday, 3 May 2022


                                                        One Little Hexi - Bernadette


I made this size 10 greyboard tag https://www.tando-creative.co.uk/TAGS180X100.html with one little hexi frame https://www.tando-creative.co.uk/HXGNS2022.html I had left from another project.  I like to use up everything I get in any of my kits, so I added other bits and pieces to make this.


I started off by rubbing distress oxide pads onto my media mat - the colours I used were antique linen, bundled sage and frayed burlap.  I kept dipping my piece of ivory coloured card in, drying and repeating until I had the effect I wanted.  


I then drew around the card using the greyboard tag for the outline and cut it to shape using scissors. I glued the card to the tag using PVA glue.


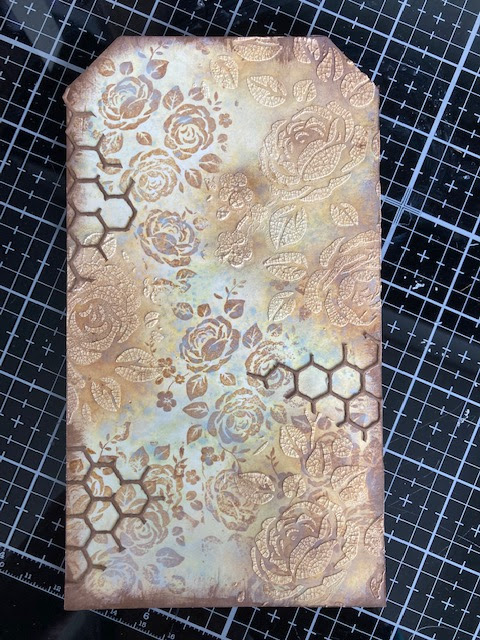
I took a floral stamp and randomly stamped on parts of the tag using vintage photo distress ink. 


Using a floral stencil I added some texture using crackle paste and let it dry.


Once the crackle paste had dried, I used a stencil brush to add some definition to the crackled areas with vintage photo distress ink.


I painted my little hexi frame using a metallic brown paint and had a rummage around in my stash for some paper dolls, die cuts, ephemera and paper flowers.  To make the little bee tag, I die cut a tag then then die cut the middle using a rectangle die.  I inked it with vintage photo distress ink splattered a bit of water to remove some of the ink then added some stamping.  I cut a piece of acetate, stamped the bee using black Stazon then glued the acetate to the back of the tag.  (I added some thread to the tag but you will see on the finished photo I decided to take that off).


To put the tag together, I first glued some pieces of honeycomb which I had die cut from brown card.


I had a play around with the bits and pieces I had decided I was putting on my tag before sticking anything down.  Once I have pretty much decided where I want everything to go, I usually take a photo with my phone, take everything off the tag then glue each piece using the photo to make sure each piece is in the place I wanted to go.

I enjoy working with lots of substrates but love tags especially.  They are small enough to complete in one crafting session and robust enough to take lots of additional layers.  Would love to see anything you create in the Facebook Tando Creative Zone if I've inspired you to have a play.


Bye for now!

Bernadette xxx