Friday, 21 January 2022

24 Boxes of Advent with Bernadette


Good Evening Everyone,

Today I am showcasing a cute advent box.  Depending on how you decorate them, they have multiple uses and are stackable too.

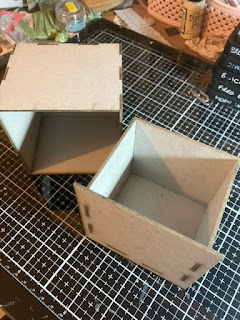
I put the inside drawer and outer box together first and secured them with pva glue.  The photo below shows how they look once they are glued together.  Everything slotted into place perfectly with the joins matching exactly as they should. When you put the drawer inside the box they fit together to make a perfect cube.

I then painted inside and outside of both pieces using a dark blue acrylic paint.
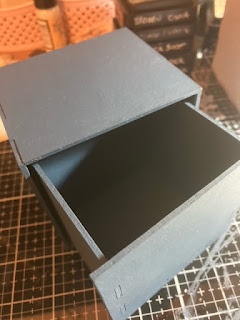

I decided with this one that I would keep the top flat, just in case I decide I want to stack another one on top. If you aren't going to stack them, you could easily embellish all sides.
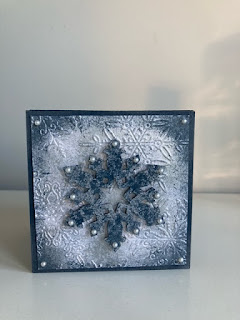

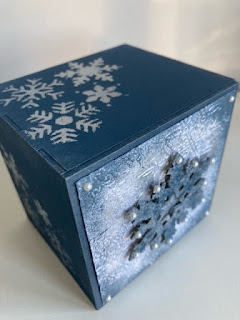
I started with the front of the drawer.  I cut a piece of white pearl card slightly smaller than the drawer front then ran it through my die cutting machine in a snowflake embossing folder.  I then took a stiff stencil brush and dabbed some silver acrylic paint randomly over the whole piece of card.  I then did the same around the edge with the dark blue paint I had used to paint the box.  

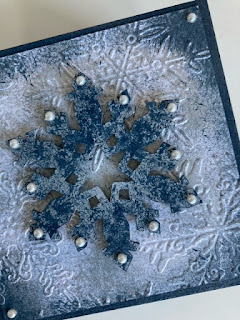
I took a snowflake from the Tando pack of 5 snowflakes  https://www.tando-creative.co.uk/SNWFLK5.html  and used the dark blue and silver paint to colour the snowflake, again using the stencil brush.  I wanted to make it look like it had an icy texture.  I took some tiny self adhesive pearls and added them to the corners of the card and the points of the snowflake.

I then glued the snowflake to the middle of the piece of card and added the whole thing to the front of the drawer, again using pva glue.
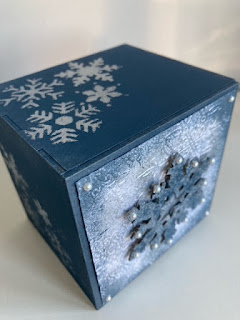
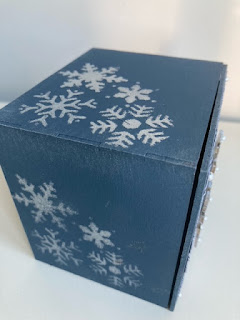


To finish the box and drawer I took the Tando mini snowflake stencil https://www.tando-creative.co.uk/MSKMINFLKE.html and stencilled on the sides of the drawer and top and sides of the outer box, again using a stencil brush.

I thoroughly enjoyed making this little box and I'm looking forward to trying a different design with my next one.

Enjoy your weekend, hope you get some crafty time :)

Bernadette xxx


Wednesday, 12 January 2022

Dee's back


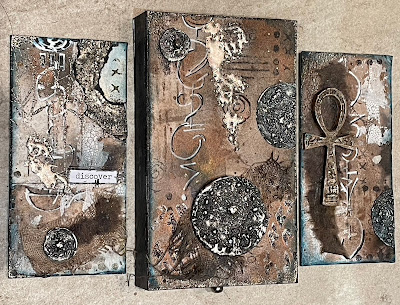
Hi everyone I am back and I have one of Tando's lovely matchbox's for you today.
I was aiming for something understated and subtle and ended up with the 
complete opposite. My first piece for a long while so I 
had to include embossing.


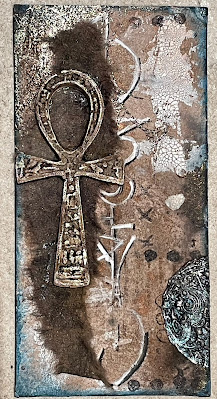
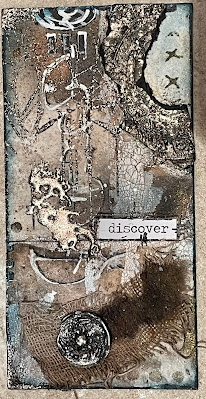
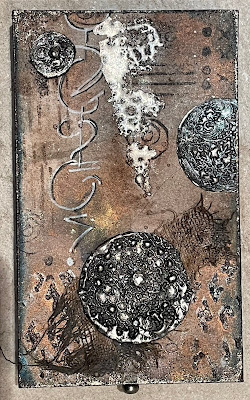
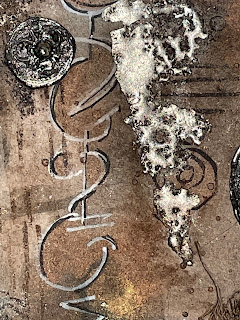
I started with constructing the matchbox and I cut some water colour paper to fit the surface of the matchbox. I spritzed it with water and used walnut ink crystals to colour the paper. Inks were used and Prussian Blue deco art fluid acrylic paint. 


Deco art white crackle paint was also applied with a pallet . I used mark making stamps and also some of my own scribbles. I triple embossed different sized Tando circles with platinum powder and stamped into them.


On the main matchbox front I put crackle paint through the harlequin stencil and sprinkled embossing powder on and heat set. I used posca pens to do the writing. Stamping and embossing (Skins) completes the look. 


Close up


I hope you have enjoyed my post feel free to ask any questions if you have any.
Thanks for popping by Cheers Dee. x

Tando Products Used


Tuesday, 11 January 2022

Hex Tex Tuesday by Sharon Quinn

 Hello there

I'm delighted to be showing you my interpretation of the Tando Creative hexagons.

I am currently decorating the walls of my craft room to give me inspiration in my creative space so this is the inspiration for this piece.

I started by painting the edges of a Tando Creative A4 greyboard greyboard  panel  with fresco paint in butternut.


Next I applied rice paper to the panel using distress collage medium, I removed excess paper by using a water brush to give a raw edge gently tearing away from the fibres.


I have chosen to use 3 solid hexagons and 3 hexagon frames to paint in DecoArt americana acrylic paint in celery green. I left to dry naturally which only took minutes but of course you can speed up the process using a heat gun. I then used a distress crayon in carved pumpkin to smudge with my finger around the edges.


Next I added areas of interest using stamps in butternut acrylic paint and doodles with a white gel pen.


Inka gold has been added to the hexagon frames but any mica powder or wax would also work, or imagine how gilding flakes would look ,,,? 

Next I played around with the position of the pieces to give a look I was happy with, I adhered with book binding glue.

Finally I added words from Tim Holtz metallic words pad.

The finished piece will look great on my wall....I wonder what you could make using the hexagons??


Tando Creative hexagons

Tando Creative A4 sheet

DecoArt americana acrylic paint - celery green

PaperArtsy fresco paint in butternut

PaperArtsy Eclectica EM41

PaperArtsy Eclectica EM45

PaperArtsy Eclectica EM48

Papers for you rice paper

Distress collage medium

 Pinflair Book binding glue 

White gel pen

Viva Decor Inka Gold

Many thanks for reading my blog post, I hope you found some inspiration.

Lots of love

Sharon Quinn xx


Monday, 10 January 2022

Mini Printer Tray


Happy Monday Everyone,

I have finally had chance to work with a Mini Printer Tray.  I think I will be getting some more of these, they are quite different to anything I have done before.  I have lots of bits and pieces: ephemera, stamped images, letters, numbers and hardware that I love and was looking for a way to show them off.  A printer tray is the perfect way to do this, mine is now in my lounge so I can keep looking at it.


I started off by selecting a Tim Holtz paper for my background.  The paper I chose has letters on it which made me decide it was the right one for this project.  I stuck it to the greyboard with wet glue to make sure it was well stuck down.


I painted the front frame panel with a grey paint then used a blending foam to add some black soot distress ink around the edges of the frames to give it an industrial, almost dirty look. I used wet glue again to secure this to the background.


I then started to gather my treasures to add to the individual frames.  I have spells of stamping and cutting out small images, just in case I need that bit of something to add to a card or tag.  I have quite a selection of Tim Holtz hardware and ephemera, but I tend to hoard it and am quite stingy with is.  Since I am keeping this piece for myself, I decided I would use some of my precious pieces.  I added some mustard coloured paint to bare pieces to complement the colours of the background paper.


I inked the edges of the paper embellishments with either vintage photo or black soot distress ink and added some glossy accents to the light bulb.  I then attached everything inside the frames either with glue or foam pads to add a bit of dimension.


Link to Mini Printer Tray:

https://www.tando-creative.co.uk/MPT178X127CV.html

Sunday, 9 January 2022

Colour theme Gothic Arch layered frame by Nicky Roussou

 These Gothic Arche Layered Frame are just so cute and I love the size of them. I also love it when I can create a project in one sitting ( which doesn't happen very often 😂)


I started this project buy getting the arches together and choosing what butterflies I was going to use. I really do LOVE these layered butterflies!


I immediately thought a brick was would look super fab, so cut some cardstock with my Time Holtz 3D embossing folder and cut it out to fit the arch.


I decided to do the back of the arch in the Tim Holts wood 3D folder which I love and used Vintage Photo Tim holts distress ink to over it to bring out the texture.


For the sides of the arch a I wanted a rough looking aged edge so used some modelling pates and roughly ran around the edges.


To get the rustic look to the brick wall I used red brick Distress Ink and Vintage Photo randomly around the page and the went over with my good old favourite, water down oil paint with white spirit to bring out the colours.


I gave all the edges a coat of DecoArt Brown umbra paint too, 


For the butterflies, I gave the base part a coat of thin brown paint and then went over with a coat of Metallic Pain to give it a lovely shine.  For the top part I glued down some Micro Beads from Prima. 


To give that extra bit of rustic loveliness, I glued the butterfly down to some chiffon fabric and burnt  around the edged which produces a wonder aged effect 


So here you go, a little step by step of my arch. I hope you have enjoyed seeing it come together. 

Thank you for popping by 💓

TIM HOLTZ 3D BRICK EMBOSSING FOLDER
TIM HOLTZ DISTRESS INKS IN REB BRICK AND VINTAGE PHOTO
STAMPERIA MODELING PASTE
PRIMA MICRO BEADS
TRESURED GOLD GILDING WAX
DECOART BURNT UMBRA PAINT
DECOART METALIC ROSE GOLD


Saturday, 8 January 2022

Playing with Plaques - Zoë Sanderson

Today I'm going to share with you a project that was going in one direction but needed with one piece going off on a tangent.


So what happened along the way.  The original plan was to use the Plaques and the Whimsical Houses.


Having released a couple of the houses from their board it was time to start.  Usually with a project like this the first step is to gesso everything however I knew texture would be a feature making time to get the pastes and stencils out.


OK I wanted to have a play as well.  This was an opportunity for me to try the DecoArt modelling paste out for the first time.   The stencil I used is from this set of 4 and I've had lots of fun with this one especially.

The fun thing about the paste is that it dries clear!   Once the paste had dried then gesso was brushed all over.  Now it is time to start to colour them.


Something else that is a lot of fun is applying wax pastes.   I like to use a cotton makeup removing pad, they pick up the paste easily and make it easy to apply.  The best thing is to use circular movements working over the surface and building the colour up.  Repeated working also brings the shine and luster up.

For the other Plaque I used watercolour paints and then decoupaged some printed tissue over the top.


The Houses were also given a gesso base, watercolored, and then glued together.   One of the houses was also given some printed tissue additions.  Although it looks OK in this picture in real life it's not so good.  I play around with layouts for a while before finally deciding how the Whimsical House plaque would look.


Well that was one plaque but what about the other?   That third house was not working especially not on the metallic finish of the second base.  It just happened that all this took place during a 4 day crafting binge when I tried all sorts of different things.

Included in my some resin casts and clay casts using a great American mould.  The resin piece was coloured with DecoArt acrylic paints, the clay pieces didn't need any paint adding.


 As always I hope you had fun reading this and are encouraged to go out and get inky/messy yourself while having fun!  

Products Used

Tando 12 Assorted Plaques

Tando Whimsical Houses 2

Tando Set of 4 Background/Flourish stencils

DecoArt Media White Modelling Paste

DecoArt Media Metallic Lustre

DecoArt Fluid Acrylics

Other mediums from my stash.

Friday, 7 January 2022

Rusty Butterfly Tag Plaque


Morning all Fiona Here with my first post of the New Year.

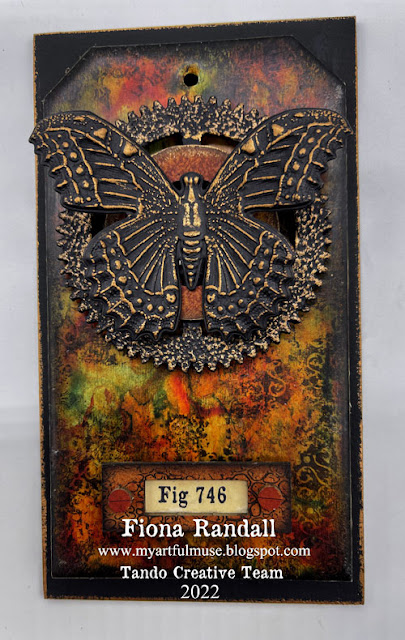
I am in my comfort zone for this project with a rusty grungy Tag topped with a metallic effect embossed Butterfly and a cog thrown in for good measure


Layers of DecoArt Media Fluid Acrylic paint were dripped and drabbed onto a Tando size 7 Tag and heat dried between layers until I got the look I was after.I then added some stamping using an Andy Skinner Vintage Background stamp for some extra interest using black Archival Ink. The Tag edges were then inked using black Archival Ink to draw everything into the background.
Texture sand paste was then applied to a cog from The Industrial Elements set. Once dry this was given a coat of DecoArt Media Fluid Acrylic in paynes Grey then swiped with Burnished Brass metallic Lustre once dry. A small washer from the industrial elements kit was given a rusty treatment along with some resist stamping. The same rusty treatment was applied to the bookplate and screw heads and black stamping added. I then embossed and die cut the butterfly using a Tim Holtz 3d Impresslit embossing folder from black 300gsm cardstock. This was then swiped with the Burnished Brass Metallic Lustre to highlight the raised areas. All elements were then layered up onto the tag using offcuts of grey board to give depth and dimension. The tag was then layered onto a piece of Tando Grey Board cut to size to which was painted using DecoArt Chalky Finish in Carbon and two coats of DecoArt Ultra Matte Varnish to seal. Thedges were then swiped with the same Metallic Lustre. A small piece of cardstock was cut to size to fit the bookplate and stamped before attaching and gluing to the base of the tag as shown. Two mini screw heads were then applied to finish.

Thanks for taking the time to stop by and read.
Fiona xx

PRODUCTS USED.