Monday, 14 March 2022

ATC box - The Ace of Spades - by Kim

 A box, playing card size, no lid, no door. What shall I do with it?

Well before we stick it together let's cut a hole in one of the big sides, a jagged, random shaped hole. I used a very sharp Xacto knife and was very careful not to damage myself.

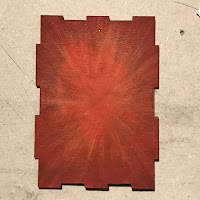
On the other flat side I painted a dramatic starburst shape with orange and a couple of reds. 

Next, I glued the box together, using PVA, with the starburst on the inside and visible through the hole.

I pulled the Ace, King Queen, and Jack of Spades from a pack of mini playing cards from a Christmas cracker. I tore the edge around the Ace, edged it with black and stuck it inside the box. KQJ were trimmed to fit and stuck to the front of the box, as shown.

The front of the box was textured with DecoArt Modelling Paste, avoiding the KQJ, and allowed to dry thoroughly.

The outside of the box was painted black, avoiding the cards and the edge of the hole. When dry the edge of the hole was painted with the deepest red from the starburst, and the texture was dry brushed lightly with it, too.

A little Champagne Ice Metallic Lustre was rubbed lightly over the very tops of the texture.

As a little cheeky element to finish I tore the corner from the Joker card and glued it inside the front panel with the word 'Joker' on show.

A fun gift for a cardsharp, or perhaps a prize for the best poker face of the evening.


Products:

Tando ATC Art Box

DecoArt Media Modelling Paste

DecoArt colours, various

Champagne Ice Metallic Lustre

Mini playing cards

Saturday, 12 March 2022

Punch & Judy photo box - by Kim


 More blank boxes. This was originally going to be one box as a photo frame/box fitting for a Victorian family photograph - but it 'just growed'.

I used both the large shallow box and the large deep box. Let's start with the deep box.

I wanted a theatrical stage as my setting, so I marked out pelmet, curtains, tie-backs and stage. Using a very sharp craft knife I carefully cut out my shape. To add a little 3D effect I carved some additional texture into the edges of the drapery. I painted black all the surfaces that would end up inside the box, then glued the box together with PVA.

I painted the outside of the 'theatre' with a medium brown, then used Paynes Grey Fluid acrylic to add some shadows to the drapes. I also darkened the outline - like a vignette - with Paynes Grey so the detail would gradually fade away.

Once happy with the shading I outlined the drapes with Venetian Gold, to look more theatre like.


It was at this point, when looking for an appropriate photo, that the Punch & Judy idea struck.

So, back to my stash of leftovers. For the header board I used a piece of art board, the two wings (and other bits and pieces) are made from Tando Offcuts.

I base coated the header and wings with Primary Yellow, then dry brushed Scarlet, then Calico Red around the edges. I planned out the decoration very lightly in pencil - making sure the letters looked central.


I used Forest Green for the letters, with Venetian Gold embellishment to the 'thick' strokes. Then I added the brush stroke design in Calico Red, Titanium White, and Primary Blue. On the large strokes on the header I added gold. When painting the design on the wings I kept them side by side to make sure they matched. 

Next I added the gold coach line around the edge using a liner brush. I highlighted the line with a ruled line in black fine marker pen.


The drapes under the stage were cut from grey board, base coated in medium blue, Primary blue shadows and Blue Harbor highlights. A little gold for the tie-ups.

I glued the parts together with solvent based glue for a quick 'grab'. I made a couple of supports for the header board for extra support.

The second box is the shallow box. No cutting this time, just glue it together. Base coat with Titanium White (two coats). Then on one large side and two long edges I marked out the stripes for the canvas.

My stripes are 1cm, but to get them in the centre I started with a 0.5cm white stripe at the edge, this meant I finished the other edge with a white stripe, too. I painted the sides of the 'theatre' box to match the base.

The Calico Red stripes needed two coats. I used a No 4 liner brush to outline the sides of the stripes, then filled in with a small flat brush. To help the liner flow you can use a little 'extender' or 'flow medium' with the paint.

The base can be glued to the top if you like. Make sure it is centrally placed to look neat. To make the whole thing more stable I glued a spare mixed media board to the bottom, added a layer of DecoArt Texture Sand and some Mini Art Stones. When dry I used Burnt Orange and Moon Yellow stippled on to colour 'the beach'.

Select a suitable picture and place it in the 'theatre'. I found a picture of Punch & Judy, fussy cut round the edge, removed the faces and replaced them with my wife's and my faces, just for fun.

Products:

Tando Creative Blank boxes large deep and shallow

Tando Creative Offcuts

DecoArt Americana Colours, various

DecoArt Texture Sand

Friday, 11 March 2022

Art Doll Match Box


Materials

·         Tando Large matchbox deep with inserts

·         Pink acrylic paint

·         Green Leather

·         Beads

·         Handmade Tyvec Beads

·         Ribbon

·         Adheasive

·         Tando Cogs

·         Large plastic Dice

·         Selection of Gelli Printed papers

·         Sand paper

·         Modge podge

·         Tando ATC coins

·         Digital Art doll kit by ART TEA LIFE (etsy purchase)

·         Doodling pens


Instructions


I began by painting my matchbox, cover and inserts in bright pink paint. I gave them a couple of coats and set aside to dry. 


Next, I took a selection of paper doll parts and borders I bought online. I had them printed using a laser printer so they would not run with all the glue. 


I covered the front and backs of the outside sleeve and inner draw with a vintage cream patterned paper. I then began by layering up the borders around the edges on both pieces. 


Next, I took some art doll images and created my front cover. I made it quite random and quirky


Once all was glued down as I wanted it, I gave it all a coat with modge podge.

For my dolls face, I took a Tando coin and painted it pink. Once dry I added a face and a floral head dress. I wanted the face to stand out, so I made some tyvec beads and added them to the face as a crown


Tyvec can be bought as A4 sheets online. But you can find tyvec in all wonderful places such as those white decorating suits and inside some padded envelopes. I used a old decorating suit.

Begin by painting squares of tyvec in acrylic paint. I chose colours to match my art dolls.

Once dry, cut the sheet into long triangles. Take a kebab stick and begin to wrap the triangle strip around it. Secure it with a dress pin. Take a heat tool and warm the bead, It will begin to melt, shrink and bubble, creating a very organic bead. I like to squeeze my bead up too to make different sizes 


Next I made 2 mini art journals from the inserts that come with the matchbox. I had already painted them pink but now I coved the outside covers in dictionary paper. I then ran ribbon across all the pieces on the inside (pink) and secured with double sided tape. I set aside to dry. 


For my pages I took a selection of gelli printed papers. I had about 10 pages per book. I trimmed them to 6” x 6”. I folded them all in half. I then glued each page to th right hand side of each previous page


I glued the outside pages to the covers with strong glue.

Once dry, I added I spine. I had to do this in too stages to allow the glue to dry between. I took some strips of leather I had. I glue it to one side of the cover. I did the same for the second book. I used clothes pegs to keep it secure. 


Once dry, I wrapped the leather over the spine and glued onto the back cover, again using pegs to secure and left over night again.


To finish I added more art doll images and borders. I also added beads and more tyvec beads to the ends of the ribbons.

Lastly I added feet to the box so it could stand up. I glued together little stacks of plastic dice.

I painted some tando cogs in gold paint and glitter and glued them to the dice. I then glued them to the bottom of the box 


I hope I have inspired you to try something new, try new colours and products and create something new


Sarah x


Thursday, 10 March 2022

Art Box by Bernadette


Good Morning!  

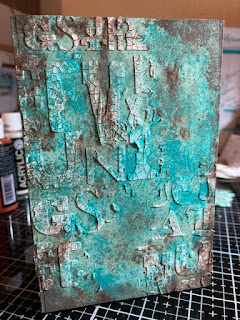
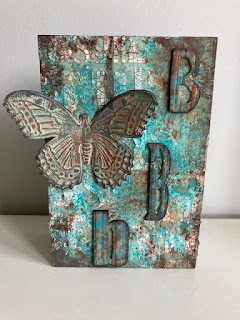
Today I am sharing this art box I made for the show on Create and Craft last week.

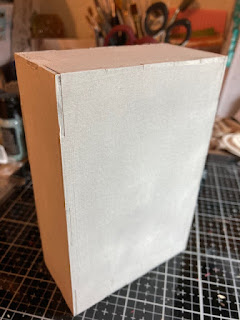
To start with, I glued the art box together, then painted it with white gesso.


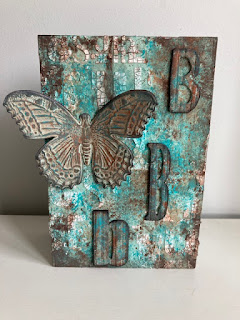
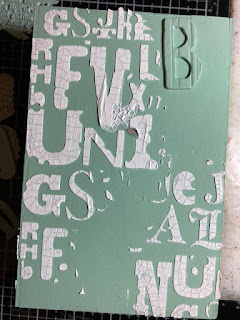
I then painted the whole box in a light blue acrylic paint and once the paint had dried, I used an Aall and Create stencil and crackle paste to add some texture randomly on all 4 sides and the top of the box.


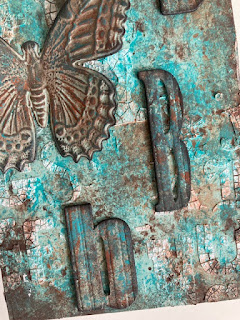
Using a stencil brush I added paint over the light blue and crackle.  I wanted to create an aged look to the box, so added several layers of turquoise and brown acrylic paints.  I kept dabbing paint here and there and layering it until I got the look I wanted.  I also added larger blobs of paint at the top of the box and sprayed some water to make it run down the box.  I found that because I had gessoed and added several layers of paint, the box kept its shape despite the layers and water I was adding.  I made sure I kept letting the box dry between layers so that I got definition between the 2 colours.


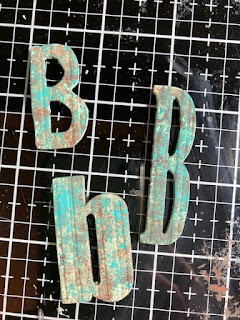
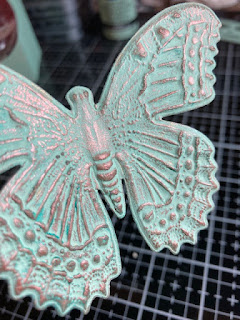
I then chose some embellishments and to the letter Bs I added some white gesso and some of the turquoise and brown paint, again using the stencil brush.  For the die cut butterfly I added a light blue paint and some gilding wax to highlight the embossed areas.


I attached the Bs and the butterfly with PVA glue


If you have bought some of the art boxes Di brought to Create and Craft I am sure you will love them.  They are so versatile and there will be lots of blog posts over the coming weeks from the other DT members showing what they created with theirs.


Bye for now, take care

Bernadette xxx


Tuesday, 8 March 2022

Hexagon Tuesday - Zoë Sanderson

 It is my turn this week to share some ideas for using the Hexagons.  When we were asked to do these it was suggested that we might make Video demonstrations of our process.  I've never made a video before so it was a bit daunting but a challenge worth trying.  You can decide for yourself if it was successful or not.

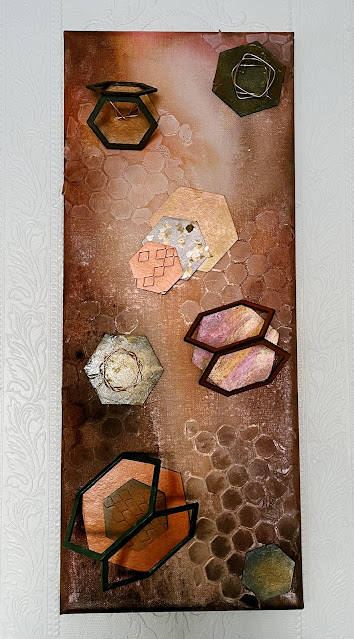
This is the finished piece under natural light .


Having chosen to work on a box canvas 20" x 8" it quickly became apparent that it was  not going to be easy to take photographs of this on my work table.  Added to which this is to be my first Video demonstration and the canvas certainly would not all fit into view.  The canvas was prepared with structure paste pressed through a Hexagon stencil, not using the whole stencil just bits of it here and there.  When the paste was ready various metallic Glimmer Mists were sprayed over and allowed to run down the canvas.  A day or so later when the canvas was fully dry it was time for my first attempt at a video demonstration;  Scary but exciting.

I did it in 2 parts 

The canvas was finished by adding the Hexagons, not necessarily in the ways suggested in the video but in a pleasing manner.

This is the finished piece under electric light.


Doing this was so much fun and a great opportunity to try lots of new ideas, I hope you enjoy watching the videos as much as I enjoyed making them.

Products Used.


Canvas and all other mediums and embellishments from my Stash

Friday, 4 March 2022

24 Boxes of Advent - Plain and Simple - by Kim

 Sometimes plain and simple is good, with may be just a little glitter.

Just two colours, white and blue (DecoArt Blue Harbor), blue at the top, white at the bottom. Blend the two together with horizontal strokes. This makes a great background snow scene.

Once all the sides are covered and dry paint a simple fir tree in white.

With the edge of a flat brush paint in the brown trunk of the tree (I know I only said two colours). Next add the branches of the tree, again with the edge of the flat brush, dab on the fronds, reducing in size as the get to the top. Give them a slight downward slope to make the tree look more natural.

I used an old toothbrush (you could use your current one, but the paint doesn't taste so good) to fly speck slightly watered down white paint for a falling snow effect. I suggest you practice on scrap paper to make sure you get the effect you want, before you splatter your project.

As this is my second Advent box I cut out a number 2 from spare greyboard, painted the edge with blue and glued glitter to the face. A few dabs of glue on the tree and sprinkle a little glitter there, too.

That's it. Simple and effective - and in plenty of time for the Christmas countdown.