
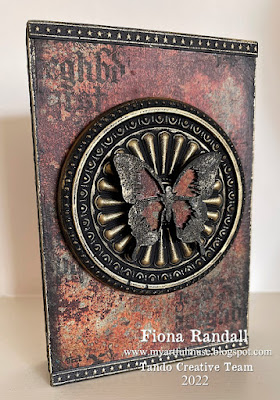
Hello again. I'm back with another Art Block.
( the Large shallow one) with a rusty theme.
I started by gluing the box together.
I then gave it a coat of DecoArt chalky finish in Carbon to the back and all four sides.
Then a coat of DecoArt Ultra Matte varnish to seal and protect.
The front of the Art block was given a coat of DecoArt Tinting base and also to the base layer of a small Tando Layered Butterfly.

Next step was to use some Rusty themed Decopatch paper from DecoArt that I have had in my stash for ages.

Using DecoArt Decoupage glue matte I cut a piece of the paper to size and applied to the Art Block front Then inked the edges with black archival ink.
I also did this for the butterfly base.


Next step was to give a cast resin mould and the top layer of the butterfly a coat of DecoArt Black Gesso. Once dry DecoArt Metallic Lustre in Burnished Brass was swiped over both pieces to bring out the detail and give an aged metal effect.

The top layer of the butterfly was the glued to the rusty base layer and the edges swiped with the metallic lustre.

Next step was some stamping using black archival ink with my favourite text stamp onto the Art Block front as shown.

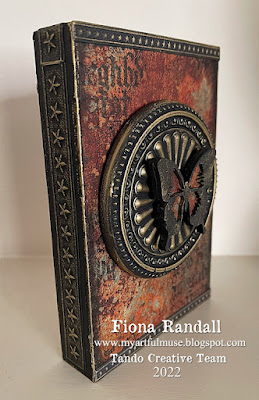
I then added the embellishments to the Art Box using off cuts of grey board to give depth and dimension.
To add a final touch to the piece I embossed some card stock strips. Gave them a coat of DecoArt Chalky finish in Carbon and swiped over with the metallic lustre to highlight the detail. These were then attached to the Art block font and sides..

Hope you enjoyed the step by step process of this project.
These Art blocks have so many possibilities and I hope myself and the DT will give you plenty of inspiration to make some for yourself.
Thanks for stopping by today.
Fiona.
Products Used.


Other Products.
Black Archival Ink.
Tim Holtz Stamps- Faded Type.
Tim Holtz Sizzix 3d impresslits Embossing Folder- Star Trim
No comments:
Post a Comment